Rucking is the latest fitness trend for functional, durable fitness, and with good reason. A workout that gets you outside, is simple enough to just start, and can be done anywhere, anytime. But can you really just start rucking safely and effectively? You can, but these rucking tips will get you started on the right foot without the pain of learning.
Personally, I learned how to ruck in Marine Corps with a lot of miles, trial and error. Read on for the 21 best rucking tips to get you started safely, efficiently, and with a bit of fun too
Contents:
How to Start Rucking
There are only 4 steps to rucking:
- Get your ruck
- Load your ruck with weight
- Pack Water and snacks
- Start walking
Granted, these are made more enjoyable by using the 15 Rucking Tips below, but, let’s continue
1. Get the Right Backpack for Rucking
Picking the right backpack for rucking is essential. Any good ruck will balance durability, comfort, and function.
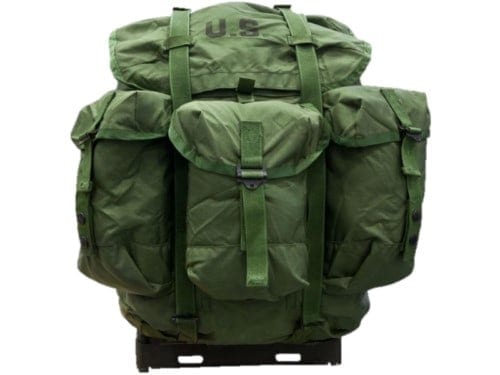
Characteristics of a good rucking backpack
Durable enough to handle heavy weight and being dragged
A good rucking backpack will have materials and construction that can stand holding heavy poundage with the abrasion resistance to handle being dragged during “side workouts”.
Comfortably carries the weight on the shoulders and back
Ample padding in the right places (back and shoulders) help you stay focused on the productive burn, instead of the annoyance of a subpar backpack
Functional enough to use in daily life
Most good rucking backpacks will run $150+ and are actually amazing backpacks beyond rucking. Ensure your backpack of choice has the function and features to make rucking seamless (weight pouch, water pocket) but still fits into daily life (ample pockets, laptop pocket)
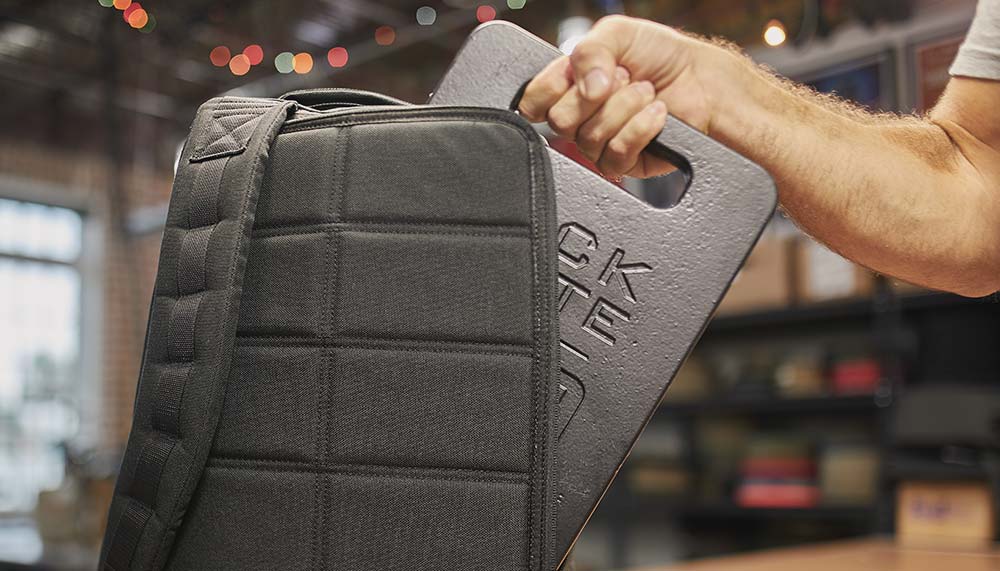
2. Load your ruck with weight
Once you’ve got the right backpack, get some rucking weights.
Place the weights as high as possible in the ruck and close to your spine and center in the bag, by putting them in an upper pocket or sitting them on something light, like a blanket or yoga blog
Cinch the bag and rucking weights tightly, so that the weights won’t move at all
3. Pack Water and snacks
A good rucking can last anywhere from 30 minutes to a few hours. Take water to stay hydrated and snacks to stay fueled.
4. Start walking
Just like you’ve done your whole life…except, now with weight.
Now that you know the basics of how to ruck, read on for the 21 tips for rucking better, safely, and comfortable
15 Rucking Tips
Prep
1. Get the right rucking backpack, to stay safe and comfortable (enough)
Having the right backpack, that’s durably constructed with solid materials will keep you comfortable and ensure your backpack lasts through years of abuse.
Checkout these 9 Rucking backpacks for ideas
2. Wear wool socks
The comfort of your feet can make or break a rucking experience. To keep your feet dry (and happy) wear wool socks. Wool socks naturally wick sweat and moisture away from the skin (keeping your feet dry) and maintain their cushy loft longer than synthetic socks, keeping your feet comfier longer.
If you’re not wearing wool socks at least wear synthetic socks, and never do cotton as cotton traps moisture next to the skin
3. Use good, supportive footwear
If you can run in the shoes comfortably, they’ll generally be fine for light rucking. As your loads get heavier, pickup a pair of boots that provide support going above the ankle. With more weight on your back, the risk of rolling or twisting an ankle is higher, but reduced by wearing footwear that supports the ankle
4. Load the ruck with the weight as high as possible and as close to your spine as possible
Loading the weight higher in the ruck makes you much more mobile than you would otherwise be with the weight at the bottom of the bag.
Keeping the weight close to your spine allows you to stand closer to upright with good, healthy posture (instead of leaning forward to compensate for the position of the weight).
Getting Started
5. Start Light: 10% -20% of your bodyweight over 2-4 miles
Rucking is a long game that tests your strength and endurance over long periods. Starting too heavy, too fast, and progressing too quickly can wreak havoc on knees, tendons, and joints that grow and develop much more slowly than muscles due to lower blood flow.
You can always add the weight or walk longer later on, so start easy.
10% of your bodyweight for 2 miles is a good starting point. Do that twice, listen to how your body feels, and add more (weight or mileage) later accordingly.
6. Increase by 5-10 lbs or 1-2 miles – never increase weight and mileage at the same time
When you feel its time to step up your game, add either 5-10lbs per week or 1-2 miles…but not both during the same week.
You can add on the miles later, but it’ll be much harder to get your knees back when they’re gone.
7. Target a pace of 15 minutes per mile (the gold standard), but go for comfort and enjoyment when starting
15 minutes per mile is the gold standard in the military. If you can keep this pace with a 45lb pack for 12 miles, you’re pretty close to rockstar, but don’t shoot for 12 miles yet.
Aim for a 15 minute per mile pace as a goal and a milestone for adding weight and mileage. Until that point, just ruck for comfort and fun.
Rucking Technique
8. Maintain and Reinforce Good Posture. Stand up straight and keep your core engaged
For long term health, “stand proud” with your spine naturally stacked and with your head up.
Doing this while keeping your core engaged (to support your spine) staves off injury and reinforces good posture practices for daily life and strengthening your spinal erector muscles in a beneficial, healthy way
9. Don’t Run. Take shorter strides with more frequent steps
Never run when rucking. Because of the weight on your back, this destroys your knees.
Rucking is easier on the knees with lighter impact than running because in rucking one foot is always in contact with the ground (just like walking). This act of shifting the weight forward avoids the pounding that happens in running when going airborne between steps. The second you start running with weight, you combine the impact of running with the weight of rucking – and that’s no Bueno for your knees in the long term.
For the sake of long term joint health, take shorter strides and work on shuffling faster achieving a fast walk and not running.
Stepping up your Rucking Workout
Use the tips to increase the difficulty of your rucking, and add some functional cross training for full body fitness.
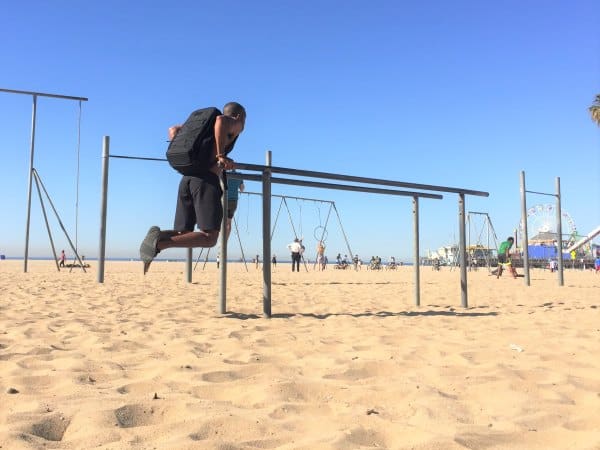
10. Along the way – use the backpack for a weighted workout
Rucking is an excellent lower body and cardio workout, but you can step it up by doing calisthenics with your weighted backpack along the way.
Consider stopping at specific distances (1/2 mile, 1 mile) or times (10 minutes, 15 minutes) and doing a set number of basic calisthenics (25, 50,) with your weighted ruck.
Some good exercises to consider:
- Overhead presses
- Pushups
- Ruck swings (Kettle Bell Swings with Ruck)
- Lunges
- Bend and Thrusts/Burpees (without the jump)
11. Hit hills or stairs to amp up your workout
If you’re feeling like a hero, hit some stairs or your nearest hills. You’ll understand once the burn kicks in.
12. Lunge with your ruck for an ungodly burn: Aim for 5×100 meters of lunges
To shift the workout from cardio to more lower body strength conditioning, drop a little weight and lunge for 100 meters at a time. When we had no real weights available (in Iraq) this was my lower body workout. 5×100 Meters of just lunges. It was pure torture but the strength and endurance gains were amazing.
13. Use intervals of speed walking and normal walking to ease into rucking or step up your workout
Keeping that gold standard 15 minute mile rucking pace for your entire walk may be far on the first ruck. Work your way up by walking at a comfortable pace for a period (10-15 minutes) followed by keeping the 15 minute mile pace for a period (10-15 minutes). As you improve, increase the fast rucking time and decrease the slower rucking time
14. Loosen your wais tbelt for a more core and upper body focused workout
If you’re using a waist belt and want a shoulder and core endurance workout, tighten up your shoulder straps and remove the waistbelt. Placing all of the weight on your shoulders trains endurance in your shoulders, and back and puts more stress on your core muscles to keep good posture.
Keep it Fun
15. Bring a friend
Great conversation and shared misery make uncomfortable times fly by. Bring a friend or loved one to share the health benefits and stress relief.
Bonus: Get outside – Exposure to greenspaces reduces the risk of heart disease
You could ruck inside or on a treadmill, but unless you working a research station in frozen Antarctica, there’s no reason to ruck inside.
A report by the National Institutes of Health found that living near and frequent exposure to greenspaces, such as forests and parks, is associated with a significantly lower risk of cardiovascular diseases.
This is in addition to the vitamin D you’ll naturally get from being in the sunlight, which can improve your mood, increase absorption of calcium for stronger bones, and supports healthy testosterone levels according to NIH.
Very rarely these days do we have activities that naturally take us outside in a stress relieving way, so take full advantage of the opportunity.
Now that you know how to ruck, what’s next? Get ready to ruck the right way by understanding how to pick the right kind of weight to use, how to pick the right ruckpack for your needs, and other info to get you rucking right.

Sources:
- < https://www.ncbi.nlm.nih.gov/pmc/articles/PMC5947462/> [Greenspaces and mortality due to cardiovascular diseases in the city of Rio de Janeiro”][National Institutes of Health]
- <https://www.ncbi.nlm.nih.gov/pubmed/21154195> [Effect of vitamin D levels on testosterone level in men][National Institutes of Health]
Great Related Reads…
- Tips to get started rucking
- How to pick good rucking weights
- The Benefits of Rucking as a fitness activity
- 5 Great Rucking Workouts
- 11 Awesome Benefits of Rucking

ABOUT THE AUTHOR
Carlos is a nomad, slow traveler, and writer dedicated to helping others live abroad and travel better by using his 7+ years of experience living abroad and background as a management consultant and financial advisor to help other nomad and expats plot better paths for an international lifestyle. Click here to learn more about Carlos's story.