
|
Core Suspension Training Movements & Free Weight Training Equivalents | |||
| Back Focused Movements | Chest Focused Movements | ||
| Suspension Training | Free Weights /Gym Equivalent | Suspension Training | Free Weights /Gym Equivalent |
| 1. Pull Up
3. Upright Row | 1. Lat Pull Down
2. Bent Over Row 3. Upright Row | 4. Dip
5. Chest Press | 4. Weighted Dip
5. Bench Press 6. Military Press |

THE CORE EXERCISES AND HOW TO DO THEM ON A SUSPENSION TRAINER
BACK EXERCISES
Pull Up with a Suspension Trainer

- Similar exercises in the gym: Lat Pull Down
- Setting up indoors:
- Hook the anchor of the suspension trainer over the top of the doorway using the DIY Minimalist Suspension Trainer Anchor
- Facing the door, grab the suspension trainer handles, extend your arms over head, and “sit into” the start position – bending at the hips, arms extending overhead. Ensure the core and legs are completely straight meeting to form an L-shape
- For a more difficult start, raise the feet off the ground (putting them flat on the door). The higher the feet with the straps at the same length, the more difficult the exercise.
- For an easier start, lower the feet or place them on the ground (touching the doorway) and shorten the straps (raising the hips higher)
- Setting up outdoors
- Hook the anchor of the suspension trainer around a post, pole, or tree using the DIY Minimalist Suspension Trainer Anchor
- Facing the pole or anchor, grab the suspension trainer handles, extend your arms over head, and “sit into” the start position – bending at the hips, arms extending overhead. Ensure the core and legs are completely straight meeting to form an L-shape
- For a more difficult start, raise the feet off the ground (putting them flat against the pole). The higher the feet with the straps at the same length, the more difficult the exercise.
- For an easier start, lower the feet or place them on the ground (touching the pole or post) and shorten the straps (raising the hips higher)
- Increasing difficulty
- Raise feet higher and lengthen straps
- Decreasing difficulty
- Lower feet and shorten straps
- Exercise progression – How to increase the difficulty of the exercise
- Easiest: Feet on ground, straps shortened, 2 handed
- Feet on ground, straps lengthened, 2 handed
- Feet off ground, straps lengthened, 2 handed
- Feet on ground, straps shortened, 1 handed
- Feet on ground, straps lengthened, 1 handed
- Hardest: Feet off ground, straps lengthened, 1 handed
- Key Points for suspension trainer pull ups
- Ensure to bend at the hips to form the L shape
- Ensure to maintain tight back and core, keeping the legs straight and the upper body straight
- As much as possible, keep the upper body in line with the arms and pointed at the anchor to focus on the upper back muscles (lats) just as a true pull up would

Horizontal Row with a Suspension Trainer
The Horizontal row continues to work the back muscles, focused on the upper lats and below the shoulders. Start with the feet on the ground and closer to vertical. As you become stronger progress to being fully horizontal and finally lifting your feet off the ground for maximum resistance.
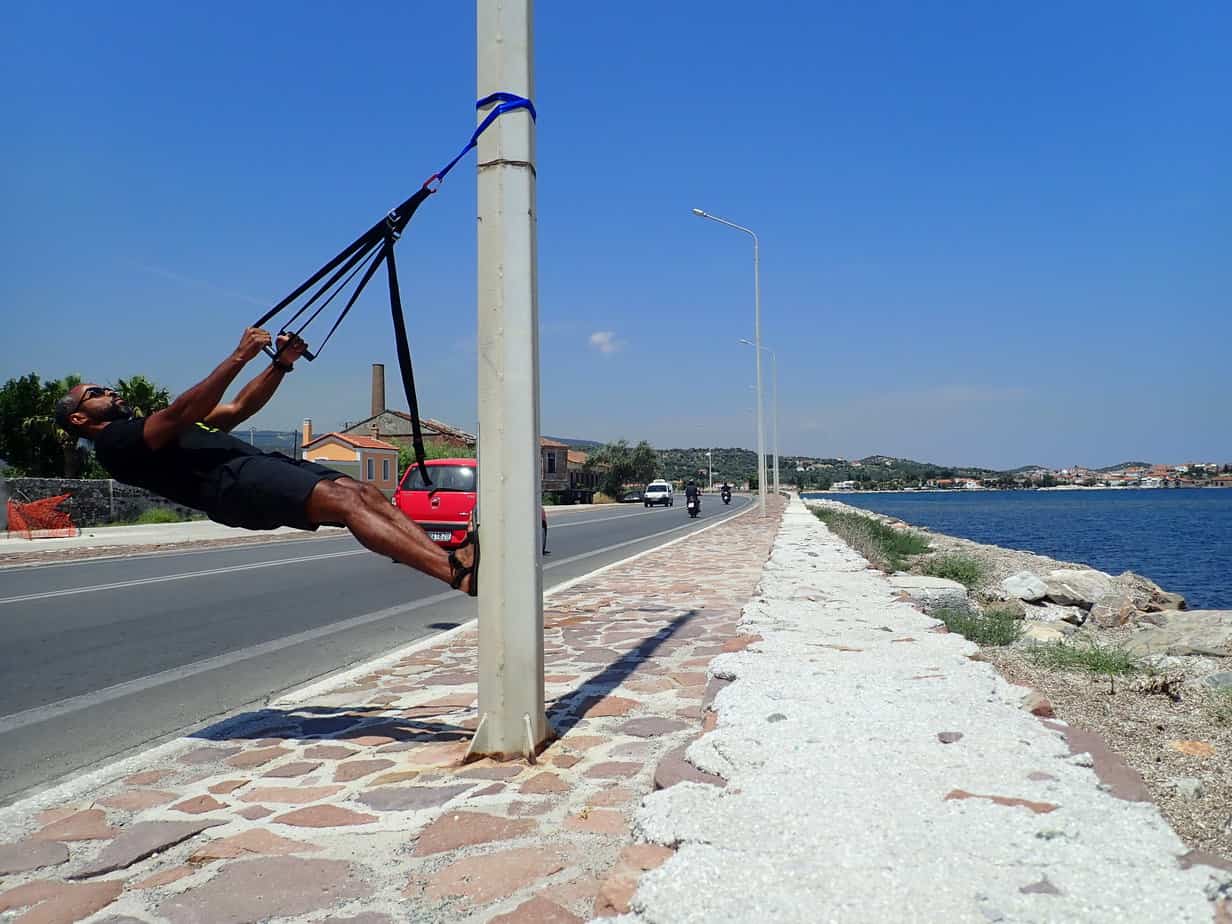
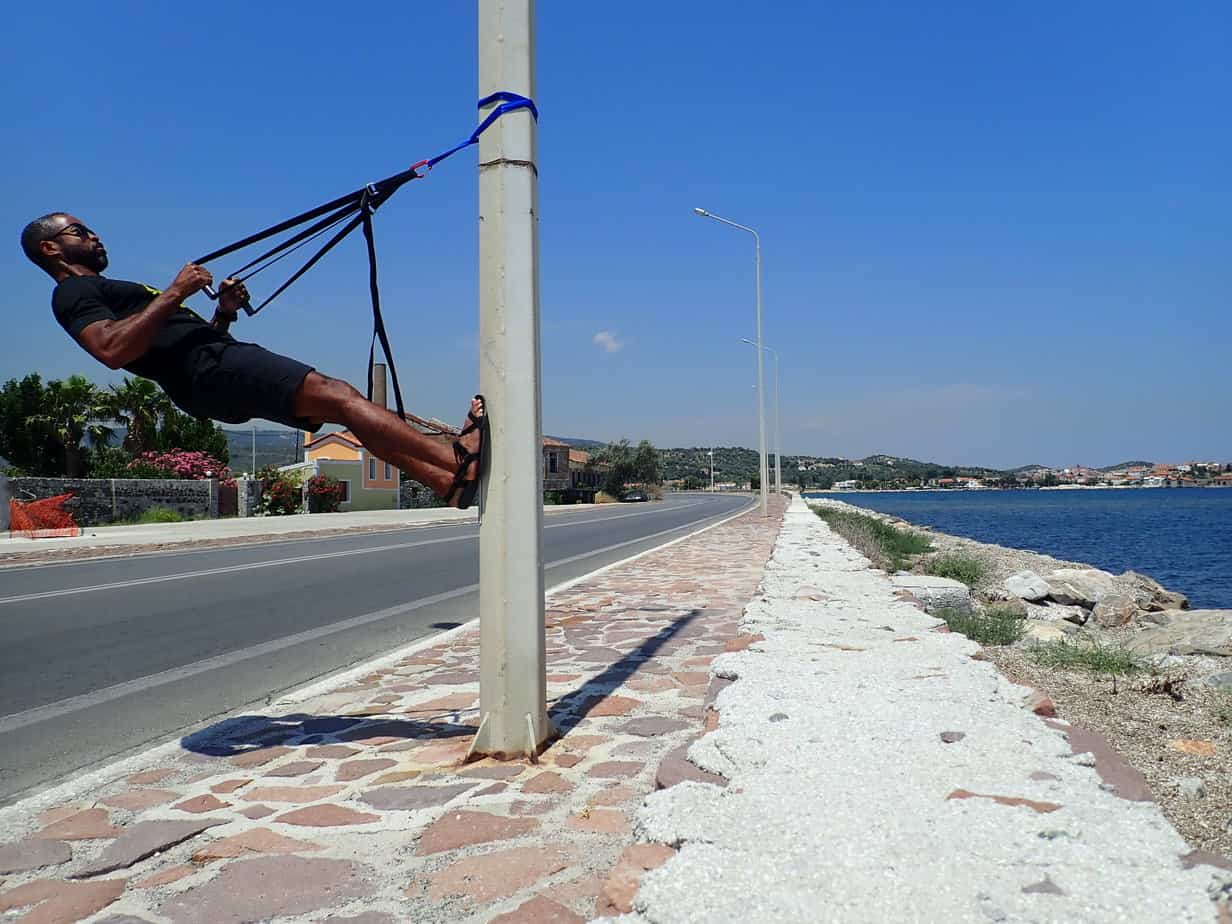
- Gym exercises similar to the horizontal row: Bent over row, row machine
- Setting up indoors:
- Hook the anchor of the suspension trainer around a post, pole, or tree using the DIY Minimalist Suspension Trainer Anchor
- Facing the pole or anchor, grab the suspension trainer handles, extend your arms straight forward (perpendicular to your body) head, and fall back into the start position – keeping the arms extended forward (toward the anchor) and the entire body in a straight line
- For a more difficult start, raise the feet off the ground (putting them flat against the door). The higher the feet with the straps at the same length, the more difficult the exercise.
- For an easier start, lower the feet or place them on the ground (touching the pole or door) and shorten the straps (raising the hips higher)
- Setting up outdoors
- Hook the anchor of the suspension trainer around a post, pole, or tree using the DIY Minimalist Suspension Trainer Anchor
- Facing the pole or anchor, grab the suspension trainer handles, extend your arms straight forward (perpendicular to your body) head, and fall back into the start position – keeping the arms extended forward (toward the anchor) and the entire body in a straight line
- For a more difficult start, raise the feet off the ground (putting them flat against the pole). The higher the feet with the straps at the same length, the more difficult the exercise.
- For an easier start, lower the feet or place them on the ground (touching the pole or post) and shorten the straps (raising the hips higher)
- Increasing difficulty
- Raise the feet higher off the ground or lengthen the straps
- Decreasing difficulty
- Lower the feet to the ground or shorten the straps
- Exercise progression
- Easiest: Feet on ground, straps shortened, 2 handed
- Feet on ground, straps lengthened, 2 handed
- Feet off ground, straps lengthened, 2 handed – body parallel to ground
- Feet on ground, straps shortened, 1 handed
- Feet on ground, straps lengthened, 1 handed
- Hardest: Feet off ground, straps lengthened, 1 handed – body parallel to ground
- Key Points in Performing the Horizontal Row on a Suspension Trainer
- Maintain a straight body keeping upper body and lower body aligned with a very tight core

Upright Row
Upright rows on a suspension trainer work the traps, upper back, and shoulders in a way to similar to the high pull, upright row (performed with weights) and the rowing machine.
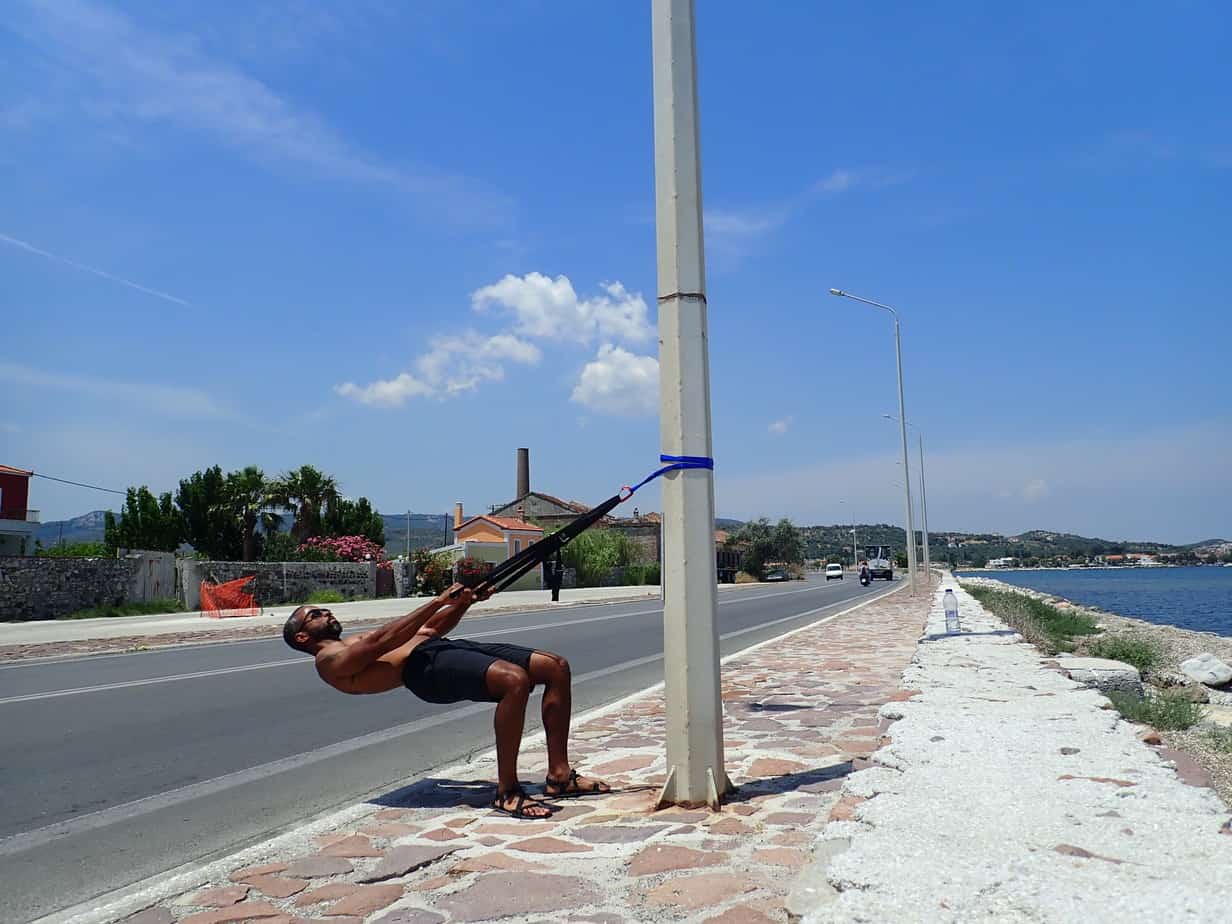
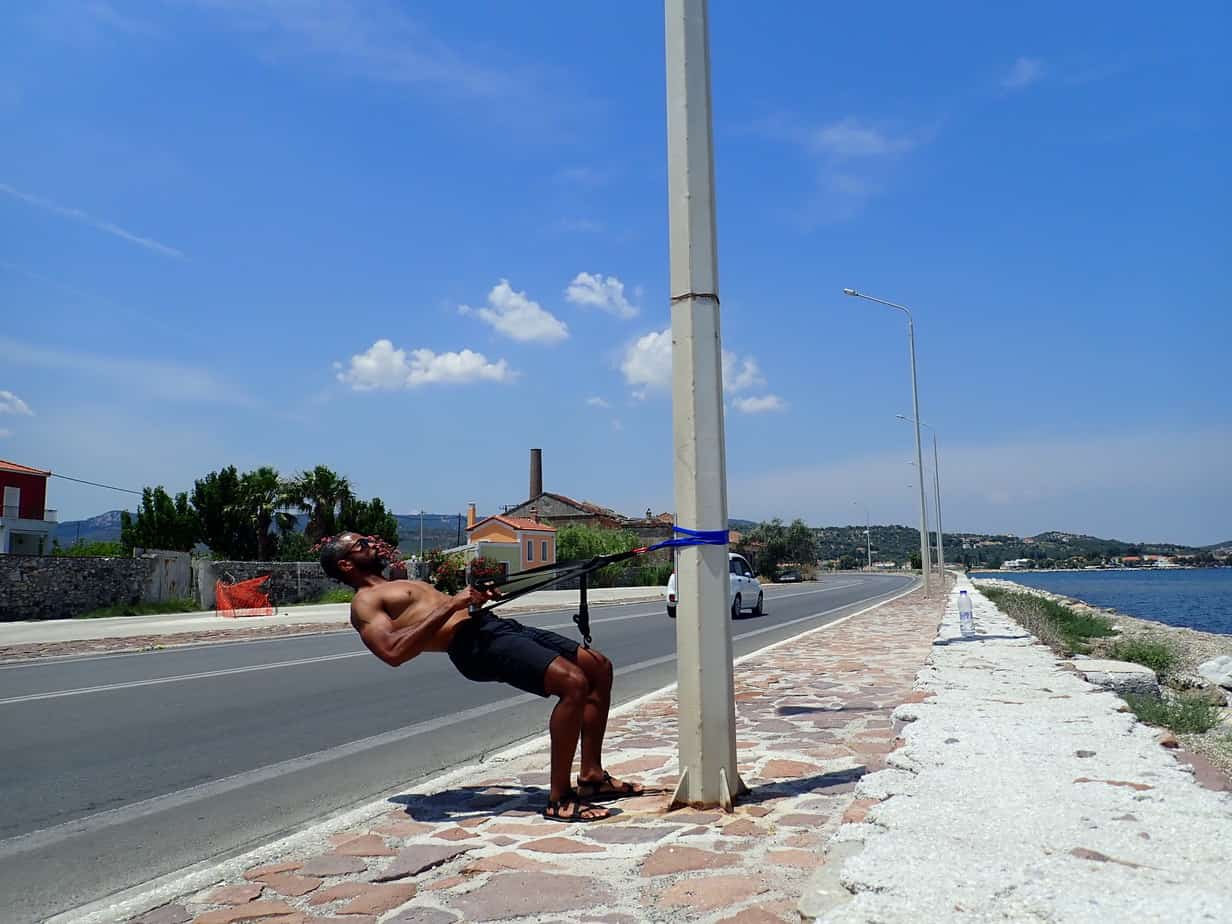
- Exercises in the gym similar to the upright row: High-pull, upright row
- Setting up indoors
- Hook the anchor of the suspension trainer on the side of the door between chest and waist level using the DIY Minimalist Suspension Trainer Anchor
- Facing the door, grab the suspension trainer handles, lean back bending at the knees and extending your arms forward toward the , and fall back into the start position – keeping the arms extended forward (toward the anchor), upper body straight, and legs bent at the knees
- Setting up outdoors
- Hook the anchor of the suspension trainer around a post, pole, or tree between chest and waist level using the DIY Minimalist Suspension Trainer Anchor
- Facing the pole or anchor, grab the suspension trainer handles, lean back bending at the knees and extending your arms forward toward the , and fall back into the start position – keeping the arms extended forward (toward the anchor), upper body straight, and legs bent at the knees
- Increasing difficulty: Lower the height of the anchor and extend the legs moving the body further from the anchor
- Decreasing difficulty: Raise the height of the anchor while maintaining the bend in the knees
- Exercise progression
- Easiest: Feet on ground (close to pole/door), knees bent, straps shortened, anchor high, 2 handed
- Feet on ground (close to pole/door), knees bent, straps shortened, anchor lowered, 2 handed
- Feet on ground (close to pole/door), knees bent, straps lengthened, anchor lowered, 2 handed
- Feet on ground in front (close to pole/door), knees straightened, straps lengthened, anchor lowered, 2 handed.
- Feet off ground and flat against door/pole, knees straightened, straps lengthened, anchor lowered, 2 handed.
- Feet off ground and not flat against door/pole, knees bent and legs curled to allow the body to hang with minimal support, straps lengthened, anchor lowered, 2 handed. May require raising the anchor so that the body is hanging.
- Hardest: If anchor allows – body hanging freely and allowing a horizontal row while performing a tucked lever or lever
- Key Points for doing the upright row with a suspension trainer
- Ensure that upper body is near perpendicular to the door in the positions where the body is supposed to be extended and that the arms extend towards the anchor to fully recreate the movement of pulling upward from the ground when standing vertically

ESSENTIAL CHEST EXERCISES
Dip
The dip is an essential bodyweight movement that works the chest and arms (triceps) in a similar way as the decline press or bench, depending on body position.

- Other exercises similar to the suspension trainer dip: Dip, weighted dip, decline chest press
- Setting up indoors
- Attach the anchor of the suspension trainer over the top of the doorway
- Adjust the length of the straps so that they are the appropriate length for difficulty – lengthening straps allows your feet to touch the ground, decreasing difficulty while raising the straps allows you to raise your feet off the ground increasing difficulty
- Setting up outdoors
- Attach the anchor around the pole, post, or tree above the top of your head
- Adjust the length of the straps so that they are the appropriate length for difficulty – lengthening straps allows your feet to touch the ground, decreasing difficulty while raising the straps allows you to raise your feet off the ground increasing difficulty
- Increasing difficulty
- Shorten the straps so that the body and feet are raised off the ground
- Decreasing difficulty
- Place feet on the ground to assist the dip and decrease difficulty
- Notes
- It is best to progress into a one armed pushup or assisted one armed push up on the ground instead of progressing into a one armed suspension training move

Chest Press/Push Up Progression
Many suspension trainer advertisers pitch the “chest press” quite often as an essential exercise. In my opinion the suspension trainer chest press offers too little resistance to be significant. It is better to simply do push ups, progress to one armed assisted push ups, and finally do one armed push ups. For the sake of consistency, the instructions for the suspension trainer chest press are listed below, but focus on push ups, assisted one armed push ups (pictured) and, finally, one armed push ups.

Assisted One Armed Push Ups are a much better alternative for progressing while building muscle in the chest and strength in the chest pressing movement
Instructions for the suspension trainer chest presses:
- Similar exercises in the gym: Bench Press
- Setting up indoors
- Hook the anchor of the suspension trainer over the top of the doorway
- Facing away from the door, place the feet close to the anchor, maintain a straight and aligned body, extend the arms forward (perpendicular and away) from the body and move into the start position
- Starting position: Body straight, core and upper body tight and straight, arms extended forward and perpendicular from the body
- Setting up outdoors
- Hook the anchor of the suspension trainer around a pole, post, or tree, jst above head height
- Facing away from the door, place the feet close to the anchor, maintain a straight and aligned body, extend the arms forward (perpendicular and away) from the body and move into the start position
- Starting position: Body straight, core and upper body tight and straight, arms extended forward and perpendicular from the body, feet close to the post
- Increasing difficulty:
- Lengthen straps, moving body closer to a horizontal position
- Move into an assisted one armed push-up (without the suspension trainer)
- Decreasing difficulty
- Shorten the straps, moving the body closer to a vertical position
- Exercise progression
- Chest press with body closer to vertical 2 handed
- Chest press with body closer to horizontal 2 handed
- Chest press with body closer to vertical 1 handed
- Chest press with body closer to horizontal 1 handed
- Push Ups on knees
- Push Ups
- Assisted 1 armed pushups (without suspension trainer)
- 1 armed pushups (without suspension trainer)
- Key Points for the Chest Press and Push Up Progression
- Ensure in all positions that the arms are extending perpendicular from the body to focus on the chest

Overhead Press
The overhead press is a great exercise that focuses on the shoulders, or chest depending on the alignment of your arms with your upper body. To target shoulders, ensure the arms extend straight overhead to align fully with the body at full extension. To target the upper chest, extend the arms slightly forward (upward and out) to simulate the movement of an incline chest press
The overhead press is a great movement in the progression to doing handstand pushups or that movement that pops up in TRX photos everywhere.
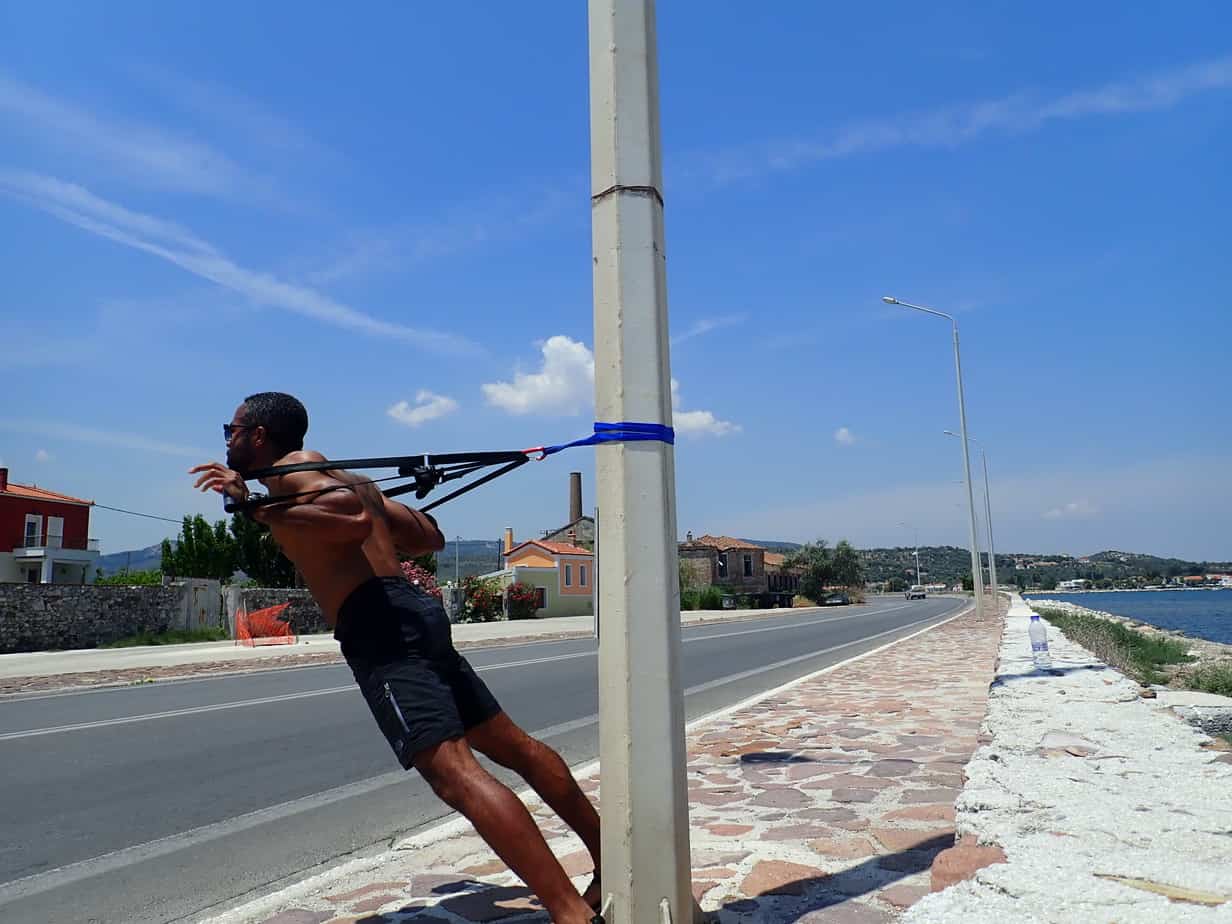
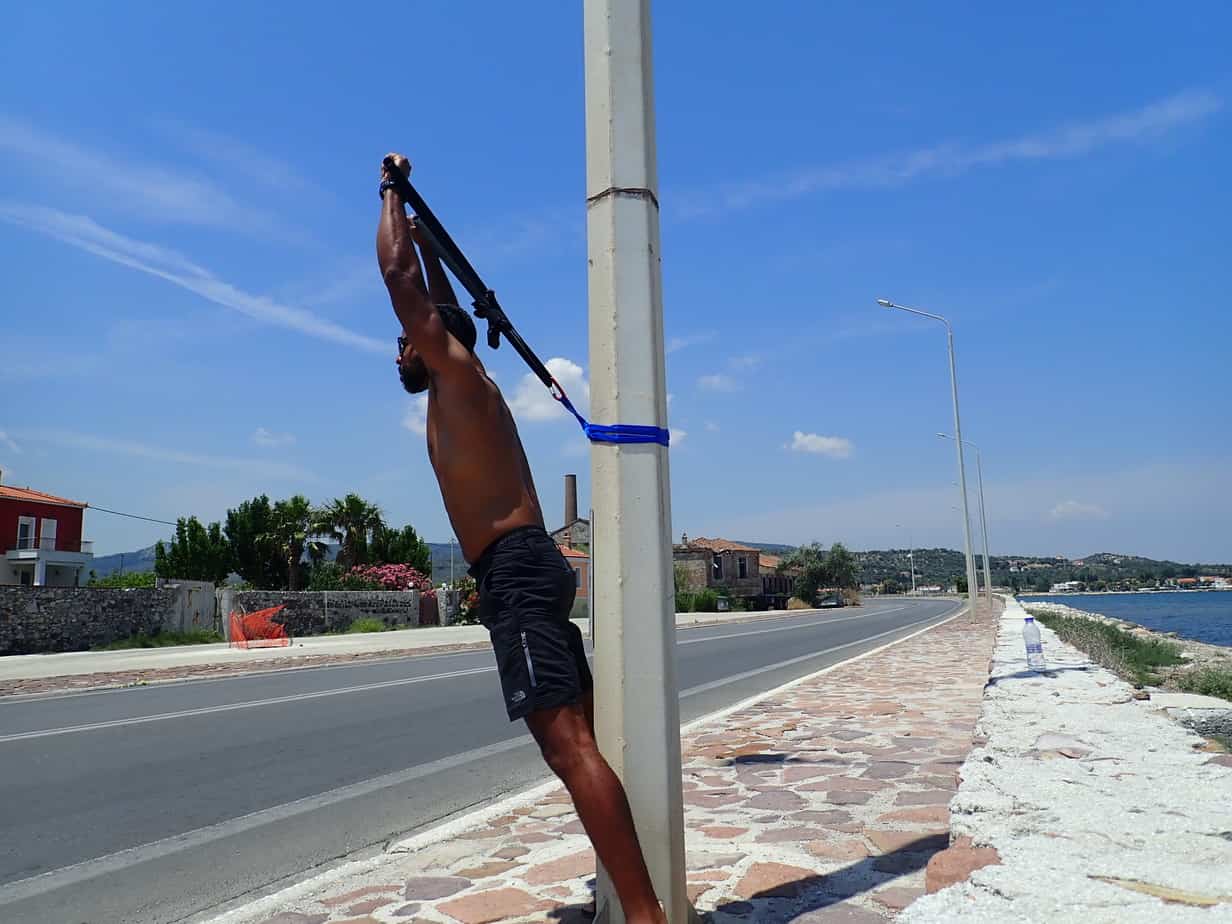
- Similar exercises in the gym: Military Press
- Setting up indoors
- Setup the anchor on the side of a door at shoulder height
- Adjust the straps such that the handles extend a couple inches above the end of your reach when your arms are extended overhead
- Grab the handles, place heels near the door for stability, extending your arms overhead and lean forward until the straps are at full tension
- Begin the exercise by lowering your hands, just as you would with a shoulder or military press as the body leans forward. Once the hands and handles reach shoulder lever, e
- Setting up outdoors
- Setup the anchor on a pole or post at shoulder height
- Adjust the straps such that the handles extend a couple inches above the end of your reach when your arms are extended overhead
- Grab the handles, place heels near the pole/post/tree for stability, extending your arms overhead and lean forward until the straps are at full tension
- Begin the exercise by lowering your hands, just as you would with a shoulder or military press as the body leans forward. Once the hands and handles reach shoulder lever, e
- Increasing difficulty
- Lengthen straps, placing body closer to horizontal
- Move into pike pushups, handstand holds, and handstand pushups (without a suspension trainer)
- Decreasing difficulty
- Shorten straps, placing body closer to vertical
- Exercise progression
- Suspension Overhead Press with body closer to vertical
- Suspension Overhead Press with body closer to horizontal
- Pike Pushup
- Handstand holds (30+ seconds)
- Handstand Pushup
- Tips
- Due to the angles and nature of the exercise, the beginning of the exercise (extension) is much easier than the midpoint (leaning forward in the “racked” position). To compensate for this, experiment with bending the knees at the midpoint to adjust (decrease) the exercise difficulty appropriately
- Ensure to maintain a rigid body, tight core, and good shoulder position throughout the exercise

How to use movements to design your workout with a suspension trainer
1. Think “movements”, not exercises
The keys to creating a great workout on a suspension trainer are:
- Remember the basic movements of the human body (in this case, the upper body)
- Learn how to place your body in the suspension trainer using gravity to apply resistance against the movement (and body part) you wish to target
- Learn how to adjust the angle of your body and placement within the suspension trainer to increase the resistance against your body’s movement, using gravity
2. Remember the basic movement angles (of the upper body)
You are already familiar with how your body moves, and how your arms move to and from your body. In order to develop your body in a balanced way, aim to workout these 6 movements (listed above, in the table, and below in detail)
Pushing Movements (Movements heavily focusing on the Chest muscles)
- Pushing down (Doing a “dip”)
- Pushing forward (Doing a pushup or bench press)
- Pushing upward (Pushing something overheard, doing a handstand pushup, or doing a military press)
Pulling Movements (Movements heavily focusing on the back muscles)
- Pulling down (Doing a pullup or a lat pull down)
- Pulling from in front of you (Doing a Horizontal Row or Bent Over Row)
- Pulling upward (Doing an Upright Row or High Pull)
3. Place your body in the suspension trainer to apply resistance against the movement you wish to target
For a detailed review of how to setup for each exercise (including pictures), please scroll down the page to the (**KF**LINK-Exercise Tutorials**KF**),
4. Adjust body positioning to increase or decrease difficulty of exercises
As you learn the difficulty of each movement, exercise, and become stronger, you will no doubt need to increase difficulty. By learning to adjust the placement of your feet, length of the straps, and shifting from two handed to one hand exercises you will have a wide range of difficulty, likely exceeding what you’re capable of – which is great, because it leaves plenty of room for improvement. The following are general guidelines for controlling exercise difficulty
Foot placement: Feet further from an anchor make the exercise easier while (with straps at the same length) feet closer to the anchor make an exercise more difficult. Feet raised off the ground is the most difficult foot position.
Strap length/Handle distance from anchor: Handles closer to the anchor (shorter straps) make an exercise easier while handles further from the anchor (longer straps) makes the exercise harder if the feet and anchor are kept in the same position
Doing an exercise with one hand instead of two: Unilateral (one-handed) exercises are the most difficult and effectively double the resistance (weight) applied against the movement. Start with two handed and progress to one handed movements to maintain the right level of difficulty
With those general guidelines for controlling difficulty, the general order of progression in how to do the exercises, from easiest to hardest, is as follows…
General order for progression and increasing difficulty in each exercise for suspension training
- Feet on Ground, 2 Handed: Exercise performed with feet on ground, straps shortened to place handles closer to anchor
- Feet on Ground, 2 Handed, feet closer to anchor point: Exercise performed with feet on ground, straps shortened to place handles closer to anchor
- Feet on ground, 2 handed, hands further away from anchor: Exercise performed with feet on ground, straps lengthened to place handles further from anchor.
- Feet elevated, 2 handed: Exercise performed with feet elevated off ground (possibly stabilized by doorway or post), straps lengthened to place handles further from anchor at maximum possible length for the exercise.
- Feet On ground, 1 Handed: Exercise performed unilaterally (using only one hand or arm), and progression begins again with feet on ground and handles closer to anchor.
- Feet Off ground, 1 Handed: Exercise performed unilaterally (using only one hand or arm), with feet elevated off ground
Consider checking out these other great Travel Fitness Articles
- The Travel Fitness Homepage
- How to setup a suspension trainer
- 10 Reasons to have a suspension trainer
- How to Setup a Suspension Trainer
- How to do the essential exercises with a suspension trainer, outdoors or in a hotel room (pull ups, dips, rows, overhead presses, curls, and extensions)
- The DIY, minimalist anchor
- How to make your own suspension trainer
- 10 reasons to get (or make) a suspension trainer

More Great Travel Fitness Reads
Grab resistance bands and try the resistance band deadlift and resistance band squats, to get in a great lower body resistance workout, anywhere.


ABOUT THE AUTHOR
Carlos is a nomad, slow traveler, and writer dedicated to helping others live abroad and travel better by using his 7+ years of experience living abroad and background as a management consultant and financial advisor to help other nomad and expats plot better paths for an international lifestyle. Click here to learn more about Carlos's story.
