Chilean Patagonia and Torres del Paine National Park offer some of the most magnificent landscapes and views in Latin America and on the planet. Lucky for you, you’ll have to take on a few days of trekking in the wild, natural solitude to reach them. Those few days of hiking and sleeping under the stars can be some of the coziest, warmest, and peaceful experiences of your life – if you’ve followed the right Patagonia, and specifically, Torres del Paine packing list.
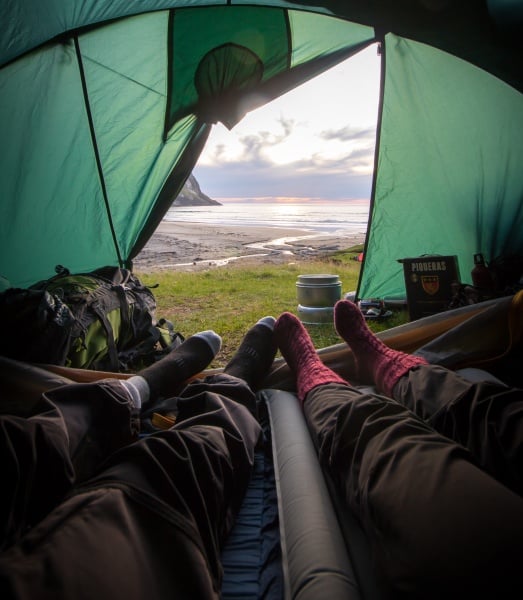
Unfortunately, with all of the options for gear to take, it’s easy to take too much or forget the small essentials that make the difference between a comfortable hike or night under the stars, and a frigid nightmare that you can’t wait to escape from. Lucky for you, over a few trips through Patagonia, the Himalayas, and countless national parks, I’ve put together the perfect Patagonia and Torres del Paine packing list that will have you ready for everything while keeping your bag light
Read on the for my Patagonia and Torres del Paine packing list that has kept me ready for everything from warm campfire nights, to rain and snowstorms and everything in between
(Note: This article contains affiliate links that support writing and publishing at no cost to you)

Contents of this Torres del Paine Packing List
- Quick Torres del Paine Packing List
- Torres del Paine Packing and Gear Tips
- The Two Best ways to waterproof your gear cheaply and effectively
- How to Layer while Trekking
- The Full Torres del Paine Trekking List
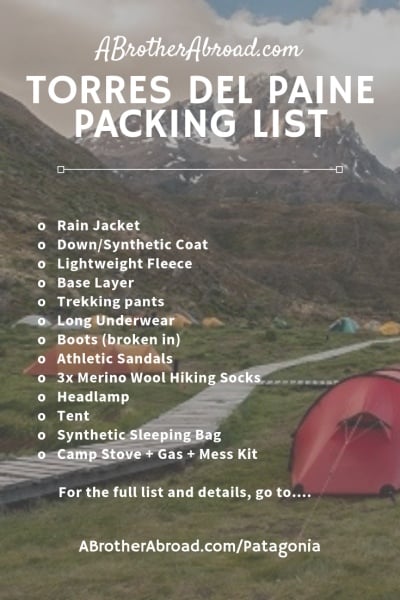

(Click each item to jump to a full explanation of how to pick)
Below you’ll find a quick Torres del Paine Packing list with everything you need to make the W or Circuit trek while staying warm, dry and happy. This list is versatile and will work for nearly any climate and place (my Everest Base Camp Trek packing list was quiet similar).
For treks of different lengths of time, like the 5 day W trek vs. the 10 day Circuit trek, the major adjustment will be adding extra pairs of clean socks and underwear, adding more food, and adding more cooking fuel. An extra clean baselayer or two may be a nice addition too. Don’t be scared to wear the same dirty hiking pants and shirt during the days – its all good and common practice in the outdoors.
Use this list a guide and checklist to ensure you have the gear for rainy days, cold nights, prepping meals, and handling small options. Click each item for more detailed advice on picking up the right one for you, why to take each item, and whether you should rent or buy while trekking.
Quick Torres del Paine Packing List
Many packing lists will list everything possible for your trek, but in my countless treks through North America, South America, Europe, and the Balkans, plus years in the military, I’ve realized less is more. Comfort while trekking is achieved by bringing a few, key essentials, and avoiding overly bulky items that you’re not likely to use.
These are my recommendations for trekking light and avoiding unnecessary gear, while staying comfy, warm, and dry
Overrated Items (Leave these at Home)
- Rain cover for your backpack: This won’t keep your pack dry, waterproof with trashbags instead
- Dry bags: These are too heavy, bulky, and expensive, use Ziploc bags or trash bags instead
- Jeans (cotton): The heavy, and cotton sucks heat from the body when wet. Go with nylon or polyester trekking pants or jogging pants
Underrated Items (Bring more than you planned on)
- Trash bags (for waterproofing)
- Large, Heavy Duty Ziploc bags (for organization and waterproofing)
Hiking Gear
- Trekking Backpack (40L-60L, with padded hip belt, lightweight, sturdy)
- Light, compressible daypack
- (Optional) Trekking Poles
Daypack Gear (Accessible while trekking)
- Headlamp
- 2 water bottles, at least 1 liter each
Camping gear (if staying in campsites and not refugios)
- Tent (go lightweight, 2 man tent is sufficient)
- Camp stove with gas for entire trip
- Mess Kit (one plate, bowl, cup, and fork/knife per person, pot for cooking)
- Small bottle of dish soap
- Synthetic sleeping bag rated for cold weather
- Sleeping pad (for comfort and insulation)
Trekking Clothing
- Comfortable trekking shoes or boots (need to be broken in)
- Flip flops or Trekking sandals (for showering and lounging)
- Rain jacket (ideally hardshell)
- Insulation’/loft layer (down or synthetic insulated coat)
- Mid layer (lightweight to midweight fleece)
- 2 x Sweat wicking base layers (shirt), synthetic or wool
- Long underwear, synthetic or wool
- Pants for Trekking
- Shorts (optional)
- 2-3 pairs socks for trekking
- 2-3 Pairs of underwear
- Gloves (windproof and waterproof)
- Sun hat
- Sunglasses
- Balaklava
Clothing for Camp (After Trekking)
- Pants for hanging out in camp (clean pair) and sleep in
- Shirt for lounging
Footwear
- Hiking boots or trail runners
Hygiene and Toiletries
- Quick drying camp towel
- An “all-in-one” soap, like Dr. Bronners, for hair, face, and skin
- Baby powder (for funk and chafing)
- Sunblock
- Lip balm
- Flushable Baby wipes
- Hand sanitizer
- Basic first aid kit (sports tape, gauze, sanitizer, pain reliever, superglue, Imodium, moleskin, electrolytes, band-aids)
- Toilet paper roll
- Water purification tablets
Accessories
- Trash bags for waterproofing (instead of dry bags)
- Large, Heavy Duty Ziploc Bags
- Lighter
- Portable charger (charged)
- Smartphone or camera
- A good book or kindle
- Krazy Glue
- Small roll of Gorilla tape or duct tape
- Two liter sized water bottles, Nalgene bottles, or stainless steel water bottles
- Trekking poles
- Map
- Insect Repellent
- Ziploc Bags (with Documents inside)
- Extra batteries
- Mini Sewing kit (needle, knife, nylon thread)
Optional Accessories
- Sleeping Bag Liner (if renting a sleeping bag)
- Gaiters – or line your socks with trash bags
- Parachute cord or thin rope
- Small roll of Gorrilla tape or duct tape
- Carabiners (for clipping “quick access items” to the outside of your pack)
- Small pocket knife or multi tool
- Bandana or handkerchief
- Phone tri-pod
- Flask with your favorite fire water or box of wine if your bag is too light
- “Enough to share”
Ladies Only
- Leggings
- Feminine hygiene products
- Baby wipes
- Dry shampoo
Travel Essentials
- Passport
- Printed Copy of Passport
- Scanned/Digital Copy of Passport
- Cash (Local currency and USD)
- Medical insurance info (printed and available)
- Emergency info and contact info
- Travel Insurance

Torres del Paine Packing and Gear Tips
- Pack and dress for four seasons
- Leave the cotton at home – embrace wool and synthetics
- Keep the headlamp handy – get a headlamp, not a handheld flashlight
- Waterproof your gear with trash bags and heavy duty Ziploc bags
- Don’t forget a book
- Avoid wearing new footwear or backpacks on the trek
- Treat blisters early – keep them clean and don’t pop them on the trek
- Improvise your pillow

1. Pack and dress for four seasons
Due to the shape of the mountain ranges, the glacial ice field and ocean nearby, and countless other factors, the unpredictable weather in Patagonia and Torres del Paine can change quickly and drastically, seemingly in a heartbeat. A sunny day can quickly turn into a thunder storm with a wet, chilly night to follow, even in the summer months.
Be prepared for the unpredictable Patagonia weather by carrying the equipment and clothes to stay dry when it gets wet, warm when it gets cold, and comfy through the miles of walking.
2. Leave the cotton at home – embrace wool and synthetics
As soft and comfortable as those worn-in cotton t-shirts and cotton jeans are, they’re a bad idea for trekking in climates like Torres del Paine.
When cotton (jeans or shirts) get wet, they suck heat from your body, making you susceptible to hypothermia and just generally being uncomfortable. Additionally, cotton dries extremely slowly compared to wool, nylon, and polyester. If you continue wearing cotton while wet, it likely won’t dry, and also likely won’t on a cool night.
Additionally, cotton is bulky and heavy adding more weight to your pack without delivering good performance
Avoid this problem by aiming for Merino wool or polyester, which still insulate well when wet and dry relatively quickly, are light, and compress well. This means that even if temperatures aren’t “warm” the gear will still dry, and if it doesn’t dry you can still wear it.
So – pick merino wool or polyester in insulating layers, and nylon in outerwear over cotton
3. Keep the headlamp handy – get a headlamp, not a handheld flashlight, and bring an additional keychain light
Opt for a headlamp over a handheld flashlight. Having the option to put the lamp on your head or hang around your neck frees up your hands in a very convenient way.
As darkness gets close, sling the headlamp around your neck and keep it with in your sleeping bag. There’s nothing like needing to go to the bathroom in the middle of the night and spending 10 minutes fumbling around for a light.
Also consider taking one of the small, keychain flashlights to hook to your waist or a bag. These are extremely convenient for those “gotta pee now!!!!” times.
4. Waterproof your gear with trash bags and heavy duty Ziploc bags instead of dry bags and rain covers
Trash bags (or trash compactor bags) and heavy duty Ziploc bags are some of the most useful and underrated pieces of trekking equipment. Though dry bags are cool, each one will cost you ~$20 USD and take up a hefty amount of space in your bag.
Compared to dry bags, Ziploc bags are cheaper (~$.10), lighter, can be found nearly anywhere in the world, and are thin enough that you can separately pack shirts, underwear, and anything else without adding unnecessary bulk. They’re also good for storing wet/dirty items next to clean items.
If you are not storing your passport and important documents in Ziploc bags you’re doing yourself a disservice
Instead of putting a rain cover over your bag, put a heavy duty trash bag in your backpack before inserting all of your gear to nearly waterproof your bag. Rain covers seem like a good idea, but in real storms, they blow off easily and moisture (from rain) easily blows underneath the rain cover. Also, if you drop your bag in a river (which is likely) everything is still getting wet.
If you use a trash bag to line your backpack in any of these circumstances, your gear will stay dry.
5. Don’t forget a book
All campsites and refugios must be booked in advance. If you don’t have a place to sleep you will be turned back to the Torres del Paine entry gate. Avoid this by booking in advance.
Also bring printed proof of your reservation, as it is necessary to check-in to refugios and campsites
6. Avoid wearing new footwear or backpacks on the trek
As long as your old boots or trekking shoes work fine, wear those. A ten mile hike is not the time to break in new shoes and is a recipe for tired feet and blisters.
A worn, but tested backpack is the same way. My pack broke on me halfway through the 9 day Circiut trek and it was a miserable experience. Since then I always advise, with backpacks, stick with what you know works and save trying something new for another time.
7. Carry the gear for treating blisters and treat “hotspots” and blisters early and keep them clean
Moleskin, hand sanitizer, band-aids or sports tape + gauze, and something sharp to “lance” the blister with (under sterile conditions) are worth their weight in gold if you have a blister. Bring them. Use them.
8. Improvise your pillow
Pillows help most people sleep comfortably, but is it worth the extra weight? Prob not. Just fill a shirt with your extra clothes or roll of your unused down jacket and use that as a pillow

The Two Best ways to waterproof your gear cheaply and effectively
Waterproof bags and rain covers are the common approaches to waterproofing things while trekking, but there are two cheaper, more efficient, and more effective options for waterproofing gear.
- Trash Bags (Heavy Duty)
- Ziploc Bags (Large, Heavy Duty)
Waterproofing backpacks with trash bags
Simply take a large, heavy duty trash bag (like a trash compactor bag), place it inside your backpack, and place your gear inside the trash bag. If you tie this off (which you shouldn’t) your gear is completely waterproofed.
Trash bags offer the advantage over dry bags of being large enough that you don’t have to choose which individual things get protected from the rain. As for rain covers, in heavy rain, rain will still get underneath the cover. Not the case with trash bags
Ziploc Bags when Trekking to organize and waterproof gear
For waterproofing individual items and separating dirty from clean, wet from dry, use large, heavy duty Ziploc bags. Reused grocery bags work well too, if they’re thick enough.
I make it a point to carry all of my important documents (passport, visa copies, insurance information) in Ziploc bags. I also use Ziploc bags to protect my electronics, and they’ve never failed me.
Bottom Line: Skip the rain covers and dry bags for waterproofing, grab heavy duty trash bags and dry bags

How to Layer while Trekking
One of the major keys to effectively packing as little as possible while still staying comfortable is planning your clothing in “layers” that can be peeled off or added to keep you warm, cool, dry, ventilated, etc.
The major clothing layers you absolutely need are:
Rainproof/waterproof layer
This layer should ideally be a “hard shell” rain jacket with “taped seams” that creates full waterproofing. Ensure this layer fits closely, but is roomy enough to wear over your other layers
Loft Layer
Your loft layer is your warmest layer, ideally a compressible water resistant down or synthetic coat. These coats will keep you warm in freezing temperatures but compress down to avoid taking up too much space in your bag.
Mid Layer
A lighter weight fleece jacket or sweater that provides light insulation. You’ll wear this when it’s a little chilly, or when you’re active but its not cold enough for the loft layers
Base Layer (top and bottom)
This is the layer that sits next to the skin, like t-shirts or long underwear, and serves the purpose of keeping you warm and dry. Ensure the garment is sweat wicking to keep you dry, and aim for merino wool or synthetic (like polyester) so that shirt/long johns will still insulate when wet.
Side Note: Remember when trekking, if you’re sweating, you’re too hot so remove a layer. Your goal is to not only stay comfortable but stay dry, as wet clothing creates issues while camping
Sun Hat
In the wild and outdoors, the sun can be brutal, especially on the gentle skin of your face, and a bad sunburn can make the following days a little less enjoyable. Prepare and pack a solid hat to protect your face from the sun.
Beanie
Your body loses a lot (as much as 20%) through your head, so having a wool or synthetic beanie to throw on is an easy way maintain body heat and warm up quickly.
As the saying goes “if your feet are cold, put on a hat”

The Full Torres del Paine Trekking List
Hiking Gear
Trekking Backpack
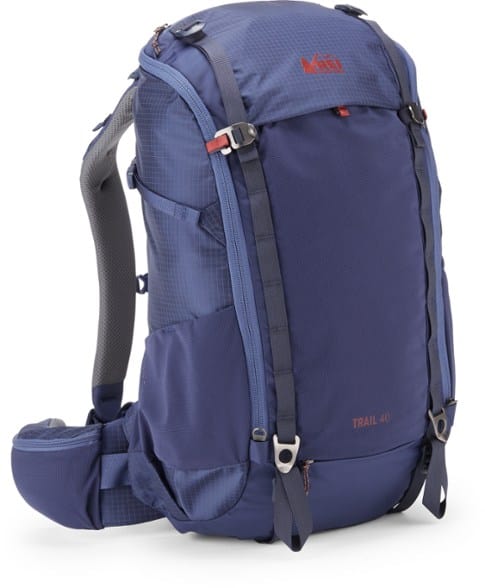
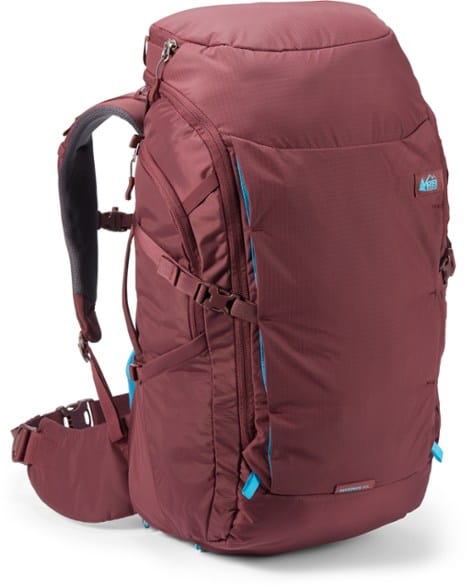
Aim for a 40L to 60L backpack designed for trekking, which means lightweight, including a padded waistbelt, and sturdy. External pockets, for water bottles, and pockets on the waistbelt for quick access items, like a smartphone or camera, are a plus too.
I recommend frequent travelers stay around the 40L to 45L range so that their backpack still fits as a carryon. I highly recommend the REI Trail 40 for travelers that spend a lot of time outside, and the REI Ruckpack 40 for outdoorsy travelers that are more bound to the city but need a backpack that performs in the concrete jungles and on the trail
Light, compressible daypack
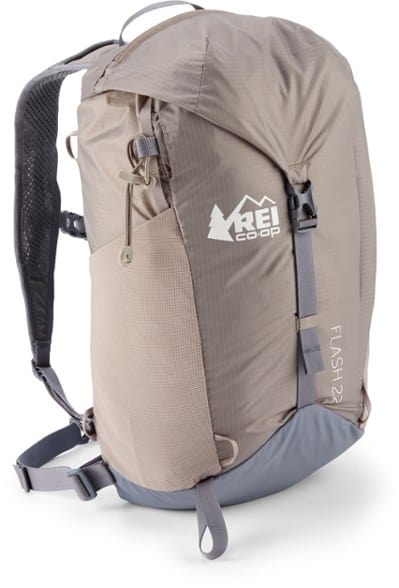
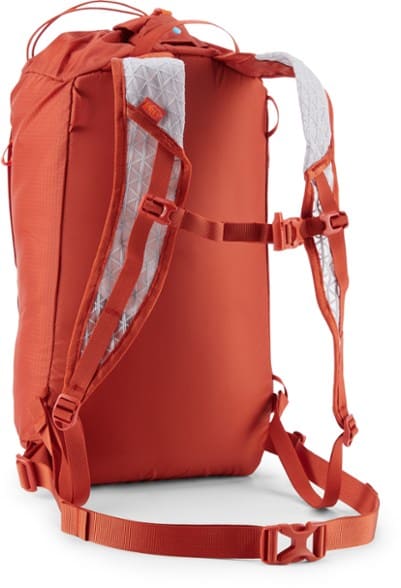
During parts of the Torres del Paine trek, and many other treks, you’ll leave your pack and gear in the morning as you go on a small hike and return for them in the afternoon. This will be the case on the Valle Frances hike and the Torres del Paine sunrise hike. Having a compressible, lightweight daypack allows you to easily carry water and snacks for these hikes. I recommend the REI Flash 18 or REI Flash 22.

(Optional) Trekking Poles
If you are worried about the distance and number of hours you’ll be hiking, I highly recommend bringing trekking poles. Using trekking poles shifts some of the weight of your body and pack away from your legs and knees. This allows you to go much further on the same amount of energy, and be more comfortable along the way.
Trekking poles can be cheaply purchased or rented in Puerto Natales

Daypack Gear
This is the gear that you want to keep readily accessible because either you’ll be using it frequently or by the time you need it (like a headlamp at night) it will be an extreme pain to get to.
Headlamp (with extra batteries)
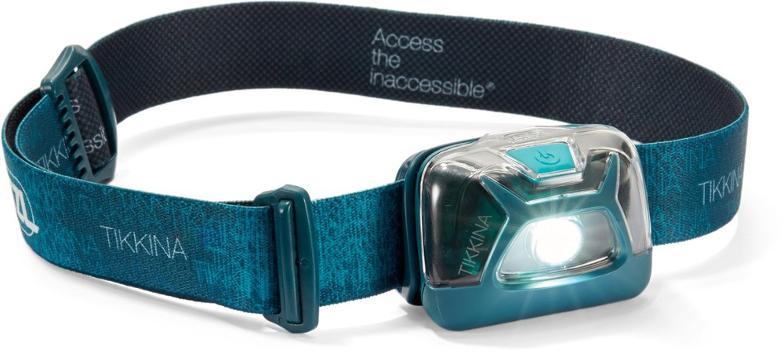
An invaluable piece of gear, headlamps change the darkened landscape of the wilderness into a welcoming adventure. Having the headstrap, which you can also use to hang around your neck, makes the lamp easy to use while using the bathroom, brushing your teeth, or reading, without sacrificing a free hand. Be sure to get a headlamp with interchangeable red and white lenses built in, as red light is much easier to use at night without disrupting others, while reading a book or sitting around a fire.
I recommend purchasing a headlamp prior to coming to Patagonia, to ensure you get a high quality one that will last at a good price. Amazon sells several reliable models for cheap.

2 water bottles, at least 1 liter each
Water is necessary for life, and having two liters of water on you means you’re very unlikely to go dry before your next watering source.
Any pair of 1 liter bottles will do. The normally single use water bottles (such as the Dasani bottles) are perfect to use as they’re cheap and light, just continue refilling them.
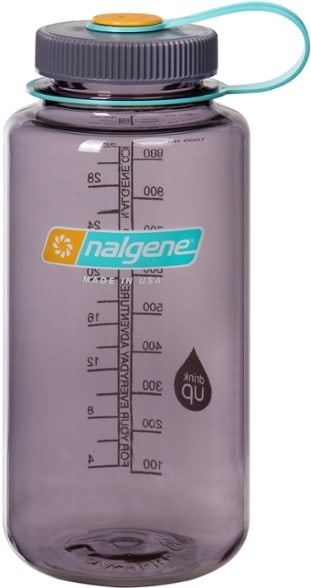
Reusable plastic Nalgene bottles on Amazon or at REI are the more eco-conscious option, so opt for those if you can spare the money
Stainless steel options such as the Kleen Kanteen are extremely practical and environmentally friendly as well.


Camping Gear
(if staying in campsites and not refugios)
Bringing your own camping gear to South America is a solid but not necessary option. Throughout Puerto Natales, you can rent everything you need such hiking poles, camping stove, tent, cooking gear, and more. The only items you should definitely plan on bringing are well fitted items that you wear such as hiking shoes, hiking trousers, rain pants, a quick dry hiking shirt, etc. **
On the other hand, if you plan on hiking in other areas of Patagonia, like San Carlos de Bariloche, El Chalten, Patagonia national park, and beyond, I recommend taking this full Patagonia packing list – and not panning to rent anything.
Tent
Go as lightweight as reasonably possible with tent to make your trekking life easier. A two person tent designed for three seasons will do well during high season, but bringing a 4 season tent if braving Torres del Paine in the winter.
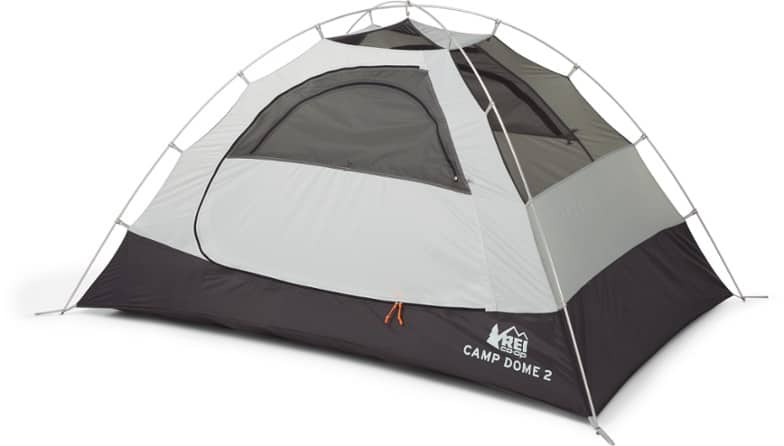
REI’s Camp Dome 2 Tent is a great option for less than $100
If you arer only trekking in Torres del Paine, save yourself a hassle and rent the tent in Puerto Natales for about $4,500 CLP ($6.50 USD) per day. Inspect the tent closely for holes, broken poles, and fully functioning zippers. Any malfunction in these at night or during rain will be miserable
If you plan on trekking in other parts of South America, such as El Chalten and Bariloche, I recommend purchasing your own tent instead of renting. The tent will pay for itself in full after a few weeks of camping by avoiding tent rental fees and saving money on overpriced accommodation.
For buying tents (and most outdoor gear) I recommend going with REI’s tent selection. REI generally carries excellent brands and products, so any will do, its just a matter of preference. Additionally, the one year satisfaction means you can use the tent on the trek and if it disappoints you, return it to REI for a full refund with no issues.
Alternatively, I fond Bariloche to be a great place to purchase tents if you are already in Patagonia. I purchased one there in 2010 on a whim to use for the W-Trek, and still use on hiking trips today!

Synthetic sleeping bag rated for cold weather
The sleeping bag will be the second most important thing (behind your tent) for keeping you comfy and happy.
Be sure that your sleeping bag is filled with synthetic insulation so that if you get it wet or you have a rain leak in the middle of the night, you’ll stay warm. Synthetic insulation continues keeping you warm, even when wet, while down insulation wilts and loses its heat. Also, ensure the bag is rate for low temperatures (freezing, at least)
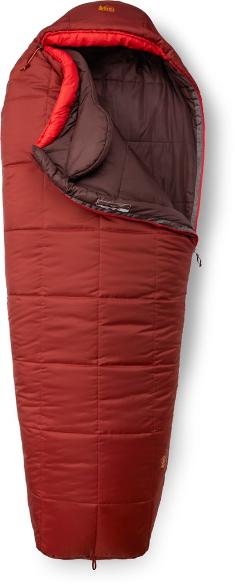
If you decide to rent a sleeping bag in Puerto Natales, be sure to bring a sleeping bag liner for hygienic reasons.
If you plan on hitting the outdoors often, I recommend checking out REI’s selection of synthetic insulation sleeping bags as they can be tested heavily and returned. Another option is to purchase used military sleeping systems on eBay as these are cheap and work extremely well. Whenever I take people camping, I always give them my old military sleeping bags

Sleeping pad
A good sleeping pad not only makes the ground more comfortable, but keeps you warmer but insulating your body from the cold ground.
You can easily rent a sleeping mat in Puerto Natales for $1,500 CLP (~$2 USD) per night.
If purchasing a mat (REI has a great selection of sleeping mats, and they’re clearly my go to for all things outdoors).

Camp stove with gas for entire trip
Bringing a good, compact camp stove from home is a great idea. I highly recommend the Jet Boil as it heats water and cooks amazingly fast, which comes in handy when you’re tired from a day’s hike.
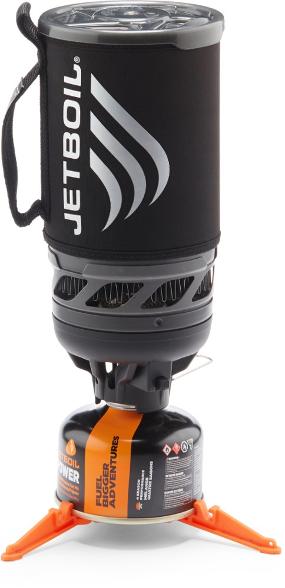
On a more eco friendly side, Solo Stove is a great, versatile option. Though you can burn wood in it, I recommend bringing alcohol or pellets as a backup fuel – in case regulations prohibit burning twigs
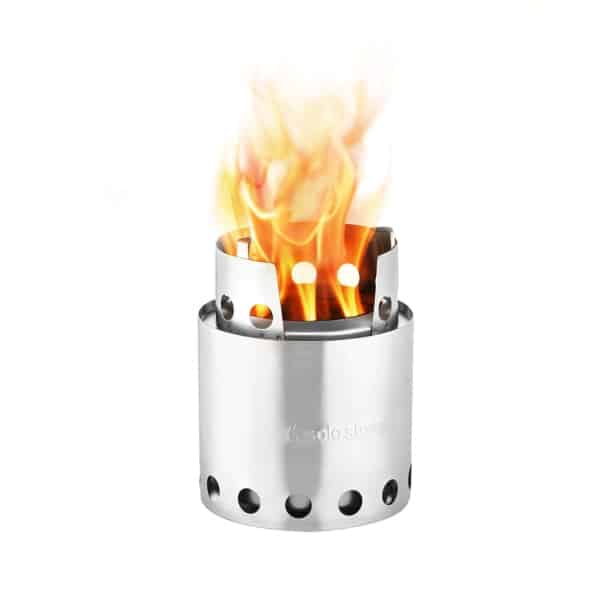
Alternatively, renting a camp stove in Natales will be cheap, easy, and guarantee that you’ll find fuel containers that fit.

Mess Kit
This can easily be rented or purchased in Puerto Natales. At minimum, pickup the following
- One pot
- One bowl
- One plate
- One knife
- One fork/spoon combo
- One cup/camp mug
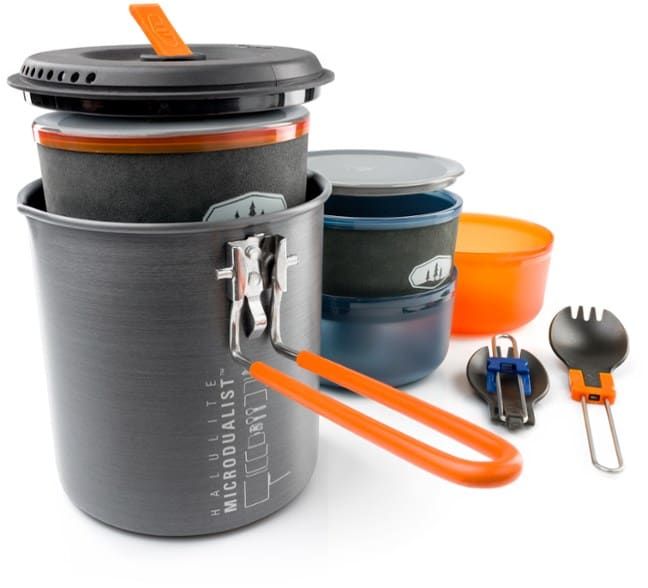
You will likely be able to purchase a basic version of these for twice the cost of renting.
If you plan on doing a lot of camping and trekking, you can easily purchase a good camp mess kit on Amazon for the same price or cheaper
Don’t forget to bring a small bottle of dish soap for keeping things clean

Trekking Clothing
Comfortable trekking shoes or boots
First and foremost, make sure your boots/shoes are broken in and comfortable.
In addition to a durable sole with enough grip handle 50 to 100 miles of walking through the wilderness, being broken in are the only prerequisites.
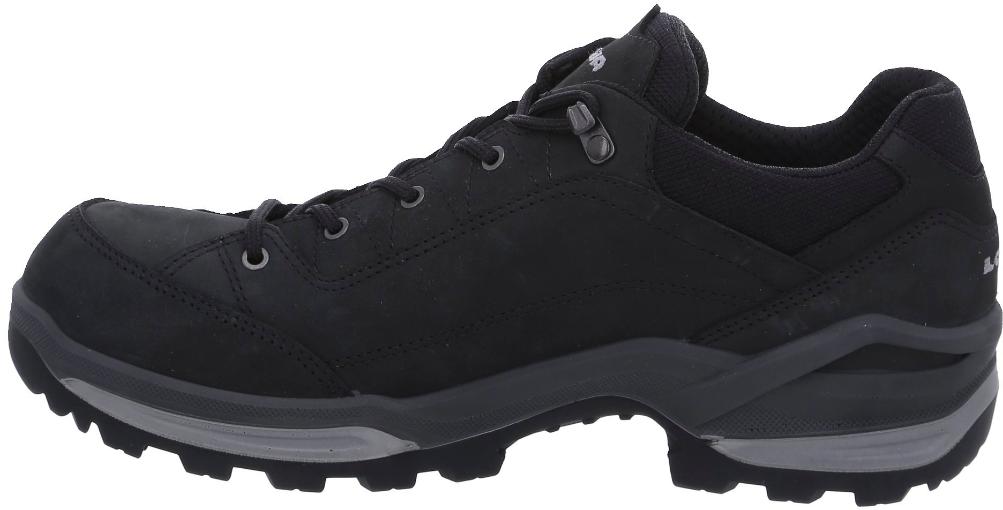
If you’re hunting for a good hiking shoe, I highly recommend the Lowa Renegade GTX which comfortably got me through the Everest Base Camp trek with a very short break-in period and no blisters, hotspots, or discomfort. The shoe’s muted design, despite its amazing outdoor performance, make it a great traveler’s hiking shoe
Sandals
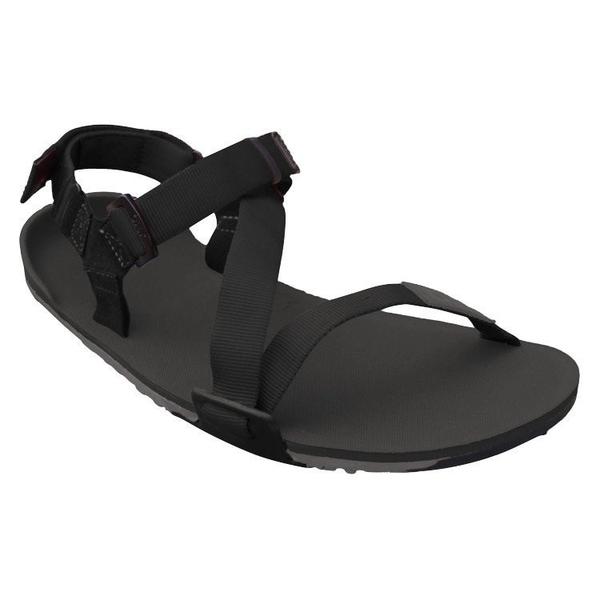
Flip Flops or trekking sandals will work, just bring something that can be worn in the shower
I recommend the Xero Trail because they’re as versatile as flip flops, but you can also trek in them.
A quickdry hiking shirt
Having dry clothes is insanely important while hiking in Patagonia, as the temperature drops quickly once the sun sets. Additionally, we, as human beings, sweat much more from our upper body (into our shirts) than our pants. Planning for that, and having quickdry shirts that will dry before the sun goes down is a pro move.
Three t-shirts minimum, two short sleeve and one long sleeve, of either wool or a quickdry and insulating synthetic material are perfect.
Also, consider packing a few tank tops. Singlet-styled tank tops are great for hiking in the heat because they keep you cool and naturally dry very quickly. Keep one in your backpack’s side pocket and throw it on after the morning warms up a bit.

Rain jacket (ideally hardshell)
Keep it simple and go for a well-reviewed, fully waterproofed hard shell rain jacket with taped seams (instead of softshell jackets). Hard shell rain jackets will give you a longer use life and perform better under extremely adverse conditions.
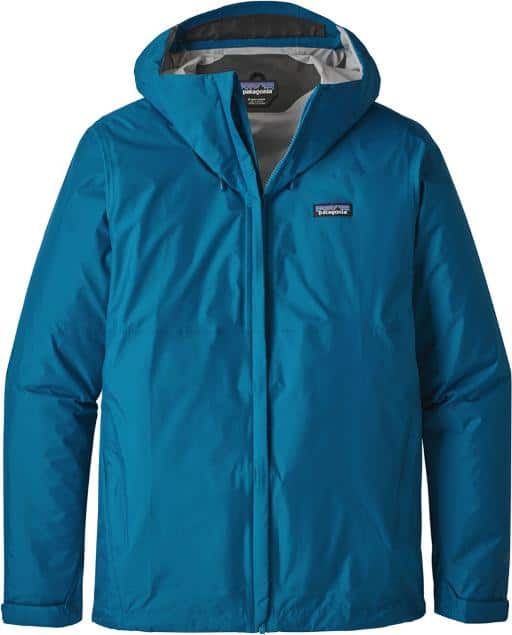
Patagonia’s Torrentshell is a worthwhile investment, but equal jackets from REI Brand, Columbia, and Eddie Bauer rain jackets will perform just as well

Insulation’/loft layer (down or synthetic insulated coat)
To keep warm in unexpected cold conditions, keep a water resistant down or synthetic insulated coat handy. These will keep you warm down to near freezing levels, double as a pillow, and compress down to nearly nothing.
I’ve used the Eddie Bauer Downlight Hood Jacket for two years from the Himalayas and love it. The jacket is part of their First Ascent line, specifically designed for use on Everest. Eddie Bauer’s no questions asked lifetime guarantee makes it well worth the investment

Lightweight Fleece (Mid layer)
For those times when you’re not freezing but it is chilly out, or you’re getting moving with a brisk chill in the air, your mid layer is perfect.
Go for a thinner, lightweight fleece in full zip or quarter zip. Ensure it is compressible, packable, moisture wicking, and still insulates when wet. This will be your go to layer when staying warm while active, and worn under your rain jacket in chillier
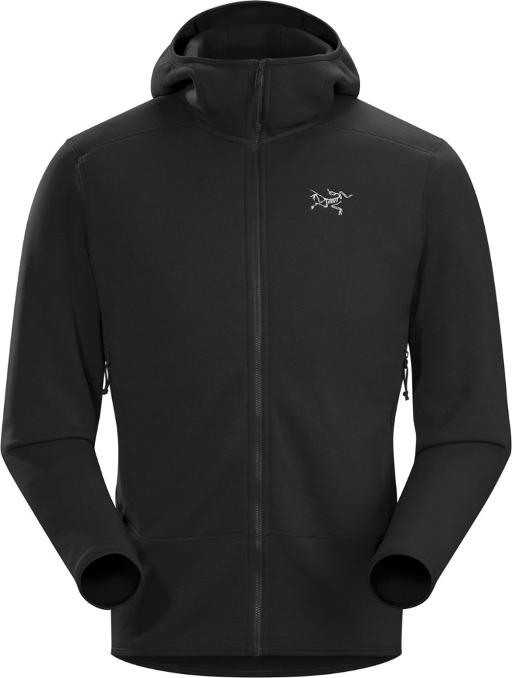
This Arcteryx hoodie available at REI is an example of a great mid layer
REI brand fleece jackets are cheap and perfect, as are Columbia’s and Patagonia delivers some amazing mid layers too.
This is a piece of gear you’ll use frequently and for years to come, so I recommend purchasing it from home, and going with good quality

Sweat Wicking Base Layers / T-Shirts
Bring at least two sweat wicking baselayer t-shirts, one in short sleeve and one in long sleeve. The short sleeve shirt will be great for when its hot out, and the long sleeve shirt will save your skin much more than sunblock
Aim for merino wool or polyester as both wick sweat away from the skin, dry quickly (even while on your body) and still insulate when wet. If you’re on a budget, go for polyester, it’ll do just fine.
My three favorite places to go for baselayers are REI, Target, and Wal-mart Online (oddly enough)
REI has an impressive selection, from REI brand to Patagonia.
Target’s Champion G9 line is impressive for the cheap price tag and delivers the design and function of Lululemon
Wal-mart comes in as an underdog delivering basic synthetic t-shirts from brands like Russel Athletic which get the job done without being pompous or breaking the bank.

Long underwear, synthetic or wool
Long underwear are another unsung hero of a good layering system. I find that a thin pair of good, wool or synthetic long johns (and beanie) keeps me just as warm as wearing a down coat. Wear these on cold nights or under your trekking pants on brisk days.
Merino wool long underwear are the gold standard but can break the bank.
I’ve opted for synthetic polyester long underwear that I purchased in Argentina 7 years ago and they’ve never failed me.
I recommend buy your long underwear from home. Amazon has a great selection of cheap, high quality options

Pants for Trekking
Though you could trek in your favorite cotton jeans, I don’t advise it. They’re heavy and bulky for packing, you’ll eventually start chafing, and when they get wet you’ll be in hell.
Opt for any synthetic (nylon or polyester), quick drying pants with slight stretch and enough room to layer over the long underwear you (should) now have. Extra credit if the pants are water and wind resistant.
Though there are many dedicated trekking pants at outdoor stores, jogging pants and thin sweat pants can work just as well. My favorite travel pants of late have been a pair of H&M running pants I purchased for only $20USD. They’re lightweight, wind resistant, dry quickly, and extremely comfortable. Any pair of pants that accomplishes those four things while still being durable will suffice for trekking
But
…if you plan on spending much more time in the outdoors, opt for the functionality of true trekking pants.

Shorts
Maybe its “skies out thighs out” time. Maybe you’ve decided to give your legs a breather. In any case, hiking shorts make the perfect “second trekking pants”.
Go for a pair made of anything but cotton, including a little stretch, and including a couple zippered pockets
I highly recommend the Columbia Silveridge short which I’ve used for the last year, or any of these other great travel shorts. **

2-3 pairs socks for trekking
Your feet do more work than any other part of your body when trekking – treating them accordingly by keeping them dry. The best way to do this is with medium to heavy thickness Merino wool hiking socks.
Synthetic socks are a decent alternative, but they will develop odor much sooner than wool socks. Synthetic socks will also lose their “loft” (that comfy, cushy feeling) much sooner than wool socks. Though wool socks sometimes cost twice the price of synthetic socks, they’re worth the investment.
Purchase these before going to Patagonia
Smartwool and REI both make reliable socks for hiking.
Other great (possibly even better) options are People Socks and Darn Tough socks on Amazon, which are relatively cheap and perform very well.

2-3 Pairs of underwear (at minimum)
Merino wool or synthetic underwear designed to be quick drying and minimize odor
Absolutely purchase these before going to Patagonia
Ex-Officio has been my go to but Amazon has a wide selection of suitable travel underwear

Gloves
Windproof, waterproof gloves will make all of the difference in the early mornings and if you’re caught in a storm.
Rent these cheaply in Puerto Natales

Beanie
Wool or synthetic to add a little touch of warmth to your noggin. Buy this ahead of time

Other Essentials
- Hat
- Sunglasses
- Balaklava

Clothing for Camp (After Trekking)
Pants and shirt for hanging out in camp (clean pair) and sleep in
During the trek you’ll wear the same, funky, dirty trekking pants day after day, and that will be fine…as long as you have something clean to change into at night. Any lightweight, compressible, comfortable pants
The same for your shirts – bring a couple to wear while lounging in camp at night and sleeping in

Other Trekking Essentials
Hygiene and Toiletries
- Quick drying camp towel
- An “all-in-one” soap, like Dr. Bronners, for hair, face, and skin
- Baby powder (for funk and chafing)
- Sunblock
- Lip balm
- Flushable Baby wipes
- Hand sanitizer
- Basic first aid kit (sports tape, gauze, sanitizer, pain reliever, superglue, Imodium, moleskin, electrolytes, band-aids)
- Toilet paper roll
- Water purification tablets

Electronics and Entertainment
- Portable charger (charged) or battery pack
- Smartphone or camera
- A good book or kindle
- Phone tri-pod

Accessories
- Trash bags for waterproofing (instead of dry bags)
- Large, Heavy Duty Ziploc Bags
- Lighter
- Krazy Glue
- Two liter sized water bottles, Nalgene bottles, or stainless steel water bottles
- Insect Repellent
- Mini Sewing kit (needle, knife, nylon thread)

Optional Accessories
- Sleeping Bag Liner (if renting a sleeping bag)
- Gaiters – or line your socks with trash bags
- Parachute cord or thin rope
- Small roll of Gorrilla tape or duct tape
- Carabiners (for clipping “quick access items” to the outside of your pack)
- Small pocket knife or multi tool
- Bandana or handkerchief
- Flask with your favorite fire water or box of wine if your bag is too light
- “Enough to share”

Ladies Only
- Leggings
- Feminine hygiene products
- Baby wipes
- Dry shampoo

Travel Essentials
- Passport
- Copy of Passport
- Cash (Local currency and USD)
- Medical insurance info (printed and availalable)
- Emergency info and contact info

Other Great Patagonia and Trekking Content
- The Torres del Paine W Trek
- The Torres del Paine Circuit Trek
- The Torres del Paine Campsites and Refugios – where to stay and how to book
- The Everest Base Camp Experience


ABOUT THE AUTHOR
Carlos is a nomad, slow traveler, and writer dedicated to helping others live abroad and travel better by using his 7+ years of experience living abroad and background as a management consultant and financial advisor to help other nomad and expats plot better paths for an international lifestyle. Click here to learn more about Carlos's story.
