Getting in a great, muscle building and body bulletproofing workout with weights may seem difficult, but its much easier than you think, healthier, and gives you the flexibility to stay fit anywhere. With four “simple” exercises – the muscle up, front lever, back lever, and handstands – you can get in a full upper body workout that builds intense upper strength, muscle, and durability.
In this article, we’ll share why these essential bodyweight exercises are so effective, how to do them, and how to incorporate these essential exercises
Contents:
- Overview of the Front Lever, Back Lever, Muscle Up, and Reverse Muscle Up
- The Simple Calisthenics Workout Program
- The Workouts
- Exercise Progressions: How to adjust each exercise to your skill level
- Exercise Overviews (with images and video)
- Front Lever Drill 1: Raising through and Lowering through a Front Lever
- Front Lever Drill 2: Pushing Back into a Front Lever from Top of Pull up
- Back Lever Drill 1: Lowering into a Back Lever
- Back Lever Drill 2: Extending into a back lever
- Muscle Up
- Reverse Muscle Up with Barbell
- Reverse Muscle Up with Suspension Trainer
- Handstand Hold facing Wall
- V-up Hold
The Only Bodyweight Back, Chest, and Shoulder Exercises You Need for a bullet proof body
Why is a workout program built on the Front Lever, Back Lever, handstand, and the Muscle Up so potent? Because the strength and mobility required to perform these movements is unmatched in nearly all bodyweight back exercises, bodyweight chest exercises, and bodyweight shoulder exercises. This means that these 5 exercises stack up to the perfect calisthenics movements for building muscle and strength while forcing the body (and the athlete) to improve and develop in a balanced fashion.
Let’s quickly review the movements before reviewing the program and the workouts.
The workout that follows is quite possibly one of the simplest yet toughest and most productive workouts I’ve ever done, given the amount of time required to complete it (roughly 30 minutes per session).

If you need a pair of gymnastics rings for this workout, check out our tutorial how to make your own packable, travel friendly gymnastics rings in less than 10 minutes!
Essential Bodyweight Back Exercises and Bodyweight Chest Exercises
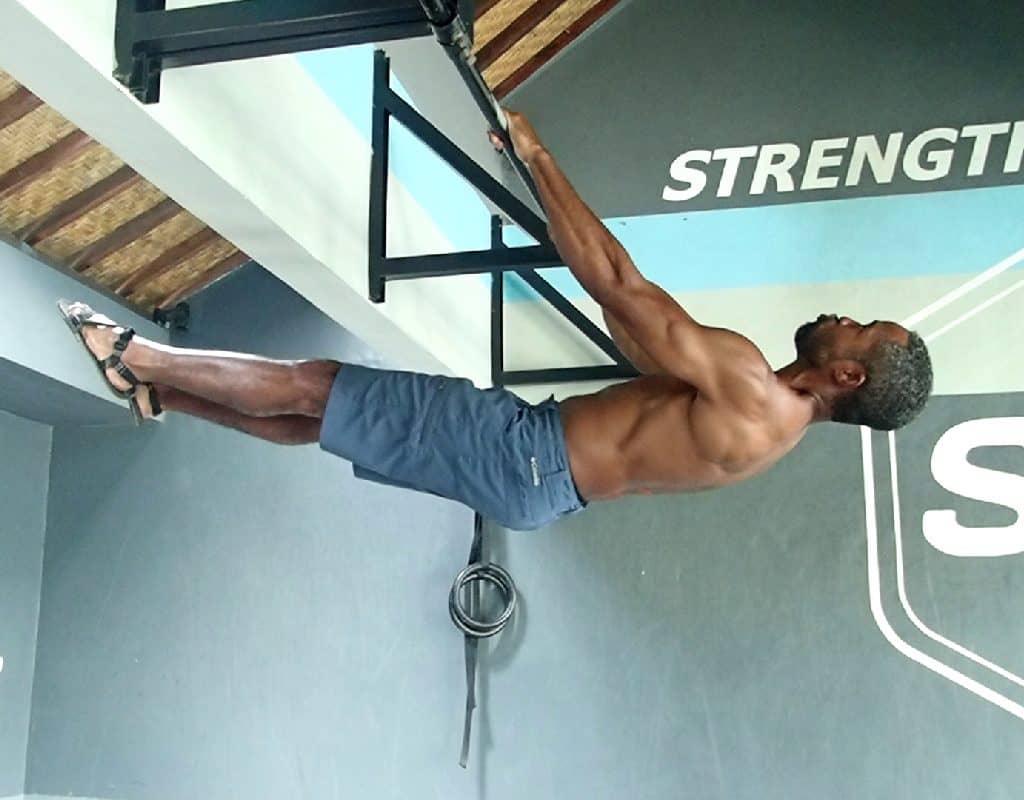
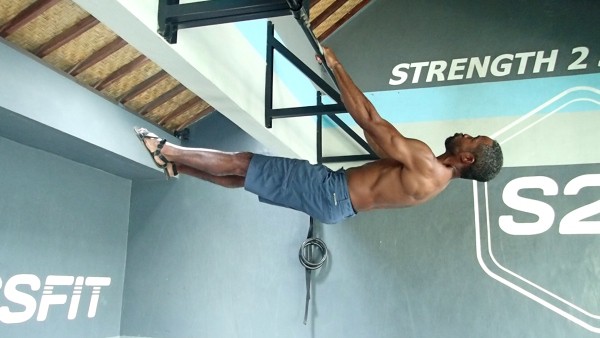
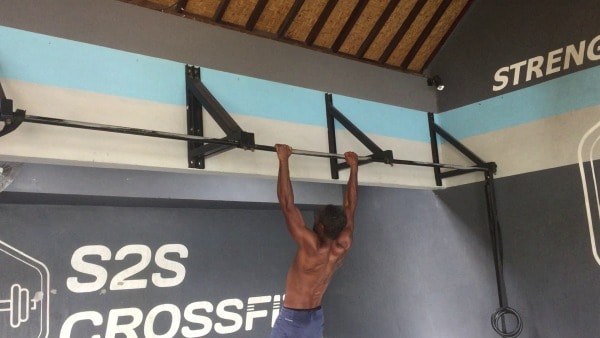
The Front Lever:
The front lever, as simple as it looks, is one of the most intense bodyweight back exercises, and bodyweight chest exercises imaginable, while still giving a very intense core workout to boot. The front lever is also a bodyweight shoulder exercise, working the rear portion of the shoulder muscles (the rear deltoid) in a way and to a degree that most other bodyweight exercises simply can’t.

In the same moment, the front lever challenges the triceps, challenges you to maintain proper scapular positioning, and challenges your core.
To do the exercise simply move into position grabbing the bar with hands shoulder width apart and arms straight, and raise into a position holding the legs, hips, and torso in a straight line parallel to the ground.
Front lever progressions and how to use the front lever in workouts:
Static, isometric holds, “push outs,” front lever raises, and front lever negatives
Though the front lever is a static movement, performed by holding a static position in an isometric hold, moving into and out of the primary position repeatedly creates a dynamic exercise alternative.
For static front lever holds, consider an 18 to 20 second hold to be equivalent to a “one rep max”.
For Front Lever “Push Outs,” move into the front lever hold. Then, for each rep, return to the hanging position with knees tucked, torso upright, and hips flexed, then “push” your feet out while extending the hips and bringing the torso back to horizontal for a single rep.
For Front Lever Negatives, start in the inverted hanging position and, while maintaining extended hips and straight legs, lower to and through the front lever position. Once you reach the bottom of the exercise (a normal hanging position) tuck the knees and rock back to the inverted hanging position with minimal effort.
For Front Lever Raises, from a full hanging position with the body fully extended, maintain straight legs and extended hips and raise the legs into the front lever position, passing through to reach a fully vertical inverted hanging position. Then lower back into and through the front lever to the hanging position again to complete a repetition. Then, repeat.
When performing the front lever be sure to maintain the straight line of your body and keeping the shoulder blades in a retracted, neutral position.
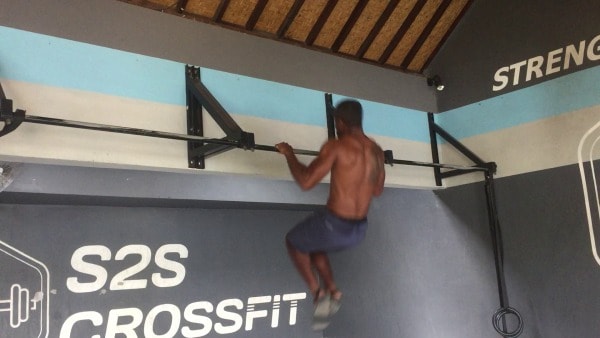
The Back Lever
The Back lever is an intense core exercise as the core strength required to maintain position in such an awkward position is extremely high. The back lever also falls under bodyweight shoulder exercises, with the end range of the movement requiring (and developing) significant shoulder mobility. This exercise heavily trains the front deltoid and helps you build strong shoulders and improved mobility.

Because the back lever is a static hold exercise, to add this exercise to your workout, use the same approach as we chose with the front lever, adapting the exercise to a static hold exercise, a push out exercise, a negative, and a back lever raise.
Muscle Ups
The muscle up is likely one of the most intense movements in bodyweight training and delivers tons of strength and muscle in return.
An intense movement that works nearly every muscle from the belly button up and is the king of bodyweight exercise. The pull up movement falls under the bodyweight back exercises, but has to be done with so much power that it takes your pull up to a new level of difficulty. The transition portion of the movement, from pull up to dip, then turns your muscle ups into high intensity bodyweight chest exercises and bodyweight shoulder exercises. Additionally, if you slowly return to the start position you create an intense negative exercise and extra burn.
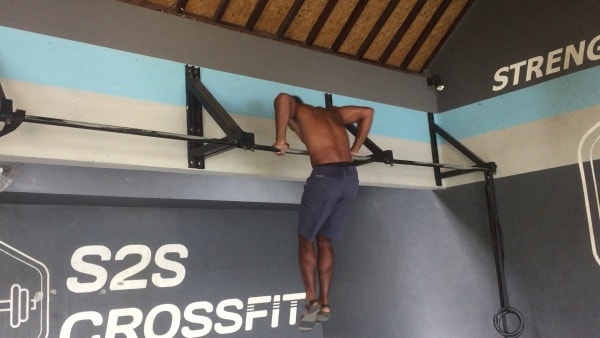
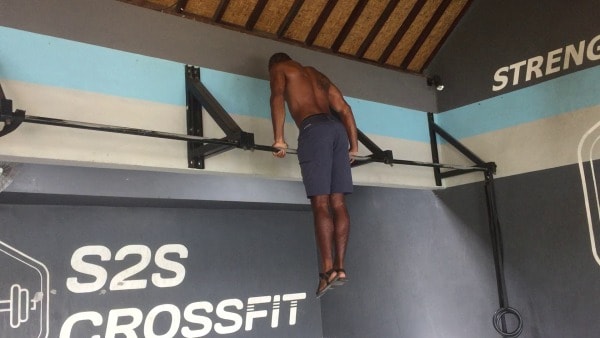
The pull up is performed with the same movement when doing bar muscle ups (as pictured above) or ring muscle ups. However, in doing Ring Muscle Ups you will need to master the false grip to gain the right leverage.
Bodyweight Shoulder Exercises
The Reverse Muscle Up
The Reverse Muscle Up adds a level of balance and health to this workout program by balancing the muscle development in the muscle up, especially in the health of the rotator cuff and muscles at the rear of the shoulder.
While the muscle up emphasizes downward pulling strength (with the pull up training the lats) and downward pressing strength (with the dip training the chest and triceps) along with internal shoulder rotation, the reverse muscle up develop develops healthy upward pulling strength targeting the shoulders, external shoulder rotation targeting the rotator cuff, and overhead pressing further developing balance in the shoulder.
Performing the Reverse Muscle Up with Barbell
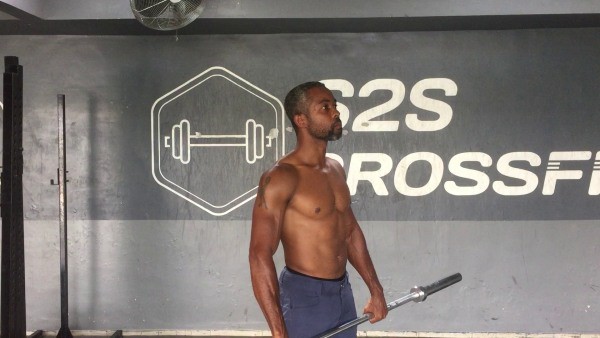
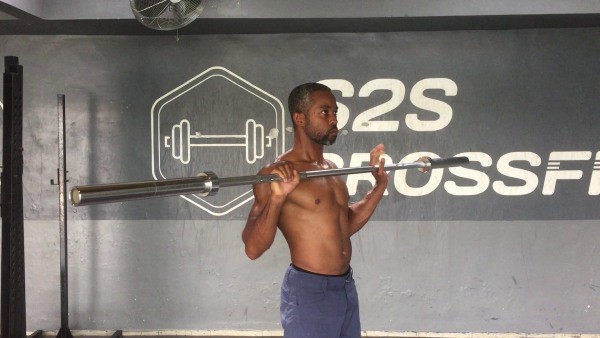
Performing the reverse muscle up with an empty barbell in a slow and controlled manner is my favorite way of making the most of this exercise.
Recreating the Reverse Muscle Up Movement with a Suspension Trainer

However, with a suspension trainer, we can easily recreate this great exercise.
The Handstand Hold
The handstand hold is a simple way to develop the handstand, and by extension the shoulder muscles and triceps. The simple nature of just holding as long as you can makes start and progressing simple and straightforward
The workouts and program that follow are the brainchild of a friend I met Freediving – who just so happens to be an acrobat and world-class diver. It seemed like he knew what he was talking about, so I decided to try out the workout for a few weeks. I quickly realized he definitely knew what he was talking about as I was pouring with sweat but felt my strength improve generally and skill in the movements improve as well. In the first session, I remember realizing I hadn’t sweated that hard in as long as I can remember. Three weeks later, I can see the strength progress in satisfying way but I still have a ways to go. That’s the kind of workout we all need. So let’s get into the program.
The Simple Calisthenics Program
The program is structured into a simple two-day split.
On day one, you’ll work on the front lever and back lever movements. On day two, you’ll work on the muscle up, balance the muscle up work with the reverse muscle up, and work on the handstand. Both days will end with a couple minutes of ab work.
Be warned, this is by no means a beginner workout, but I still highly recommend working up to this workout.
Each workout day uses circuit style training to get in as many repetitions as possible, evenly distributed across all sets of each exercise but aiming not to exceed 12 repetitions in any set – optimally doing 10 repetitions per set.
For rest periods between exercises, aim for a 15 second to 2 minute rest. Go for a shorter rest period if the exercise is too easy or you’re targeting hypertrophy (e.g., building muscle) and a longer rest period if you are focusing on strength and skill development
For rest days between workouts, the number of rest days and when they need to happen will very much depend on you and will change depending on workout intensity and your own ability to recover. Workout as many days in a row as your body feels comfortable with, paying special attention to how joints feel (especially elbows) not just how your muscles feel. When you are feeling fatigued, depleted, and overly sore, rest for as many days as you need to get your strength, energy, stamina, and full muscle control back. For reference, I’m averaging 4 days of workouts in a row with 1-2 days of rest (with stretching) in between.
The Workouts
(Jump Below to exercise explanations)
Workout 1: (Front Lever, Back Lever Development)
Perform a circuit of the following exercises, doing the first exercise for one set then proceeding to the next exercise in the sequence. Once you reach the last exercise, repeat the list of exercises aiming to do an equal number of repetitions of each exercise up to five sets of each exercise, but feel free to stop when you’ve reached exhaustion, even if that’ s before five sets of each exercise.
The optimal number of repetitions per exercise is 8-12 repetitions, so increase or decrease the difficulty of each exercise to stay in that range.
(click each exercise to jump to the movement explanation)
Workout Structure: Circuit – perform one set of each exercise in the cycle, 1 to 4, then repeat
Sets Per Exercise: Target 5 sets per exercise
Rest Period: 15 to 120 seconds
(Click each exercise to jump to an explanation and demonstration)
- Front Lever Drill 1: Raising feet into Front Lever then continuing up and Lowering into a Front Lever and continuing to a dead hang pull up
- Front Lever Drill 2: Pushing Back into a Front Lever from Top of Pull up
- Back Lever Drill 1: Lowering into and through a Back Lever and then “skinning the cat” to return to the inverted hang position
- Back Lever Drill 2: Extending into a back lever
+
V-Up Hold + “Juggling” for 2 minutes (not part of
Workout 2: (Muscle Up and Handstand Development)
(click each exercise to jump to the movement explanation)
Workout Structure: Circuit – perform one set of each exercise in the circuit, then repeat from first exercise
Sets Per Exercise: Target 5 sets per exercise
Rest Period: 15 to 120 seconds
+
Hold
V-Up Hold + Juggling for 2 minutes (not part of
Notes:
- Stretch after workouts and extensively on your days off to stave off injury and assist recovery
- Listen to your joints and throw in rest days as necessary
- Focus on slower, controlled movements in every exercise, to build strength and reduce risk of injury
How to Adjust Exercise Difficulty
To make the front lever and back lever drills easier, pull the feet and knees closer to the body.
To make the movements more difficult, extend the body as much as possible.
Adjust your body position in the movements accordingly to suit your current skill level and to adjust the exercise difficult accordingly as you improve.
How to adjust the Difficulty of Front Lever and Back Lever Drills
- Bend at the waist (Easiest)
- Bend at the knees
- One leg straight, one leg bent
- Both legs straight (Hardest)
Overview of exercises in this workout and how to scale them
Front Lever Drill 1: Raising through and Lowering through a Front Lever
(Youtube Link for Front Lever 1 Drill)
To Do the Movement:
- Start from the pull up dead hang position
- Maintaining a straight torso, back, and legs, lift the lower body in a controlled fashion, raising to and through the Front Lever Position
- Once your feet reach the top of the movement and the body is in an inverted hanging position perpendicular to the floor, pause briefly in the inverted hang before continuing
- Reverse the motion, lowering the body into and through the Front Lever Position before reaching the pull up dead hang position
- Repeat
To Make the Movement Easier:
To make the movement easier, and progression possible, adjust the body position to keep the feet and knees closer to the body.
How to adjust the Difficulty of Front Lever Drill 1
- Bend at the waist and at the knees(Easiest)
- Bend only at the knees
- One leg straight, one knee bent
- Both legs straight (Hardest)
Front Lever Drill 2: Pushing into a Front Lever from Top of Pull up
To Do the Movement:
- Move into the top of a pull up as your starting position
- Extend arms pushing the upper body backward while raising the lower body into the Front Lever position – aim to make the entire body horizontal and parallel to the floor
- Stop in the Front Lever and hold the position briefly
- Return to the start position (the top of the pull up) by pulling the upper body forward and lowering the legs
- Repeat
To Make the Movement Easier:
To make the movement easier, and progression possible, adjust the body position to keep the feet and knees closer to the body.
How to adjust the Difficulty of Front Lever Drill 2
- Bend at the waist and at the knees (Easiest)
- Bend only at the knees
- One leg straight, one knee bent
- Both legs extended (Hardest)
Back Lever Drill 1: Lowering into a Back Lever
To Do the Movement:
- Start in the inverted hang position
- While keeping the torso and legs as straight possible, lower the legs in a smooth, controlled manner into a back lever
- Pause briefly in the back lever position
- Reverse the motion to raise the legs and lower body back up to the inverted hang position, pausing at the top to regain control – this movement can be done extended for high difficulty or with knees tucked for minimal difficulty
- Repeat the movement
To Make the Movement Easier:
To make the movement easier, and progression possible, adjust the body position to keep the feet and knees closer to the body.
From easiest body position to most difficult
- Bend at the waist and at the knees(Easiest)
- Bend only at the knees
- One leg straight, one knee bent
- Both legs straight (Hardest)
Back Lever Drill 2: Extending into a back lever
To Do the Movement:
1. From an inverted hang, lower into and past the back lever position as far as is comfortable and feels safe for your shoulders to achieve the starting position
2. Bring your knees in towards your chest while maintaining a straight back and actively flexed shoulders and arms, to protect the shoulders and elbows
3. Extend both legs and raise into a back lever while raising the lower portion of the torso slightly (if necessary)
4. Once the back lever position is reached, pause and hold the position briefly
5. Retract the knees, reducing the difficulty of the position, maintaining a straight back and protected joints
6. Repeat
To Make the Movement Easier:
Instead of extending completely, extend only as far as is appropriate for your skill level according this progression:
From easiest Body Position to most difficult
1. Raising the lower portion of the torso to be parallel with the ground while bending at the knees and waist (easiest)
2. Extending one leg with a bent knee while keeping the other leg bent at the waist and knee bent
3. Extending both legs (at the waist) while keeping the legs bent at the knees
4. Extending both legs with one leg completely straight and one leg bent at the knee
5. Extending with both legs completely straight
Muscle Up
To Do the Movement:
1. Start in the dead hang pull up position
2. Perform a pull up powerfully raising your chest above bar level
3. Allow your grip to transition into position on top of the bar in position to perform the dip
4. Perform a dip
5. Lower your body into the dead hang pull up position in a controlled fashion
6. Repeat
To Make the Movement Easier:
Start by doing pull ups and dips as two separate exercises, building volume and the number of repetitions you’re capable of doing in a single set until you can pull up over the bar and then dip, effectively completing a muscle up
Reverse Muscle Up (with Barbell)
To Do the Movement:
1. Hold the pull up bar with a grip just wider than shoulder width and hanging in front of your body
2. Maintaining healthy shoulder position, slowly pull the barbell up in a controlled movement until it reaches chest height and the end of healthy shoulder range of motion for the movement
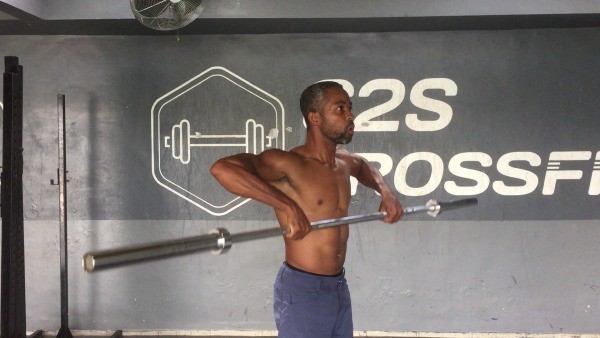
3. Rotate the shoulders externally and elbows down to position the barbell in a “front rack” position
4. Press the barbell overhead ensuring full extension with the “head through the window”
5. Lower the barbell in a slow controlled movement to the front rack position
6. Slowly internally rotate the shoulders, lifting up the elbows to reverse the original movement
7. Lower the barbell to the hanging position in a controlled fashion
8. Repeat
To Make the Movement Easier:
Go as light as possible to start. This movement, when done in a slow, controlled fashion, will be more taxing than you think.
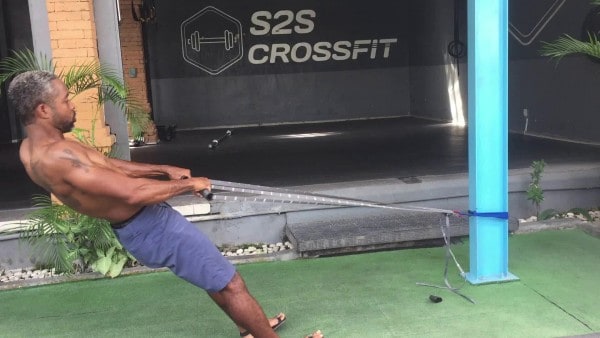
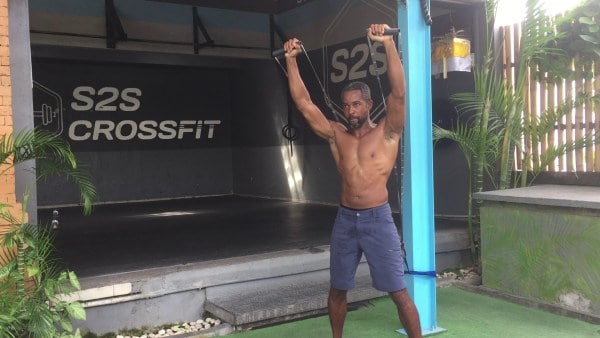
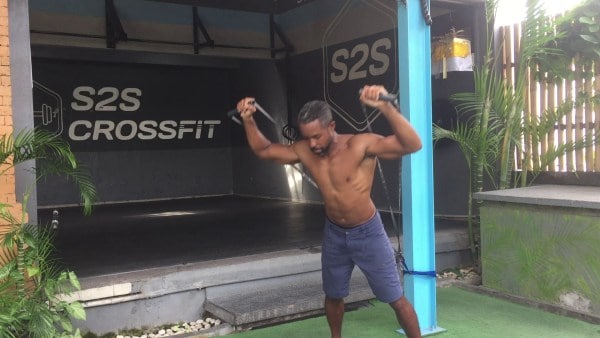
Reverse Muscle Up (with suspension trainer)
To recreate the “reverse muscle up” with a suspension trainer, you’ll need to do a set of high pulls with an external shoulder rotation movement after the high pull and then transition straightaway into a set of overhead presses with the suspension trainer. Being able to do this movement with a suspension trainer makes the entire program very suited to travel as I always carry the Monkii Bars 2, a travel friendly suspension trainer or my backup, my DIY suspension trainer that’s cheap and works extremely well.
How to Do High Pulls with a Suspension Trainer
1. Anchor the suspension trainer low, between the floor and chest height. Lower will be harder, higher will be easier.
2. Adjust the length of the suspension trainer and your foot position so that when your arms are in the front rack position you are near horizontal – this will be your starting position. You should be facing your suspension trainer anchor. If you’re worried about your feet sliding, move your feet (and adjust the suspension trainer length) so they are braced against your anchor point.
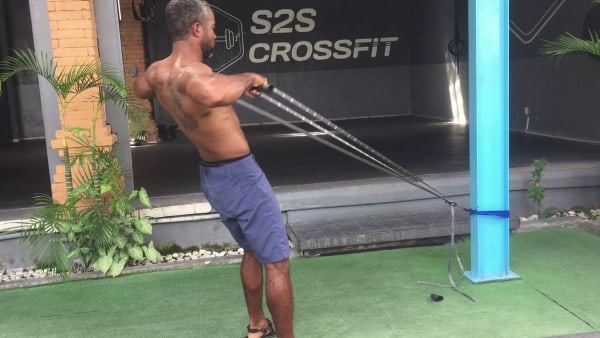
3. Pull the handles in a line parallel to your body, up toward your chest.
4. When the handles reach chest level, rotate your shoulders externally and your elbows down until the handles are in a “front racked position”. Pause and hold this position briefly.
5. Reverse the movement by rotating your shoulders internally and raising your elbows in a slow controlled motion
6. Lower your hands and the handles to return your body to the start position, near parallel to the ground.
To Decrease High Pull Difficulty
Raise the height of your suspension trainer anchor to decrease difficulty
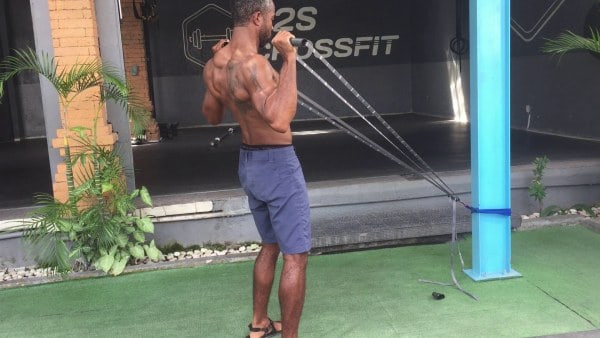
How to Do Overhead Presses with a Suspension Trainer
1. Set the height of your suspension trainer anchor shoulder level or lower. The higher the anchor, the easier the movement will be.
2. Adjust the length of the suspension trainer so that while holding the handles and facing away from the anchor you can extend your arms overhead completely while the suspension trainer straps are still tight.
3. Get into the starting position by facing away from the anchor, taking the handles in your hands, extending your arms overhead, and leaning forward until the suspension trainer is tight.
4. Lower into the movement by lowering your hands in a line parallel with your body until reaching the “front racked position” with your hands just to the sides of your upper chest. Pause here.
5. Press up to lift your body up and backward, recreating the movement and resistance of a shoulder press/military press.
To Make the Movement Easier or More Difficult
Raise the height of the anchor or shorten the length of the suspension trainer straps so that your starting position is more perpendicular to the ground to make the movement easier. To make the movement more difficult, extend the straps of your suspension trainer, increase your lean angle.
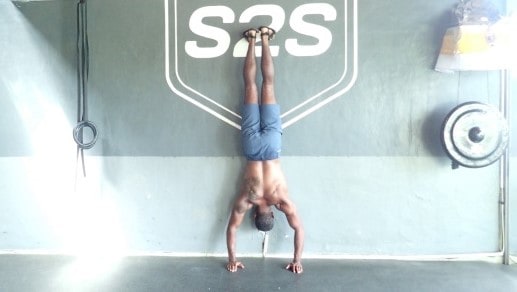
Hold handstand against wall (“nose and toes”) aiming for 3-5 minutes total
Simply get into a proper handstand facing a wall, ensuring your arms are fully extended and your “head is through the window” of your arms. Keep your shoulder blades in a protected, neutral position (generally by pulling them back and down). From there, just hold as long as you can. No way to make this one easier. Make sure only your nose and your toes are touching the wall. Nothing more.
V-Up Hold + Juggling
To Do the Movement:
1. Sit on the ground
2. Bend at the waist and balance on your but with straight legs and torso
3. Hold this position for 2 minutes
4. Along the way, pass a ball or small object around your legs and waist and between your legs to make the exercise more dynamic
Equipment
Whenever I travel, I either travel
Share your thoughts
This workout has given me excellent results quickly, but everyone’s different. If you have thoughts or ideas share them in the comments, and let us know what worked for you. If you have questions or sticking points that are causing problems, feel free to drop those in the comments as well.

More Great Articles to Help You Get Fit
.

.
ABOUT THE AUTHOR
Carlos Grider launched A Brother Abroad in 2017 after a “one-year abroad” experiment turned into a long-term life strategy. After 65+ countries and a decade abroad, he now writes about FIRE, personal finance, geo-arbitrage, and the real-world logistics of living abroad—visas, costs, and tradeoffs—so readers can make smarter global moves with fewer surprises. Carlos is a former Big 4 management consultant and DoD cultural advisor with an MBA (UT Austin) and Boston University’s Certificate in Financial Planning. He’s the author of Digital Nomad Nation: Rise of the Borderless Generation and is currently writing The Sovereign Expat.