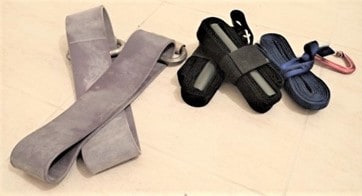
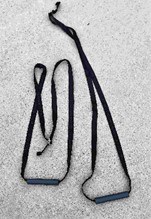
My lower body travel gym that’s small enough for carryon travel: A compact suspension trainer + heavy resistance bands with handles
The travel gym that I always keep with me, consisting of a compact, travel ready suspension trainer and heavy resistance bands with handles (such as the Rogue Fitness Shorty Monster Bands I reviewed) allows me to get in a great, full body resistance & strength workout on the road, to complement a healthy running, calisthenics, HIIT, and mobility regimen.

These two pieces of workout equipment enable my Travel Workout Plan that keeps me strong, fast, mobile, and ready for anything that comes.
The suspension trainer lets me get in the essential upper body movements (e.g., pull up, push up, dips, overhead presses, rows, inverted rows, curls, triceps extension) while a pair of short, heavy resistance bands for legs with makeshift handles attached blet me do a resistance band squat or deadlift with up to 280lbs resistance, while still fitting in my backpack.

The Travel Gym: What’s in it and why you need it’
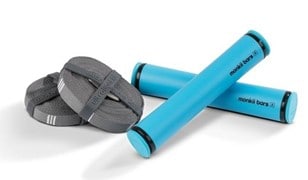
My compact suspension trainers, the Monkii Bars 2, which I reviewed a couple weeks ago, and the DIY suspension trainer I call “the Minimus” both allow me to do all of the essential upper body movements with the resistance I need to stay strong, maintain muscle, and reap all of the benefits above
DIY heavy resistance bands with handles are cheap, easy to make, and allow me to do the essential lower body strength movements, resistance band squats and deadlifts, with enough resistance that I get the same benefit as if I had done squats or deadlifts with free weights in the gym. Because I use short, heavy resistance exercise bands, such as the 12″ Rogue Fitness Shorty Monster Bands I can use two bands at once (one on each leg) and achieve resistance equal to 280lbs of free weights in the gym, all with a simple piece of gear that fits reasonably into a carryon backpack

Resistance and strength training is important, even on the road, to burn fat, balance hormones, and build or maintain muscle
Strength and resistance training is an important part of any balanced workout program. Benefits ranging from higher (and healthier) metabolic activity and fat burning, toning and maintaining muscle, increased bone density and health, and more positive hormone balances in the body are all great benefits of a resistance training. Balance also means sufficient lower body resistance exercise just as much as upper body, and not just calisthenics

Did you know after 2 weeks without training, muscle atrophy and strength loss begins? For travelers that spend months on the road (like me) it’s not worth giving in to the demands of travel and giving up hard earned health and fitness gains. Being healthy and fit helps me take on risky adventures (like trekking to Everest Base Camp) or riding a motorcycle through Vietnam and Laos more safely and keeps my body running smoothly.

The Bottom Line: Heavy resistance bands with handles are a perfect half of a travel gym as they allow us to do resistance band squats and resistance band deadlifts while traveling, without the hassle and cost of a gym
How to make the resistance bands with handles to do resistance band exercises for Legs
1. Gather the equipment
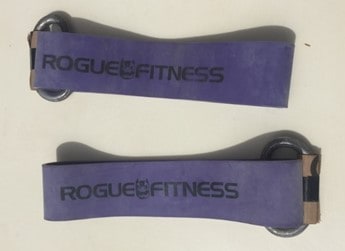
Two – short, high resistance bands for legs at your preferred resistance level.
I suggest the Rogue Shorty Monster Bands (read the review here) at your preferred resistance level.
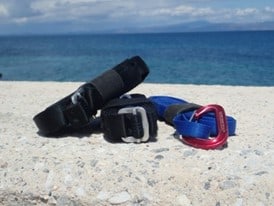
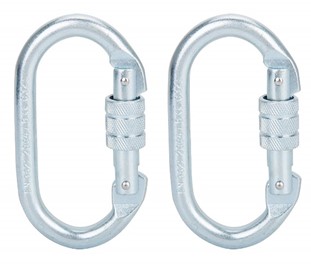
Two carabiners: large enough to slide your hand into, such as these carabiners on Amazon. The brand doesn’t matter, as long as they’re durable, rated for climbing, and are large enough for your hands to fit in. These will be our handles.
6 to 8 pieces of cardboard approximately 4″ x 6″: These will form our tiny “platforms” to step on and support our feet when anchoring the resistance bands with our feet.
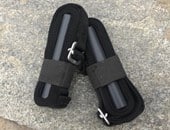
2 pieces of ~4″ wide strips of cardboard: This will be used to wrap carabiner handles and make gripping easier and more comfortable
Duct tape: This will be used for wrapping or cardboard pieces (platform, handle covers) to add durability. I recommend Gorilla Tape due to its durability. Plus, you’ll only use a few inches which means you’ll have an entire roll of Gorilla Tape afterwards to play with.
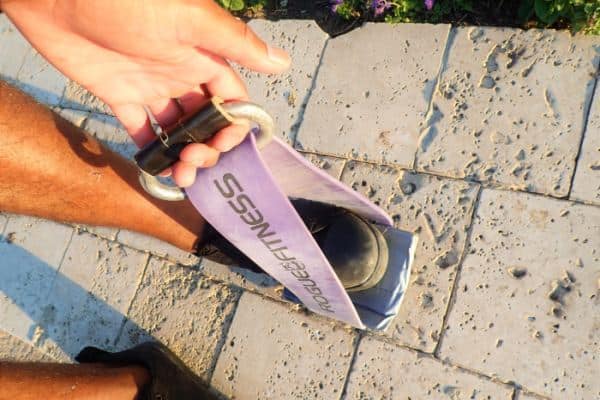
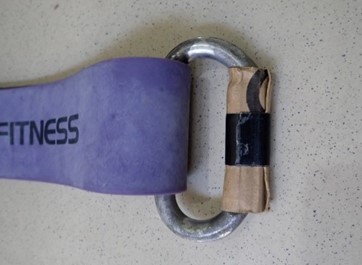
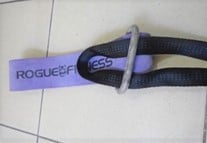
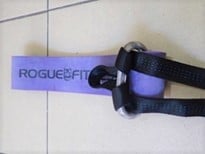
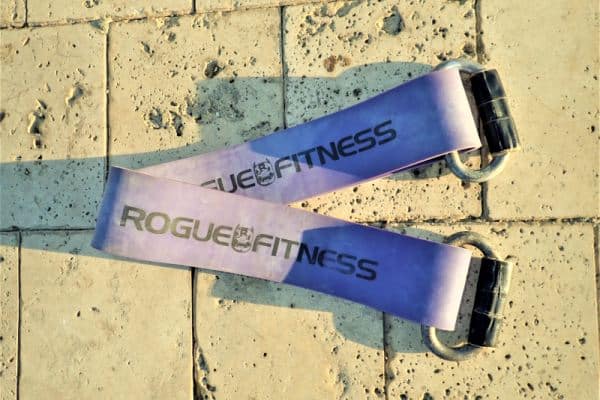
2. Attach the carabiners to create resistance bands with handles
- Take the carabiner and clip a resistance band into it
- Wrap the carabiner with the ~4″ piece of cardboard to your level of comfort for grip
- Wrap the cardboard with the duct tape (hopefully gorilla tape) to keep it in place
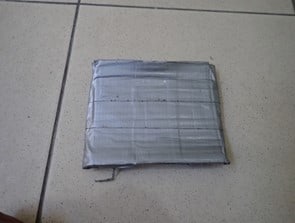
3. Assemble the cardboard platforms (to be used for supporting the feet)
- Stack the individual pieces of cardboard 3 or 4 pieces of cardboard high
- Wrap the stacks of cardboard heavily with duct tape to secure them in place and preserve the cardboard
Note: These cardboard platforms are used as support under your feet when squatting or deadlifting with heavy resistance

How to do the essential resistance band exercises for legs: Resistance Band Squats and the Resistance Band Deadlift
The best resistance band exercises for legs are simple, straight forward, and recreate the movements of the best free weight exercises for legs: the squat and the deadlift.
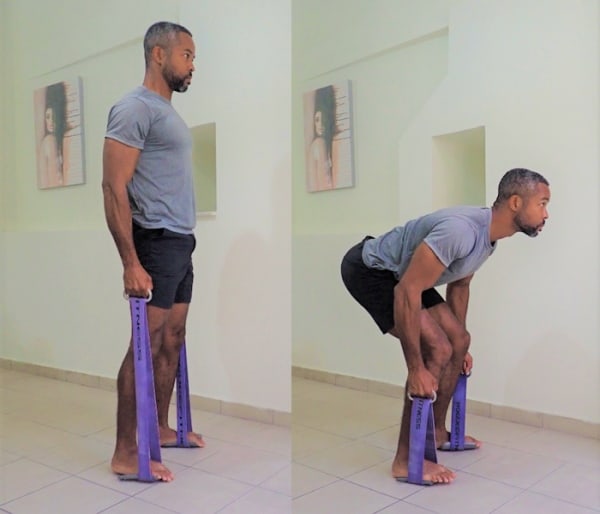
Resistance Band deadlifts
The first of the essential resistance band exercises for legs is the resistance band deadlift. This movement has a host of benefits, and is essential for anyone that is interested in gaining or maintaining full body strength and building a durable, functional body. Resistance bands with heavy ratings, such as the Rogue Monster Bands, make the deadlift movement possible even without a gym and while traveling.
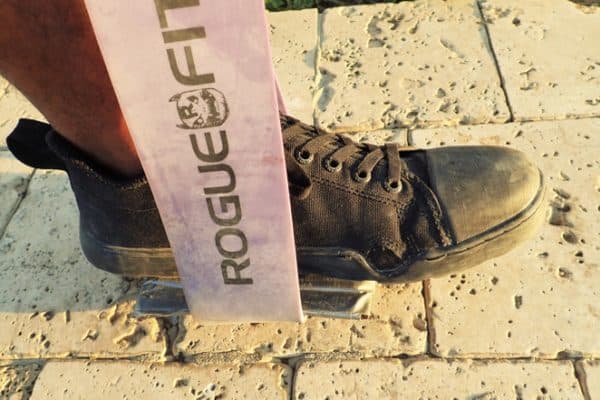
- Take one of your resistance bands for legs by the handle and place one of the platforms on the inner portion of the resistance band
- Step on the platform so that your foot anchors the resistance band and grab the carabiner handles.
- Setup the body for a deadlift as you would for a deadlift with free weights and commence the exercise
For detailed instructions on how to do the squat and deadlift, checkout the article “How to do the essential resistance band exercises for legs: Resistance Band Squats and the Resistance Band Deadlift“
Essential Resistance Exercises for Legs: Resistance Band Squats
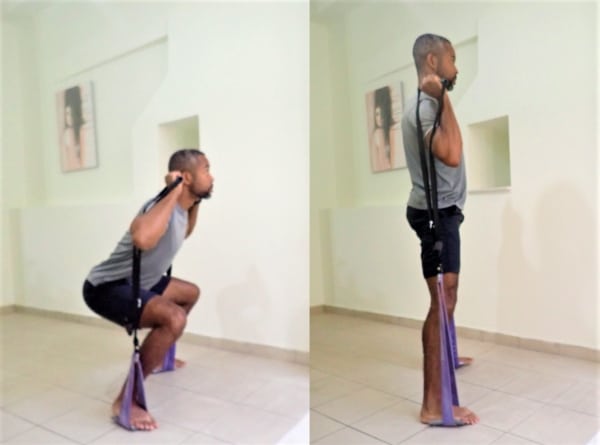
The second of the essential resistance band exercises for legs are resistance band squats. This is a very natural movement that encourages strength and mobility and also includes a host of benefits for more than just the lower body. Once again, the heavy resistance bands with handles mean we can get the benefits of resistance training in the squat movement, while traveling and without a gym
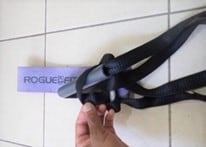
- Take one of the straps and handles from a minimalist suspension trainer, such as the Monkii Bars 2 or our DIY “Minimus” Suspension Trainer and wrap strap of the suspension trainer around the carabiner handle using a “pipe hitch” knot

- Take one of your resistance bands and place one of the platforms on the inner portion of the band
- Step on the platform so that your foot anchors the resistance band and grab the handle of the suspension trainer.
- Adjust the length of the suspension trainer strap such that the resistance band will be under tension when you hold the handle up at the bottom of a squat.
- Repeat the setup process with the other suspension trainer handle and resistance band.
- Setup the body for a proper squat, starting at the bottom of the squat with hands holding the suspension trainer handles in the racked position with the straps running over the backs of the arm.
- Commence the squat as you would with a back squat done with free weights and a barbell
For detailed instructions on how to do the resistance band squat and the resistance band deadlift, checkout the article “How to do the essential resistance band exercises for legs: Resistance Band Squats and the Resistance Band Deadlift“
Gear featured in this post
Rogue Fitness Shorty Monster Bands
The Monkii Bars 2

The DIY TRX Suspension Trainer

Other Great Travel Fitness Links
- Essential Home Workout and Travel Fitness Gear
- A Review of the Monkii Bars 2 Compact Suspension Trainer
- How to setup a suspension trainer indoors or outdoors with the DIY minimalist suspension trainer anchor
- How to do the essential exercises with a suspension trainer, in an outdoors or hotel room workout (pull ups, dips, rows, overhead presses, curls, and extensions)
- The DIY TRX: How to make your own compact suspension trainer
- How to do the essential resistance band exercises for legs: Resistance Band Squats and the Resistance Band Deadlift

ABOUT THE AUTHOR
Carlos is a nomad, slow traveler, and writer dedicated to helping others live abroad and travel better by using his 7+ years of experience living abroad and background as a management consultant and financial advisor to help other nomad and expats plot better paths for an international lifestyle. Click here to learn more about Carlos's story.