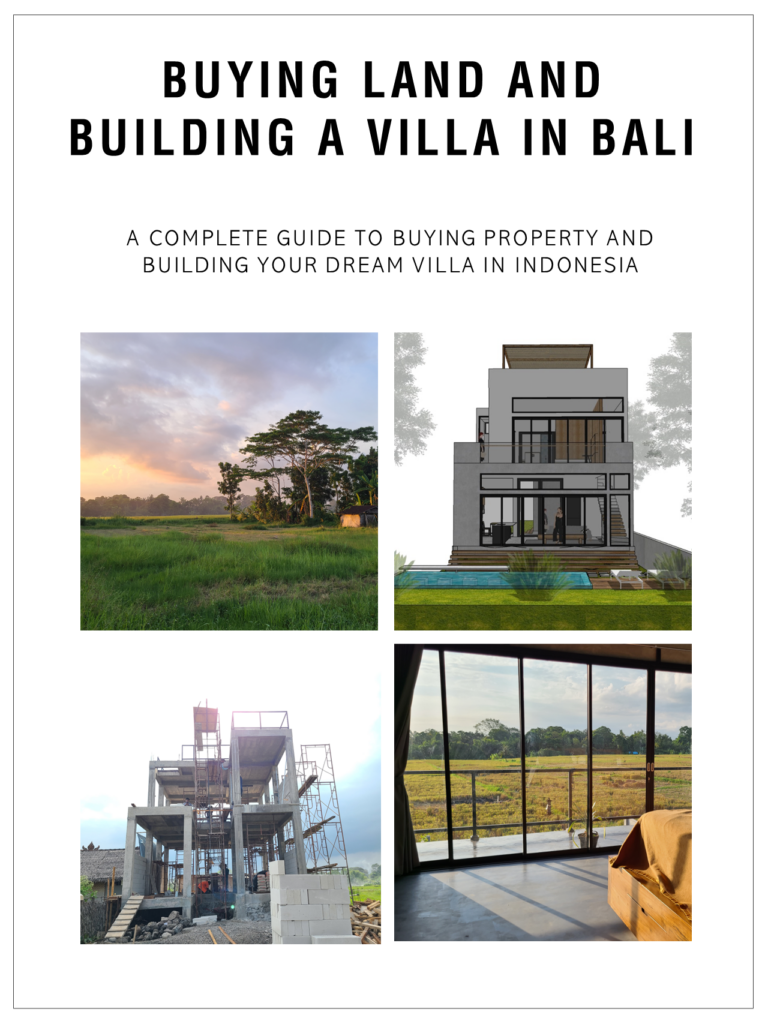
Beautiful villas are everywhere in Bali and easy to find. With the eclectic international crowd of Balinese, French, Italians, Americans, and beyond, finding an architect or interior designer to sculpt you a beautiful island villa is an easy task.
However, finding a team to build you a durable villa that stands up to the torrential rains and winds of Bali rainy season without leaks, resists the earthquakes so common amidst the volcanoes on Bali and in the “ring of fire”, survives the scorching equatorial sun, doesn’t succumb to mold, and keeps in mind how to keep the ricefield pests (think cobras and rats) out is a completely different task.

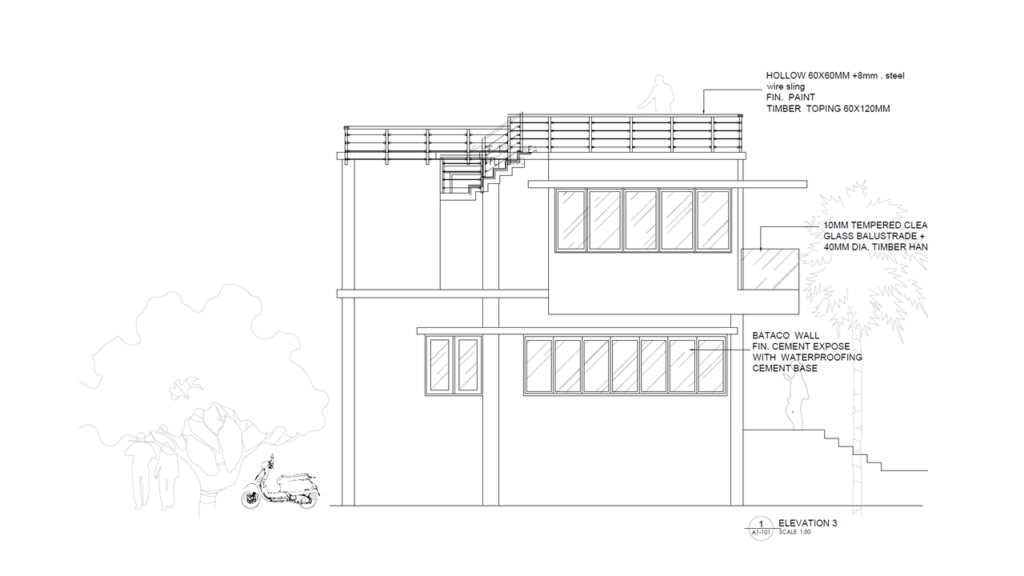
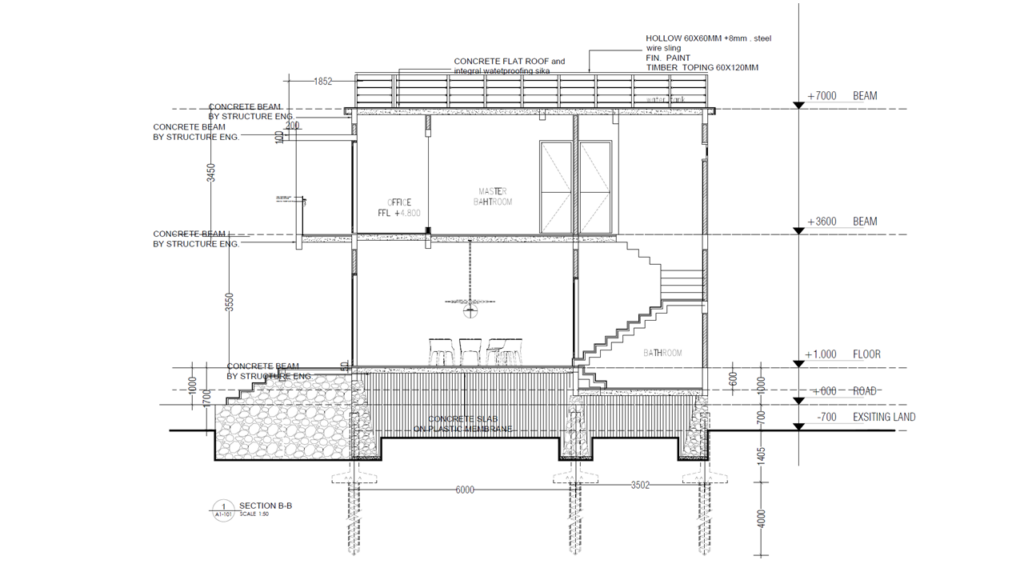
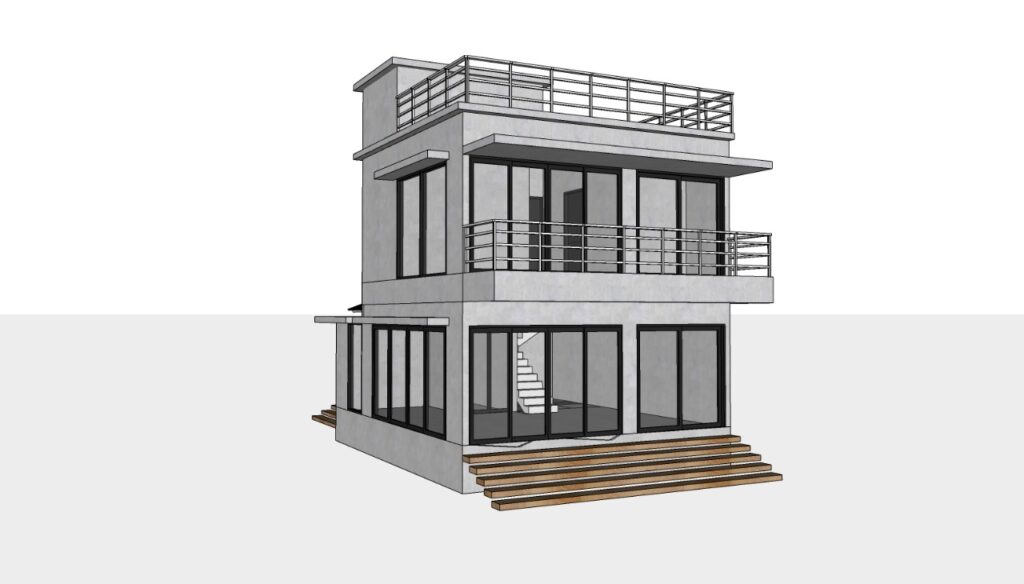
To put this in perspective, the full, international level standard design process for villa Balifornia took 9 months of meetings and $4000. All of the plans for you to build the same, beautiful, industrial style villa can be yours at a fraction of the price and time I paid.

Combine these environmental factors with the Indonesian laborer’s notoriously relaxed approach to abiding by constructing standard, low exposure to the construction standards of Australia, Europe, and North America, and add in a lower quality of materials – from cement, to steel, to windowpanes and fixtures – and you have a situation that absolutely requires good planning and management if you want a good villa, and not just a pretty villa.
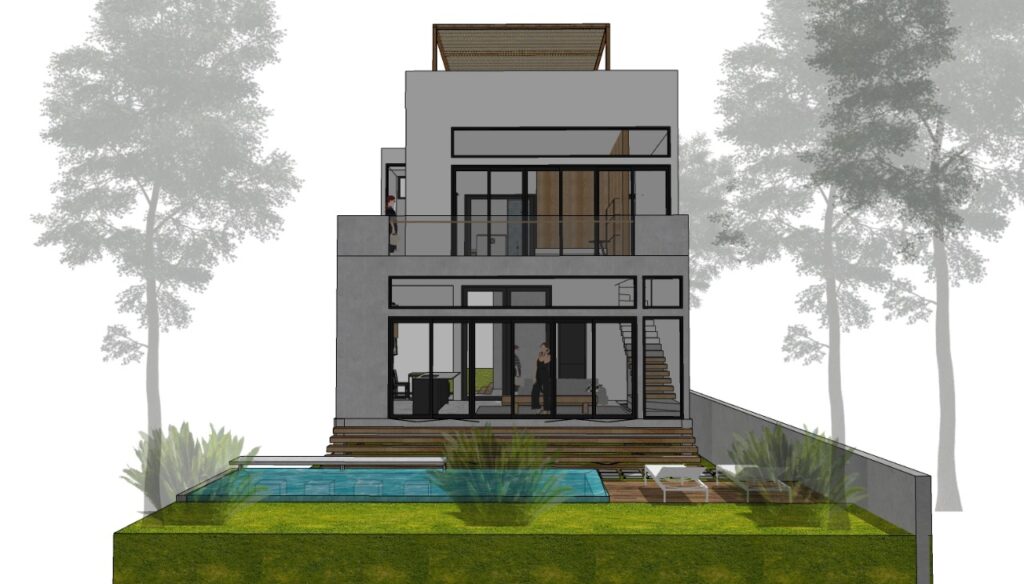
If you want a villa that is not only beautiful and comfortable in the first 6 months, but also stands up to the elements and doesn’t fall apart by year 2, you will need a very good set of plans to stick to. You will need architectural plans, structural engineering plans, Mechanical Electrical and Plumbing plans, all analyzed and drawn by licensed, experienced experts.
Do not assume that anyone coming to you offering to build your villa (local or foreigner) appreciates this fact, and take the time and diligence to ensure these plans are part of your process.
Taking some time to understand how building in Bali normally happens and understanding the best construction practices from around the globe you should demand is absolutely necessary to avoid the major pitfalls of construction on Bali.


CONTENTS OF THIS GUIDE TO BUILDING A VILLA IN BALI
BALI VILLA DESIGN AND PLANNING PROCESS: ARCHITECTURAL, STRUCTURAL, INTERIOR DESIGN, AND MORE
- Step 5. Planning Your Villa Build and Drawing the Plans
- Understanding the Types of Construction Plans and Tests You’ll Need
- Average planning document costs
- Why are these plans important?
- My Experience Planning my Villa + Some Tips to Avoid My Disaster
- The Professionals You Need to Hire and Consult in the Design Process
- List of Elements to Think through in Your Villa Design
- Step 6: Properly Permitting the Build of Your Villa

Types of Construction Plans You’ll Need for a Successful Villa Build
The designs and plans you’ll need to build your own villa go far beyond the aesthetic and design and dictate the function and durability of your villa, as well as home it will perform in extreme weather.
At a minimum, your villa plans should include the following components:
- Soil Tests
- Architectural Plans
- Structural Engineering Pans
- Mechanical Electrical Plumbing Plans (MEP Plans)
- Landscaping, drainage, and access plans
Now let’s review what each of these are and why we need them for a good build.

Soil Tests
The soil test is a test conducted by soil specialists in which they “bore” (drill) deeply into the ground of your land extracting samples of dirt, clay, rock, and soil. The goal of the soil test is to analyze how much weight the soil can carry at what depth, how much water content the soil carries, and how stable the soil is. Soil tests will be especially important in unstable soil or expansive clay (such as rice fields) to assess the right way to build and the foundation required based on the weight of the structure.
The soil test is very important as it will ultimately be used by the structural engineer later to analyze and plan the proper foundation for the house.
For instance, my home is built on rice field land that had gone unused for years, but was still covered with 5 meters of deep, muddy, rice field clay before hitting solid, stable rock.
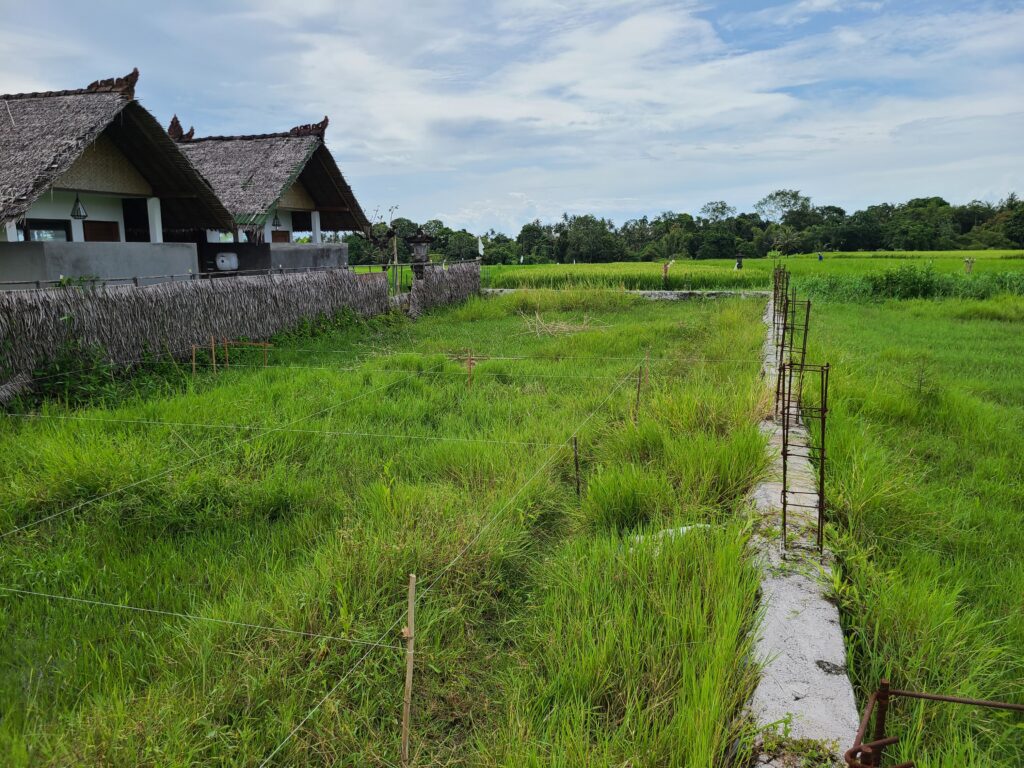
As a result, the foundation for my house (a large, concrete box) required 6 meters of steel reinforced concrete borepiles at all corner of the house, drill into the rock, support the house like piers in the ocean.
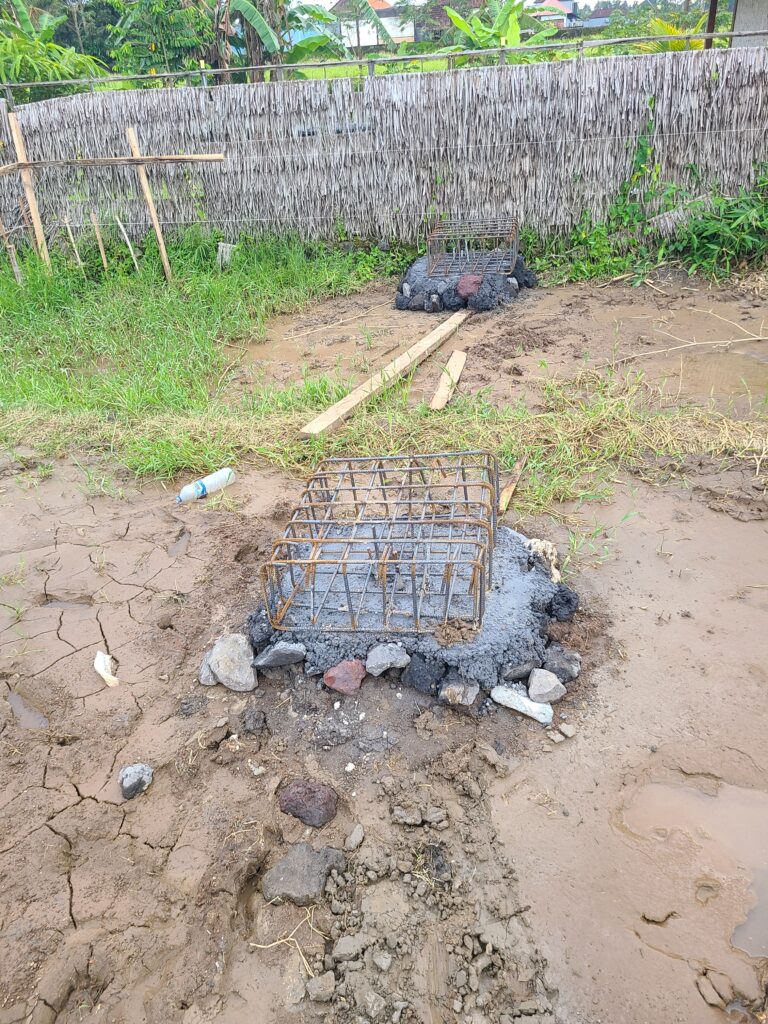
The soil test is essential for the PBG/SLF building permitting process and a proper building structural design.
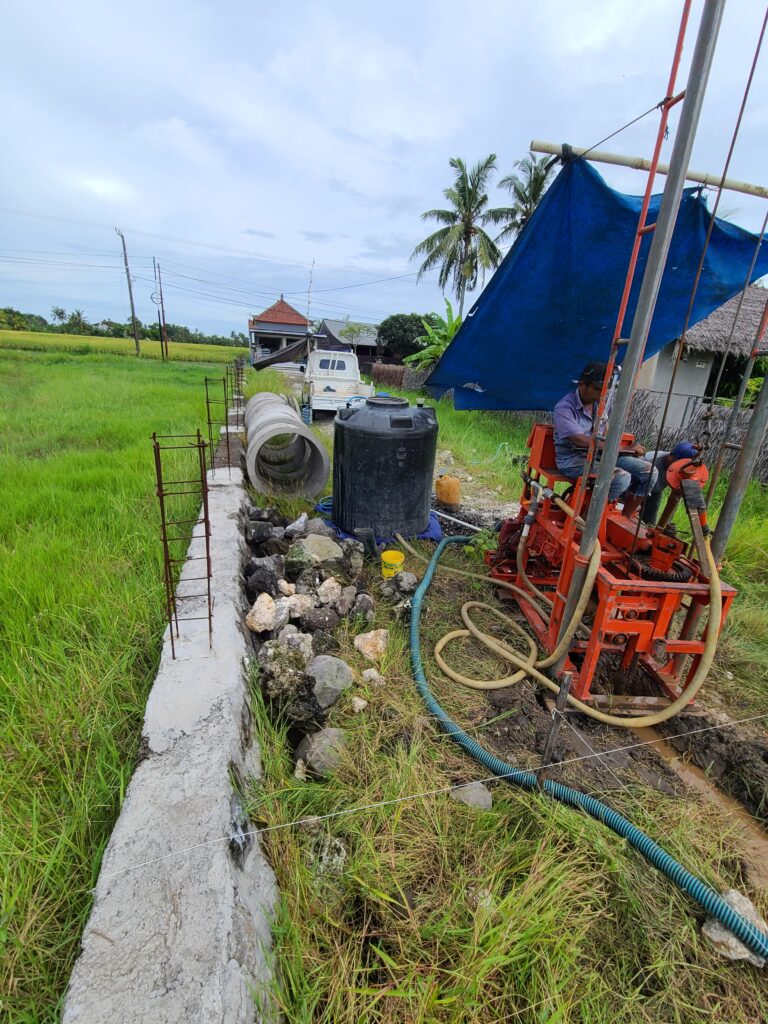
When I first started researching a build in Bali and looking at rice field, I’d heard many times the phrase, “let it [the mud] dry out for a few years” and that would fix the problem enough for building. This couldn’t be further from the truth due to the nature of expansive clay and the risks of “liquefication” in soil, especially during earthquakes.
The only option in dealing with muddy lands is a proper soil test and enlisting an engineer to design a proper foundation for your structure.
Architectural Drawings
Architectural drawings are plans and drawings performed by a licensed architect of your building and surrounding land in an effort to plan the function and aesthetics of your building, the spaces within, and the spaces around.

These sketches at minimum require CAD sketches of all aspects of the home and can additionally include 3D renders. However, proper CAD files are requisite, and 3D renders are just an optional “nice to have.”
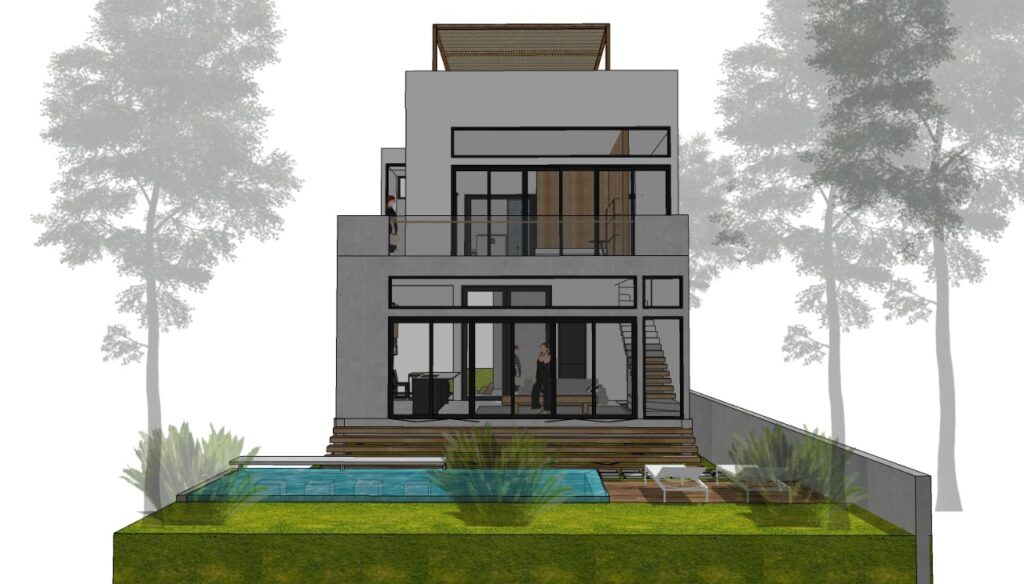
Though most people simply think of sketches of a home as architectural drawings, a good architect will draw the home down to the millimeter including
- Foundation types
- Foundation footings
- Foundation loads
- Foundation construction techniques to be use
- Structural components (columns, beans, slab composition)
- Floor plan
- Elevations throughout the house, from outdoors, to indoors, to wet spaces, etc.
- Wall and floor measurements, heights, and composition (tiles, polished concrete, reinforced steel concrete)
- Windows including size, type, and positioning
- Fixed stored spaces, such as islands and concrete shelves
- Roofing type, composition, and pitch
- Façade materials for interior and exterior of home for floors, walls, and ceilings
- Electrical wiring map (first attempt)
- Lighting map
- Switches map
- Plumbing line map (first attempt)
And these elements are just the tip of the iceberg. Keep in mind that your architect’s job is to keep things pretty and functional, but the architect functions more as a designer than an engineer. The architect should use best practices for making a space livable, functional, and look good, but you will still need engineers to engineer and calculate the size and position of structural columns and beams (how much concrete, what type, and what reinforcing steel), and an MEP engineer (Mechanical Electrical Plumbing) will need to draw a map of electrical lines and plumbing lines from the perspective of an MEP professional.
When signing a construction contract, be sure the architectural drawings are a signed component of that contract.
Structural Engineering Plans
The structure of your building is essentially the skeleton of the building, made up of vertical standing columns, horizontal lying beams, steel reinforced concrete floors (slabs), and the foundational elements below the ground (foundation walls, borepiles, sloof beams, etc.). This structure is what supports the weight of your house and transmits that weight to the ground creating your home’s strength and stability.
Additionally, this structure is what keeps the house rigid and upright during the swaying of earthquakes.
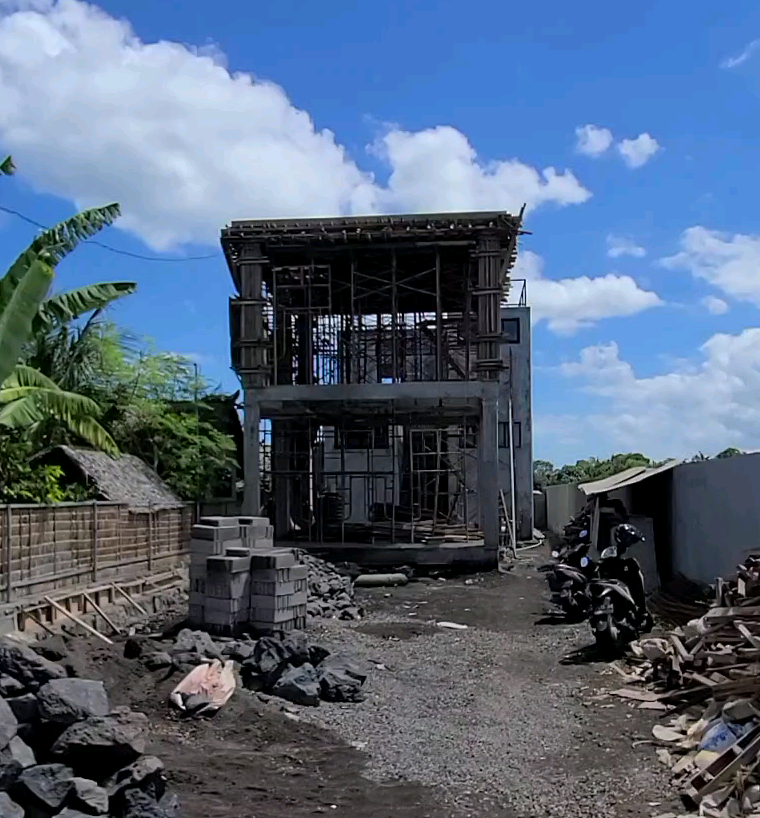
In a place like Bali, where earthquakes are frequent and many people build on unstable rice field clay, structural engineering plans are potentially the most important step for safety in a construction project.
Once you’ve run a soil test on your land, and your architect has drawn your idea of what the home should be then the structural engineer gets his hands on the architectural plans to create separate set of structural engineering plans.
The engineer then calculates the weight and load capacities of the sub-foundation (bore-piles), foundation (reinforced concrete slab), columns, beams, roof, and countless other elements to figure out how big (wide and thick) your villa’s columns and beams need to be to support the vertical and horizontal loads.
Additionally, the structural engineering plans will dictate how much steel to reinforce the concrete with to make the structure stable and safe in the earthquake ridden conditions of Indonesia.
DO NOT skip the step of having a professional structural engineer adjust your villa construction plans.
Just as well, do not let anyone but an engineer make structural changes to your home plans.
For example, in Bali, there are common practices of either hollowing out columns to fill with drainage pipes, or to build columns thinner than the western standard (called practice columns), compromising their load bearing capacity. Do not allow anyone but an engineer (not an architect, not a contractor, not a tukang, not a builder) to make these decisions about your buildings structural integrity – only the engineer.

Just like the architectural drawings, ensure the structural engineering drawings are a signed component of your construction contract.
Mechanical Electrical Plumbing (MEP) Plans
Electrical and Plumbing plans, commonly referred to as “MEP” are one of the most commonly overlooked planning elements. When electrical and plumbing plans aren’t done by professionals, you end up with stinking pipes and drains, showers that overfill and don’t drain quickly, pipes so small the toilet clogs are common, messes of electrical wires that are miserable to repair, and plenty more issues.
Do yourself a favor and hire an MEP professional to your plans, and ensure these MEP plans are included in the construction contract.
Why plumbing plans need to be done by an MEP professional
Having a professional design your plumbing will take the guesswork out of pipelaying for the low level construction workers that are actually doing the work. This will ensure your waste water plumbing is already planned to be smell free, drain quickly, and be easy to maintain. Issues such as inclusion of p-traps, wide wastewater pipes, efficient pipe routing, and conveniently located cleanouts will be in a good plan. So, all you have to do is ensure your team follows the plan.
Why electrical plans need to be done by MEP professionals
Electrical plans done by professionals ensure safe, tidy electrical wiring that is additionally easy to maintain.
Electrical wiring plans will point out not only the paths of wiring and locations of switch boxes, but also the location of lights, light switches, and plugs, heights, type, the number of outlets, and more, planned in a way to make daily life easier, and taking the guess work of best practices out of the experience for you.
Additionally, wiring plans will dictate wiring procedures, such as the use of chases to prevent wires from being plastered directly in the wall as well as how different outlets are connected to maintain a consistent aesthetic.
Though you could walk around the house point to where you want outlets and light switches, a good architect and MEP engineer should combine their knowledge of your preferences and best practices to create a logical, convenient, and safe wiring map for the electricians to follow.

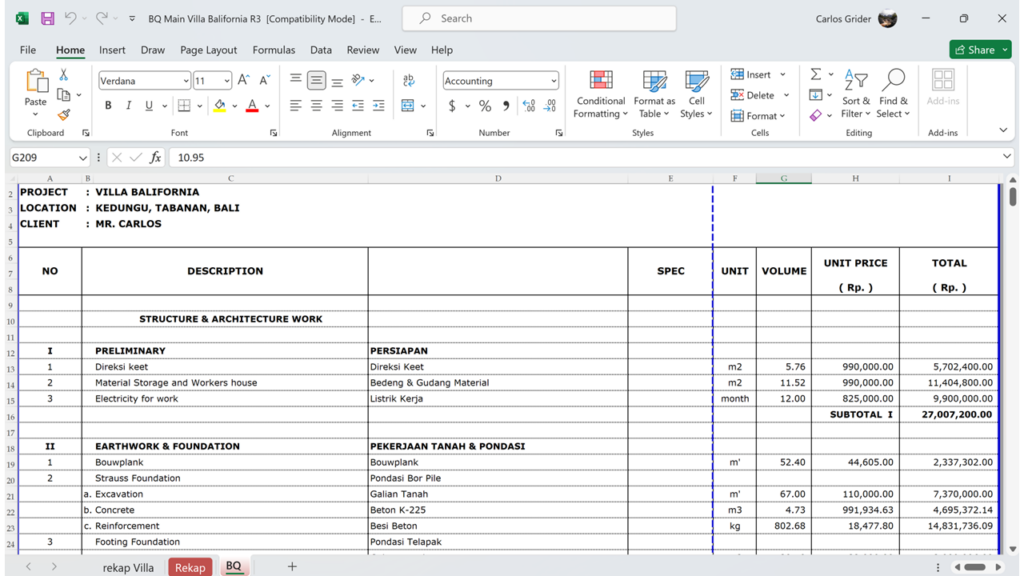
[BOQ] Materials planning, creating a Bill of Quantities (BOQ) and cost estimates
These plans that we have discussed, and the work behind them, add up to a plan of your potential villa sufficient to estimate the required materials, the required labor, and the potential costs of your villa.
The document that summarizes these quantities of materials and costs is referred to as the “Bill of Quantities,” or the “BOQ” for short.
This spreadsheet that literally lists everything required for the entire build should be completed by your contractor or a quantities surveyor with materials, quantities, and costs. This is the document you will use to get bids for your house – simply remove the costs (leaving the materials quantities) and send it to competent contractors, and they should be able to provide you a very accurate bid for their work.

To improve the state of your BOQ, demand a separation between materials costs and labor costs. By having material costs and labor costs separate you will be better be able to manage the project and there will be tax advantages to categorizing labor and material costs. Note that virtually every contractor will argue against this initially, as maintaining one “materials + labor” cost per item allows them to bury more cost (and profits) in the project without scrutiny.
When signing a construction contract, ensure this document is part of the contract, and details as much detail as possible, including brands of fixtures, appliances, and tiles, species of wood, thickness of glass for windows, types of bricks, etc. This accountability document will be used to get what you pay for.
Average planning document costs
Lump sum Drawings including architectural, structural engineering, MEP, permit drawings: 35jt to 50jt for an average villa, commonly calculated on a per square meter planning basis.
If your construction contractor is handling your drawings, negotiate discounted or free drawings and free project management and progress checks according to contracts and planning documents and negotiate unlimited drawing revisions for free. Have this written in the construction contract as well.
However, if you choose to use separate experts for each planning document, plan on the following fees on a per square meter basis.
A La Carte Plans (Purchased individually and not from a single contractor
- Architectural Plans: 35k IDR per m2 of building drawn
- Structural Analysis Work: 15k IDR per m2 of analysis
- Structural Engineering Plans: 25k IDR per m2 of building drawn
- Mechanical, Electrical, and Plumbing Plans: 35k IDR per m2 of plans drawn
- Total of a la carte plans Purchase A La Carte”: 110k IDR per m2

Why are these plans important?
Though you could get away with building a house in Bali with nearly no prep and just handing a contractor a picture, you will want to gather all of the plans above to ensure your house build stays on track with best practices. Additionally, these planning documents will serve as an accountability basis for your construction contract and construction performance.
By forcing your team to stick to a plan with best practices already planned and your specifications defined, you’ll increase the likelihood of getting what you want and allowing the professionals to mitigate the mistakes that DIY homemakers can likely make.

My Observations about the Planning Process, from Building a Villa in Bali: Be VERY skeptical
- Most contractors haven’t been around long enough to “test” and see how a building degrades in 10 years and how efficient their building practices are. This makes it more important to follow global “best practices” and have every detail of how to use global best practices in your plan
- Many people on Bali (foreigners and Indonesians alike) have followed the real estate boom and suddenly becoming “developers” and project managers, and are thoroughly unqualified – but they won’t admit that during their sales pitch. This thin pool of talent with many “builders” crowing about nonexistent successes make choosing your team an important step, and making checking on the progress (and knowing what you’re looking at) extremely important to building the villa you designed.
- Home warranties in Bali last for 3 to 6 months maximum, and there is a great reason why – because problems are expected by the end of year one. Most developers and contractors don’t have the experience to guarantee long term quality. Good builds don’t happen this way, and this short of a warranty in Europe or North America. Don’t settle for it here.
Ultimately, there are many underqualified “construction management professionals” in Bali, and you may not notice their mistakes until too late. You can hedge your risk by ensuring upfront that you have plans for a safe and solid building that will be the basis for your construction contract.

My Experience Planning my Villa + Some Tips to Avoid My Disaster
Despite the fact that I’m spilling volumes of information right now and live in a villa in Bali that I’m very happy with, I am not immune to the cluster of exploitative nonsense that is the Bali real estate scene. I learned all of this information in the process of obsessively inspecting work and firing architects, plumbers, floor specialists, electricians and more, while learning Indonesian building practices (bad and good) from some very impressive foremen that saved my build.
Though I am a former real estate agent (licenses in California) and have light experience in American style home construction, the experience of trying to build in Bali was at best “extremely taxing” and at worst nearly disastrous.
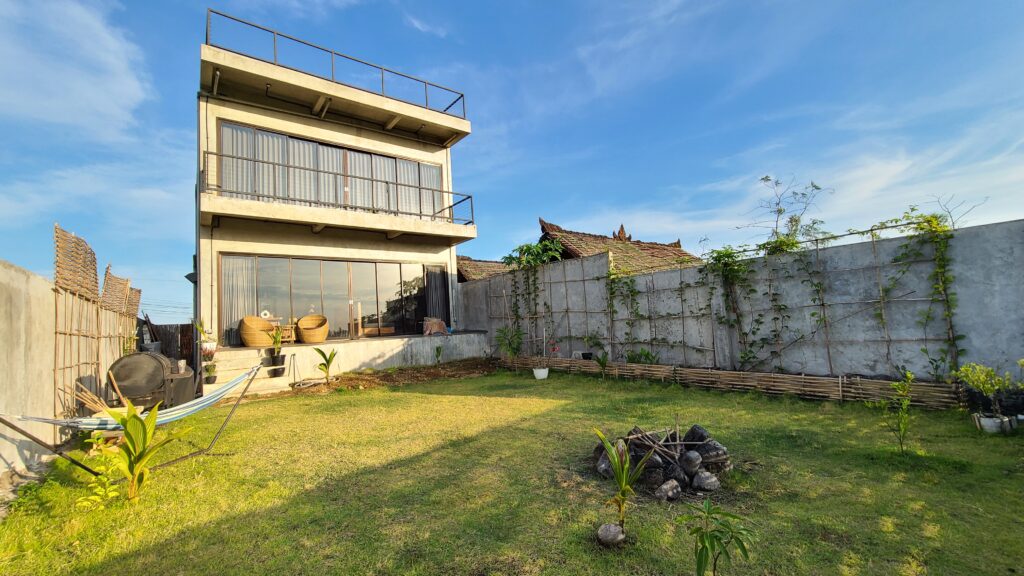
My partner and I went through 8 design teams and 7 contractor (builder) bids before we finally decided to go back to the drawing board and draw a simplified version of the house ourselves, aiming for something that even a monkey couldn’t screw up.
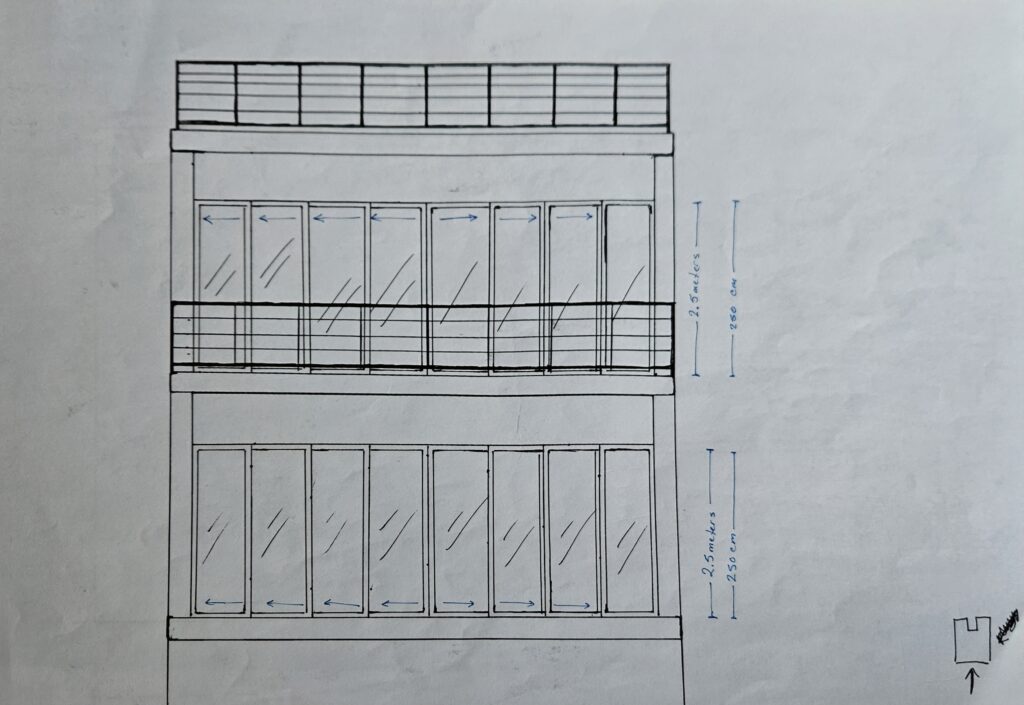
The same happened after crunched timelines and numerous mistakes in the electrical system – I redrew the wiring map and plumbing map for both houses to be as simple and low maintenance as possible.
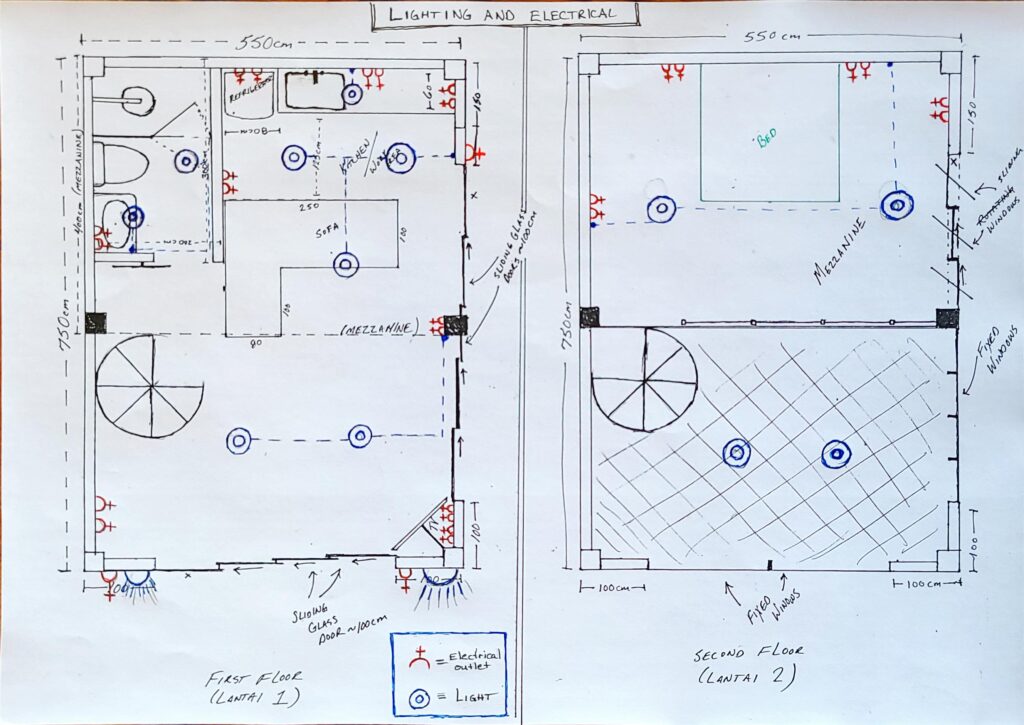
Though I failed on finding an MEP engineer and finding a good architect, a combination of Google and sticking with simple design and construction principles made sure I was able to understand every aspect of what was happening and manage the quality of the build better than any of the foremen/builders/contractors were delivering. Later I was able to consult with reliable architects and MEP professionals to verify that the plans we had created were good enough.
This approach (nearly managing and quality controlling the build myself) is risky, and not something I would advise for anyone but a seasoned construction professional. Though my house is definitely not perfect, I’ve achieved my target of a spacious, airy, industrial style build that is easy to maintain and not prone to the leaks, mold, and plumbing issues that happen so much in Bali, or are at least quickly, easily, and correctly fixed – at the expense of a lot of grey hair.
Due to the lack of professionalism I encountered, I am very lucky I was meticulous about having detailed and quality villa plans in the beginning, allowing me to inspect the home and find problems myself as well as easily bring in new teams to finish construction with minimal issues.
For your situation, I recommend taking your time, finding all of the necessary professionals for your build before starting, and diligently leveraging their expertise to solve problems. Don’t blindly and completely trust anyone, but do allow and encourage your trusted professionals to solve the problems in your build in an innovative way, and think about the problems you won’t see.
My guy, Tamrin, an East Javanese foreman that normally built shopping malls, became my eyes, ears, and insight during the building process, ensuring quality and correcting issues when I wasn’t on site and able to. I owe my home in large part to him. Make sure you find a good Tamrin for your project, treat him well, respect him, and trust him enough to let him work freely.
Next, we’ll review a list of the professionals you absolutely need on your Bali Villa project

The Professionals You Need to Hire and Consult in the Design Process
- Notary (Notaris) + Lawyer or Legal Research Team (zoning and build limitation research)
- Agencies in Bali (PLN, BPN, Immigration, Regency Government) (zoning and building limitations)
- Local government (Desa / Kepala Desa / Banjar / Adat) (local building regulations)
- Architect
- Structural Engineer
- MEP Engineer
- Contractor / Builder
- Project Manager
Notary (Notaris) + Lawyer or Legal Research Team (zoning and build limitation research)
The notary and legal team will be pivotal to the build for their knowledge and research expertise.
Before you can design the villa, you will need to know the building limitations – such as the maximum buildable area on the lot, maximum allowable size of a villa, or maximum allowable height of the villa. These two experts will be able to tell you that information and more.
Your lawyers or notaris will have connections in the land office, the regional government, and the local government (Desa / Kepala Desa / Banjar / Adat) to give you accurate building restrictions before you start the building planning process.
Note that the requirement of Balinese architectural influence, maximum buildable are on a lot, maximum size of a villa, maximum height of a villa, minimum distance to neighbors, minimum distance to a street, and minimum distance to a subak (canal) are the most important restrictions that will vary by location, and you should consult the lawyer, notary, regional government, and local government about
Architect
The architect will be invaluable to your project as he will take your ideas and desires and roll them into a functional building.
When choosing architects, the biggest struggle will be deciding between a Western trained architect (generally from the US or Europe) or a Balinese trained architect.
Western architects tend to be better creating villas that look more western and incorporate more Western standard dimensions and measurements, as well as western standards for stairs, plumbing, windows, etc. However, few western architects have lived in an area with the blazing sun, torrential rains, and mold threat that Indonesia has, and fail to plan for that unless prompted.
Balinese or local architects bring the benefit of understanding Balinese architecture and how to artfully combine that with Western styling for a villa. Additionally, local architects are generally cheaper and can double as project managers to check on the build progress according to their designs – as they speak Indonesian and are familiar with Indonesian building practices. However, “local” architects tend to lean toward local building standards in their designs instead of international building standards (such as the International Building Code) and western approaches to climate control, standard sizes, and wiring.
DO NOT hire an architect unless you have seen a portfolio of work, seen a finished structure of theirs (ideally in Bali) and spoken with the resident about how it has handled sun and rain.
Ensure that the architect’s work includes several free revisions (minimum 5) and inquire as to whether the architect’s fees would/could include project management duties and progress checking at your job site.
Structural Engineer
The structural engineer’s analysis and drawings can be coordinated by your architect or builder and will likely come off their introduction. You will likely have to pay extra for structural engineering services but, please, absolutely do this.
The structural engineer will make any required changes to the architectural plan and will add an addendum of structural engineering plans.
MEP Engineer
Like the structural engineer, the MEP engineer will likely come from the recommendation of the architect or builder/contractor. The MEP engineer’s designs will be fairly straight forward (to him) based on the architectural and structural plans. You likely won’t see the MEP engineer, but still enlist his service.
Contractor / Builder
Oh, the contractor (commonly referred to as builder in Bali)! I have met the best, and I have met the worst.
The contractor (referred to in Bali as “builders”) is responsible for assembling to the individual teams and specialists (foundation team, walls team, windows team, electrician, etc.) to start and finish the construction project.
In a contractor, look for two things:
- Experience
- Professionalism
If the contractor has both of those in spades, the experience of building will be a breeze…or at least more pleasant than it otherwise could be.
In terms of experience, ensure the contractor has managed the build of tens of villas over a minimum of 5 to 10 years. This is long enough to figure out if the bad houses have fallen down. Additionally, no contractor has any business managing projects until he has completed as an understudy for an experienced professional, and in his first 5 years projects will come by name reference only based on work/portfolio. Don’t accept work from anyone selling their construction services hard with a short track record of experience and few recommendations.
Insist on inspecting three of his projects, ideally in the beginning, middle, and finishing stages of completion. If you can find a villa that is 3+ years old, to inspect for water damage and mold issues, this would be best.
In terms of professionalism, you want to screen for a contractor that is mature, levelheaded, and intelligent enough to solve problems that you won’t even think of. Additionally, screen for someone who is on time, responsive, respects your time, respects the workers, and respects you as well as your project. Beware of egos, dismissiveness, and a lack of accountability as these traits will cause stress to compound very soon into the build, and you quickly switch from managing the project to managing your contractor.
This individual will be the principle that you will sign contracts with

Now that we understand what our plans need to amount to and who we need to them, let’s start brainstorming ideas for our part of the villa design process, bringing our preferences, inspiration, and essential elements we don’t want forgotten.

Brainstorming your villa preferences and design ideas and what not to forget
The most unfortunate part of building in Indonesia (coming from the west) is that design cues and home features you feel should come standard aren’t necessarily intuitive in Indonesia. To make up this, you will need to spend time brainstorming your villa and the little details to present everything to your architect and contractor for inclusion.
To ensure our “custom home” has everything we prioritize in a home, our architectural design process has a handful of goals:
- Planning structures with maximum function and aesthetic in mind
- Using the natural elements of light, air, and land for aesthetic, climate control, and comfort purposes (such as passive cooling)
- Planning logical home flow and floor plan (room sizes, placement, and livability)
- Planning logical dimensions for spaces in the home (hallway, room, and doorway widths, counter heights, plug heights and positions, sink heights and positions,
In this section, I’m simply going to dump a list of things to consider for your villa. If it catches your attention, add it to your checklist and think through the details to later hand to your architect.
Why am I about to list everything to look for, including (the height of) the kitchen sink? Because finding good help is difficult in Bali, and if you “trust” someone and leave the job to get down, you’ll likely return with the details missing, steps forgotten, or glaring flaws.
The best option for the future of your villa, and everyone involved, is to make a checklist of virtually everything and, as the process goes on, take the time to review that everything on the checklist is in the plans and ultimately in the home. Don’t be afraid to ask what the plans are for any element of the build. Remember, it is better to be a nuisance and ask before – before the window gets skipped, before the chase for the electrical conduit is filled with cement, or before a floor is built too low – while you still have time to correct.
Keeping a checklist of what needs to be done and what has been done properly is the best way to ensure the precious details don’t slip through the cracks. Measure counter heights, door widths, and window spaces. Check wire installation, drainage placement, and plumbing positioning. Trust but verify and rely on a plan-based checklist.

List of Elements to Think through in Your Villa Design
Geography and Views
Are there any beautiful views that should be incorporated into your windows?
Weather
How will the constant wet of the rainy season and the beating sun affect your home? Roof, windows, wall waterproofing, pathways, etc.?
For the rainy season, is the roof sufficient to keep the inside and pertinent areas outside from getting wet?
Is the elevation of the home high enough above ground to avoid flooding?
Do both the roof (gutters) and the land have proper drainage (to the subak) to avoid flooding on your lot?
Is the pool designed such that overflowing creates no major issues for the house or lot?
Will the windows – based on size, position, type, materials, and quality – stand up to rainy and windy season and the sunny days?
During the sunny days, are sunrises and sunsets enjoyable? And with window placement, will the house get too hot?
Environment
Does the design compromise comfort with open living?
Is the house comfortably secure from bugs, rice field snakes and mice, and mosquitoes – within the walls of the land perimeter as well as the house?
Climate
Is the house taking advantage of any passive cooling properties built into the house or in the surrounding environment?
Combatting Major Issues with villas
Are the house foundation walls of elevation height and material to prevent rising damp?
Are potential entries into the house snake proof?
Does the house have sufficient ventilation (passive and automatic) in all rooms to prevent mold?
Privacy
Do the villas walls and window positioning ensure privacy currently? Will that privacy remain as development continues?
Access
Does the villa compound have access paths to all areas outside for maintenance (pool, well, septic, electrical) without entering the villa?
Are all potential maintenance areas on the sides of the house, top of the house, or under the house accessible in a convenient way?
Architecture
Does the building incorporate sufficient Balinese architecture for PBG/SLF permitting?
Is the house below the maximum residential home height limitations for the village and the region without fine?
Is the villa plan larger than 200 meters2? If yes, plan on extra taxes and a higher priced PBG.
Efficiency Considerations
Are the bathrooms stacked, to save plumbing and created more efficient construction?
Interior Design: Consider the placement and wiring of all of the following appliances to plan then into your architectural design, walls, plumbing plans, and electrical plans early
- Appliances in general
- Cabinets and cupboard
- AC’s and outdoor units
- Refrigerators
- Water heaters
- Water tank positioning (for best function and aesthetics)
- Water booster pumps placement (for easy access but least noise)
- Water Filtration Systems
- Water dispenser
- Dishwasher
Standard measurements and heights to plan for
- Kitchen counters *
- Bathroom counters *
- Door heights *
- Door widths *
- Stair step heights *
- Stair widths *
- Ceiling heights *
- Electrical plugs *

Step 6: Properly Permitting the Build of Your Villa
After all of this research, design, and planning work, the final step before starting the construction process is getting a permit for your specific building plan.
Though the old building permit in Bali was the IMB (Izin Mendirikan Bangunan) the new building permit, the PBG (Persetujuan Bangunan Gedung) touts being more straight forward and corruption free as it is handled by the Indonesian national government. The SLF (Sertifikat Laik Fungsi) achieves the same purpose, but simply allows future homeowners to apply for the permit after their build is started or completed, albeit for a higher price.
What are they IMB, PBG, and SLF?
The IMB, PBG, and SLF are simply licenses that authorize a specific building and its use.
Why are the necessary?
Though many Indonesian and Balinese locals do build small structures unpermitted, this is very risky for foreigners as the Indonesian government may quickly seize or demolish illegally built structures. As good rules – do not buy greenzone land and do not build without an IMB, PBG, or SLF
Beware: you will be told you can build without it – don’t. That is a sure way to headache that you don’t need and for when you won’t expect it.
Process of getting the PBG?
Visit the official Indonesian government site https://simbg.pu.go.id/ to open an account and apply for a PBG.
Prices to expect for an IMB, PBG, or SLF
Most residential constructions require a 25jt to 50jt payment for villas under 200m2. However, prices for SLFs, villas permitted after builds, and villas larger than 200m2 tend to be significantly higher.


OTHER PARTS OF THE BUILDING IN BALI SERIES
My experience building Villa Balifornia: Trial by (ring of) fire
HOW MUCH DOES IT COST TO BUILD A HOUSE IN BALI
- Hypothetical Villa Estimate Costing
- The Real World Cost of Building a House in Bali: 3 Villa Construction Case Studies, and Prices
- The Process of Building Your Own Villa in Bali: A Quick Overview
- Step1: Finding Land for Sale in Bali
- Step 2: Conduct a Due Diligence Check
- Step 3: Understanding Buying (Leasing) Land for Builds in Indonesia
- Step 4: “Buying” Land in Bali (Leasing land long term): Signing Contracts and Paying
Also Consider Reading: 4 Easy Steps to Buying a Villa in Bali


Other Great Articles in the Moving to Bali Series
- Moving to Bali: A Complete Guide
- The Bali Digital Nomad Visa: A complete guide
- 73 Awesome Cafes in Canggu
- The Best Bali Coworking Spaces
- Things to do in Canggu
- The Best Sunset Points on Gili Trawangan
- Buying a House in Bali
- Buying Land in Bali
- Building in Bali
- How much does it cost to build a villa in Bali?
- Bali villa design and planning process
Other Great Nomad, Travel, and Expat Lifestyle Articles
- Moving to Malaysia: A Complete Guide
- The Ultimate Malaysia Digital Nomad Visa Guide
- Thailand Visa Exemption Essentials: What to know before your trip to Thailand
- The 51 Best Digital Nomad Jobs among Successful Nomads
- 9 Epic South America Backpacking Routes
- Backpacking the World…2 Weeks at a Time
- Is Geoarbitrage for You? An Ultimate Guide to Living Better for Cheaper as a as a Nomad


ABOUT THE AUTHOR
Carlos is a nomad, slow traveler, and writer dedicated to helping others live abroad and travel better by using his 7+ years of experience living abroad and background as a management consultant and financial advisor to help other nomad and expats plot better paths for an international lifestyle. Click here to learn more about Carlos's story.

