With the huge number of high tech gyms, exercise trends and fitness fads, knowing how to ruck gives a simple, easy, and functional workout option that’ll lets you build durable fitness with minimal equipment. Rucking is good enough to train elite military forces and more than enough to help you build your body, your fitness, and an all-around healthy lifestyle.

In this guide to rucking, discover the prep, tools, and technique you need to ruck, conditioning your legs and core while getting fresh air and enjoying the great outdoors.
Note: This article may contain affiliate links that fund the cost of writing at no cost to you
RUCKING BASICS
To get started rucking there are only 5 steps
- Get a good rucksack (a sturdy backpack with comfortable shoulder straps, ready to handle heavy weight)
- Get a good rucking weight and cinch and secure it tightly into your rucksack
- Get a good pair of rucking shoes or boots to keep your feet dry, and adequately supported
- Pack water in a Nalgene or water bladder to carry in your ruck
- Start walking with good rucking technique

CONTENTS
- What is Rucking?
- Why should you Ruck? — The Health Benefits of Rucking
- How to Ruck in 5 Easy Steps
- Find a Good Backpack for Rucking
- Add Ruck Weights
- Get a Comfortable Pair of Durable Shoes
- The Shoes
- Pre-Ruck: Warmup your legs and hips
- Start Rucking…with good rucking technique using these key points
- Post Ruck: Stretch…everything
- Other Good Rucking Tips and Advice
- How to add mini workouts for a full body rucking workout
- Increasing Difficulty in Your Ruck Training Plan: How often, How far, How heavy
- Rucking Tips for Getting Started Correctly and Safely
The quick version: All you need to start rucking are a supportive backpack, some weight, water, and the motivation to get moving. To ruck right, stand tall maintaining a neutral and supported core starting with between 15-25lbs (or 10% of your body weight for lighter and less conditioned individuals) and rucking no more than twice weekly.
The basics of rucking are that simple, however, there’s a lot more you can do to maximize the benefits you get from rucking
Read on for details on the gear you need and how to pick it, proper rucking technique and progression, and how to stack your rucking with calisthenics, HIIT workouts, and backpack workouts to achieve maximum fitness, mobility, and longevity without a gym.
WHAT IS RUCKING?
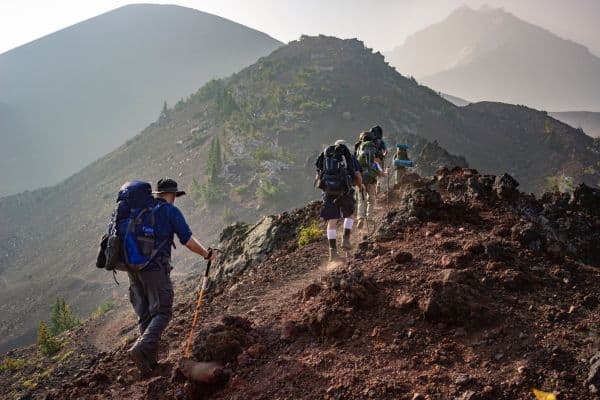
Rucking is the act of walking or hiking with a weighted backpack with the goal of conditioning the legs, core, and cardiovascular system.
The name “rucking” comes from the common military slang term for military backpacks, “rucksacks” (which actually has roots in German in the phrase “Rucken” and “Sack” meaning back+sack) used for transporting gear during military operations and troop movements. Within the modern-day Marine Corps, Army, and Special Operations Forces, “rucking” from one point to another not only happens during operations but is also used as a training tool for conditioning soldiers and Marines physically and mentally.

The activity of rucking originally started simply as a military trying to move troops from one place to another. At times when there were no motorized vehicles, and not enough horses to move troops and gear, the only way to move from one location to another was on foot, with everything they owned in their “rucksacks”. Though most travelers now move by boat, monster truck, and plane, the practice of rucking is still a ubiquitous means of training warriors that conditions the body as well as the mind
In recent years, rucking has picked up mainstream popularity with the rise of GORUCK events, Spartan races, and other low-speed adventure challenges, as a way to build functional, practical fitness that goes beyond these fun events and conditions the body for living an adventurous life.
At its core, rucking is no more than hiking with a bit more weight and intensity for better performance in the long term.
So why should you ruck? What are the benefits of rucking?
Rucking conditions the legs, building strength and stamina, while also conditioning the core (abs and lower back) and reinforcing good posture.
That’s the short answer, let’s look more into why rucking is a great, cheap, and easy form of fitness that will prep you for travel and adventure.
THE HEALTH BENEFITS OF RUCKING & WHY YOU SHOULD RUCK FOR FITNESS
Rucking’s value goes way beyond building strong legs and core and getting you outside. Here are a handful of the benefits you’ll enjoy simply by taking a hike with a little weight…
- Increase Muscle and Strength in legs and lower back
- Cardio conditioning
- Reinforce good posture
- Lower impact on the knees compared to running
- Getting Outside: Sunlight, Fresh Air, Lowered Heart Disease Risk
- Cheap
- Easy
- Natural
- Conditions core, structural health, and bone density
- Calories burned

HOW TO RUCK IN 5 EASY STEPS
The appeal of rucking isn’t just that it has a ton of health benefits, and gets you outdoors, but also that it’s simple and easy enough to start quickly.
If you remove the weight, rucking is actually just walking in a very healthy way, which you’ve been doing since you could walk.
If you take away nothing else from this article, take these six steps to get you started rucking.
- Find a supportive backpack
- Add a rucking weight
- Get a comfortable, athletic, durable pair of shoes
- Pre-ruck: Warm up your hips, posterior chain, and lower legs
- Start walking
- Post-rucking: stretch and hydrate
Now that you’ve got the basic idea, let’s look a little further into how to ruck for maximum benefit and enjoyment with minimal risk to your body…
1. FIND A GOOD BACKPACK FOR RUCKING
The perfect rucking backpack has two aspects:
- fits your torso size to be comfortable and allow you to ruck freely
- has enough support and padding to distribute the weight
Optionally, if you want to focus the rucking workout on your legs, instead of your shoulders and core, get a padded waistbelt, that allows you to move the weight to your hips
Let’s look a little closer at what you need in a good rucksack
The Perfect Backpack Fits Your Torso Height/Length
A good rucking backpack for you should rest on your shoulders and end before the top of your butt. Getting the backpack to fit your torso this way ensures it doesn’t impede your stride while walking. If the backpack is too tall, the base (and the weight) will sit behind your glutes, impeding your stride. If the backpack is too short, a waistbelt becomes impractical, being too high to allow your hip bones to support the waistbelt.
The perfect backpack has a rigid frame to support the weight in your ruck
Either an external frame, internal frame, or frame sheet, the backpack and padding should have a rigid/semi-rigid system for distributing the load of the ruck weight across your back. This helps avoid having any points (from a kettlebell or weight) digging into your back.
The perfect backpack is durable enough for heavy loads
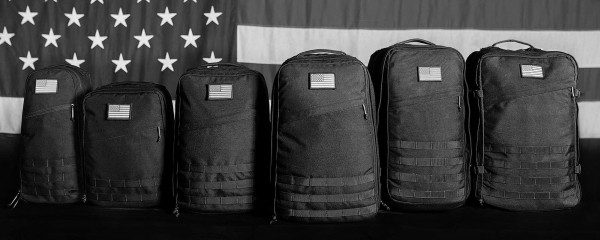
The shoulder straps, seams, and padding should be built to hold heavy loads durably and comfortably. The Spec-Ops T.H.E. Backpack is a great durable option that lasted me years in combat zones, and the GORUCK Backpack Lines are as tough as they come with 400lbs+ ratings.
Durable Materials and Construction:
The backpack’s cloth should be a durable, tear-resistant material such as 1000D Cordura, padding in the shoulder straps and back panels should be durable and suitable for heavy loads, Stress points in the shoulder straps, handles, and seems should be stitched with high tensile thread with tight high-quality construction.
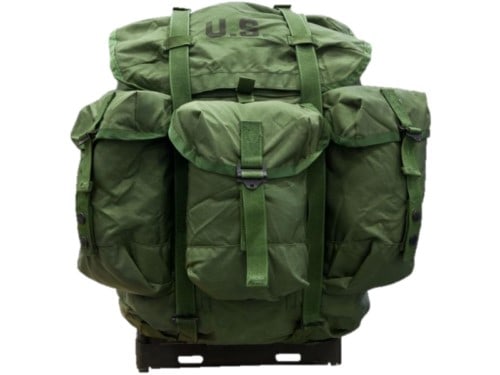
I highly recommend military rucksacks to find this kind of durability at a price that won’t break the bank.
Wide, Overly Padded straps
Wide, well-padded straps ensure comfort. Overpadding ensures that as the padding compresses over time the straps will adapt to the shape or your body (shoulders, back) while remaining comfortable.
Optional: The perfect backpack has a padded waist belt for carrying weight on hips and legs
A padded waistbelt is useful because it can be tightened up to the hips to support the weight and relieve the shoulders and lower back. Then loosening up the shoulder straps or loosening the “risers” on a backpack allows the weight to be carried on the hips with minimal pressure on the shoulders.
Though I do this, placing the shoulders on the hips via the waistbelt and removing the weight from the shoulders, quite often when trekking, and during ruck marches in the military, I skip the padded waistbelt when rucking for fitness. By keeping all of the weight supported by the shoulder straps, and not the waistbelt, my “rucking workout” works out my shoulders, lower back, and core, while keeping just as much pressure on legs.
Ultimately, I recommend getting a backpack that is waistbelt compatible but opt to ruck waistbelt free if you want to max out your shoulder and lower back/abs
Which backpack should you get?
There are so many backpacks out there that finding the right one for you can be a little tough. To start your search, make things easy and check out our list of best backpacks for rucking as well as the great military tough backpacks
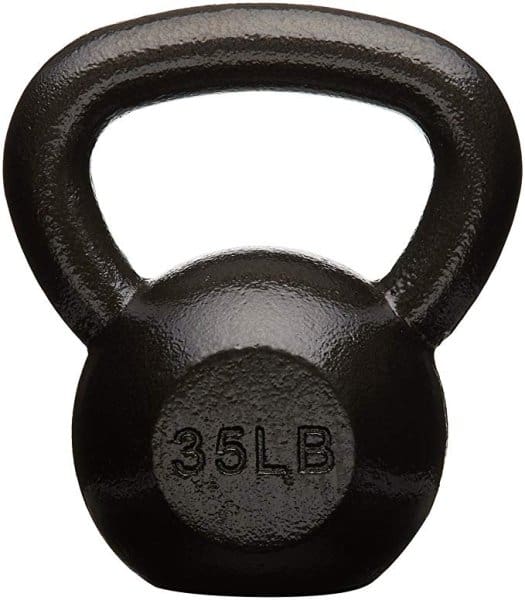
2. ADD A GOOD RUCKING WEIGHT
Picking the right type of weight to ruck with is very straight forward. The weight you put in your ruck should fit the following criteria to make life easier:
- Shouldn’t move when you walk (so half-filled jugs of water may create a problem by sloshing)
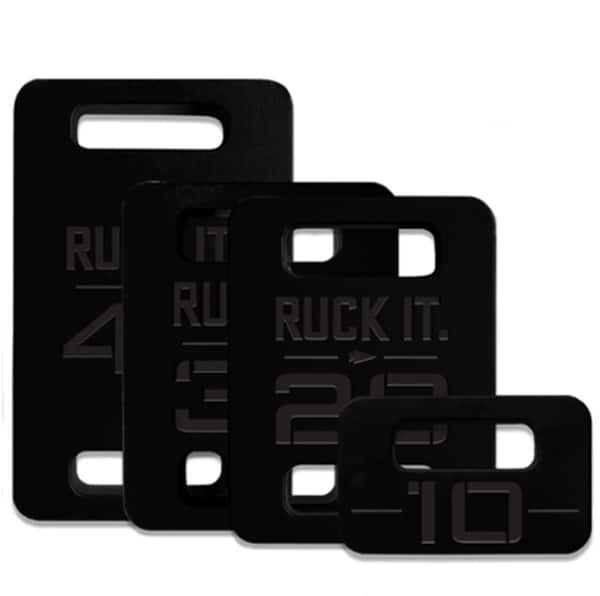
- Should sit evenly and balanced in your bag: Symmetrical weights, like weight plates or rucking plates are best because they’ll keep the load balanced in your bag between the left and right shoulder
- Bonus if soft: Sandbags are the best rucking weight, as the sand shifts you don’t have to worry about corners digging into your back. You can always use a pillow, blankets, or a ruck weight pad to keep hard, sharp corners out of your back.

The amount of ruck weight to start with is much more important, so definitely check out the how to start rucking portion of this article.
RECOMMENDED RUCK WEIGHT OPTIONS
The best rucking weight options I recommend, that fit all of the criteria above, are:
- Sandbell filled with sand
- Improvised sandbag filled with sand and taped with Gorilla Tape
- GORUCK Ruck weights
- Similar ruck weights
For a full comparison of the best rucking weight options, read our article comparing the best weights for rucking
How to setup Your Ruck the Right Way
Setting up your ruck is a simple, quick, and straight forward process that will save you a lot of pain and frustration.
Position the weight in your backpack in a way that it won’t shift while walking and sits as high as possible on your back.
Use blankets or pillows to help secure the weight in place, and cinch the straps on your pack tight so it doesn’t move.
Use a cheap yoga block or foam to prop the weight up and position it as high on your back as possible.
Why do you want the weight high on your back? First, keeping the weight high on your back allows you to maintain balance, and correct rucking technique and posture, without bending over too far at the waist. Second, having the weight high on your back and above your center of gravity allows you to move more nimbly, changing directions easily at will.
3. GET A COMFORTABLE AND DURABLE PAIR OF ATHLETIC SHOES OR BOOTS
Aim for a pair durable enough to handle rucking, cushioned enough for your choice of terrain, and minimalist enough to let your feet develop safely and healthily
Keep your rucking activities practical and cheap by using what you have in your closet before buying anything new.
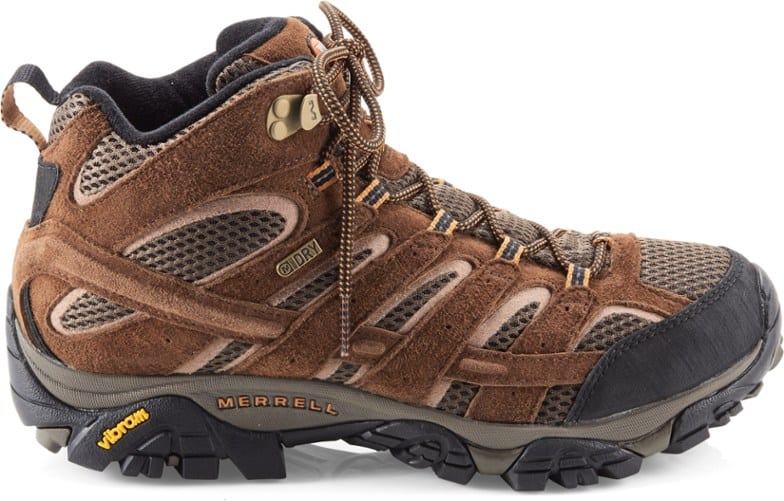
The best shoes will be breathable, athletic shoes that lock your heel in place well (to avoid blisters and hotspots). They will also have enough room in the toe for your foot to spread naturally with each step, and be supple enough to allow your feet, ankle, and lower leg to move naturally. “Support” is overrated in shoe marketing. A secure fit in the heel with minimal friction and just enough cushioning for your terrain of choice is what you want in a good rucking shoe or boot.
Ensure that when walking downhill that the toes do not touch the front of the boot (which will result in bruising the toe over long hikes). Just as well, ensure that the heel is locked in place and prevents the foot from sliding within the shoe while walking downhill, as this will usually lead to painful hotspots and blisters.
Avoid waterproof boots when rucking. While rucking, the muscles in your feet will work harder than normal and will sweat more than most waterproofed shoes (even breathable waterproof shoes) can allow the moisture to escape. This moisture becomes trapped and ultimately either causes hotspots and blisters, or funky feet and athletes foot. Avoid this trouble by getting breathable boots or shoes.
I highly recommend avoiding high-top, military-style combat boots because the over the ankle protection and support doesn’t allow your feet to move freely, robbing you of a great lower-leg workout. The more minimalist your shoes are, and the less support they have, the more your feet, ankles, and lower leg will develop from the weight and from the rucking.
CRITERIA FOR A GOOD PAIR OF RUCKING BOOTS OR SHOES
The best pair of shoes for rucking are simply the ones that keep your feet feeling good the entire time you walk and stave off knee, ankle, and usage injuries. Those “perfect rucking shoes” for you may be one of the pairs recommended in this article, or they might be your favorite gym shoes that are hanging out in your closet right now. In any case, run through this checklist of criteria for the perfect rucking boot or shoe to decide.
- Should lock the heel in place
- Toes don’t touch the front when walking downhill
- “Minimalist vs. cushiony” is subjective, but adjust your ruck weight accordingly for lighter with minimalist shoes
- For training – aim for less ankle support to develop strength and mobility in the lower legs
- If you’re rucking on “hardball” roads, ensure the shoes have enough cushion
- Remember that new isn’t always better, what you have may work fine
- Breathability – moisture should easily escape the shoes
- Don’t forget the socks, and an extra pair, and choose wool socks over any other option
If you’re at a loss for a good, durable pair of rucking boots, I highly recommend the GORUCK MACV-1’s (specifically designed for rucking) or the Danner Jags. For more great rucking boot options read our rollup on the best rucking boots on the market.
4. PRE-RUCK PREP: WARM UP AND LIGHTLY STRETCH YOUR HIPS, POSTERIOR CHAIN, AND LOWER LEGS
Consider stretching and mobility work to be a long term investment in your joint health, mobility, and overall “spryness”.
Keep in mind that before you ruck, you want to warm up your joints and muscles and after your ruck you want to stretch tightened, flexed muscles as they cool down.
Stretching after your workout helps your muscles return to a relaxed, elongated position instead of “healing” in and maintaining a shortened, contracted position. This stretching post workout increases blood flow, thus quickening recovery, and improves flexibility, mobility, and joint health in the long term.
Pre-Ruck Warm Up
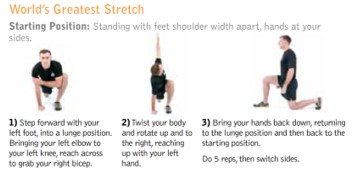
- Do the “world’s greatest stretch” drill to lightly stretch the hip flexors (groin) and glutes + hamstrings, ultimately loosening up the hips
- Perform the “pinned calf stretch” for 30 seconds to 1 minute per leg, aiming to loosen up the lower leg and ankles
- At the start of your ruck, start slow to give your body time to warm up. For the first 3-5 minutes, maintain a leisurely strolling pace to allow your heart rate to adjust to the activity and “warm up” your body, flooding the muscles involved with nutrient rich blood in prep for the workout to come
5. START RUCKING: WALK WITH GOOD RUCKING TECHNIQUE USING THESE KEY POINTS
Rucking is easy because it is one of the most natural things you can do for exercise – simply walking with good posture in the healthiest way possible. In addition to starting with the right distance and weight, start walking incorporating these techniques to ruck in the healthiest way possible that reinforces good posture, builds a strong core, and saves your knees.
RUCKING TECHNIQUE BASICS
- Keep your head high, spine aligned,
- Stand tall, maintaining the aligned spine with chest opened and in a “proud” position
- Don’t lean over, stay upright achieving full extension of the hips while walking
- Take shorter strides than normal aiming to keep the foot strike (against the ground) closer to underneath the hips (similar to minimalist and barefoot running)
- Step with flat feet, aiming for a midfoot to forefoot strike (similar to minimalist and barefoot running), instead of a heel strike, to save your knees in the long run
- Glide stride” as opposed to “pounding”, to keep smooth momentum moving forward and saving your knees, ensuring one foot is touching the ground at all times
- Flex the glutes to power through the movement, aiming for full flexion of the glutes, fully “driving the hips” propelling the body forward
- Keep the shoulders “activated” in a slightly neutral position, pulled back and down. Avoid shrugging to hold up the weight – if you have to shrug, consider going lighter on your ruck weight
- Maintain a neutrally engaged core or “hollow” core, with the abs and lower back engaged and supporting the spine
- Maintain good posture & “stand tall” with an engaged core, neutral spine, chest open and “proud”, head up. This approach reinforces good posture, places your muscles in and engages them in a natural position, staves off usage injuries. If you can’t do this, you’re rucking too heavy for your level
- Don’t ruck until you’re running the same distance, or at least walking with 5lbs less than your target ruck weight
- Don’t run with your ruck, ever – ensure one foot is in contact with the ground at all times
- Use heart rate to gauge the intensity of your workout (180 – your age as a target BPM). For a higher heart rate, walk faster.
If you’re just getting started rucking, be sure to start with between 15-25lbs and no more than 10% of your weight for smaller and untrained individuals as a rule of thumb. Read our tips to start rucking section for full advice on starting in rucking and progressing.
6. AFTER RUCKING: STRETCH, COOL DOWN, AND HYDRATE
Post-workout your priorities are 1) hydrate and 2) stretch
When rehydrating, keep in mind that 3 liters of water for men and 2 liters for women is recommended as a base minimum water per day, plus water equal to how much you sweat during the workout.
For stretching, focus on stretching the hips, lower legs, and shoulders with 30 seconds per stretch minimum, 1 minute for any spots that feel tight, and 2 minutes for trouble spots that you’re trying to develop mobility in.
The following stretches are standard post-workout for me, to regain flexibility, maintain mobility, and encourage relaxed muscles with better blood circulation and quicker recovery
- “Locked in” calf stretch: stretches calves, ankles, and feet **
- “Couch stretch”: stretch hip flexors/groins, quads **
- “Locked in” posterior chain stretch: stretches hamstrings, glutes, and relieves pulling on the lower back **
OTHER GREAT RUCKING TIPS AND ADVICE
SELECT THE RIGHT TERRAIN (OUTDOORS) OR ADAPT TO WHAT YOU’VE GOT (CITY)
For recreational ruckers, if all things are equal then the great outdoors, in trails or in parks, is the best for rucking. Not only are there numerous health, happiness, and hormonal benefits for getting onto trails in undeveloped terrain, but the unevenness of trails can help develop the lower legs.
For mapping routes and tracking progress, I recommend downloading Maps.Me, as the app has trails already mapped for everywhere I’ve been and has the ability to map distance and estimated time for even backcountry paths.
If you’re stuck rucking in the city take into account the concrete and traffic during your rucking.
Walking on concrete with the repetitive pounding and extra weight can wear on joints and lead to shin splints and a host of other issues. To mitigate this warm up properly, do your stretching after, progress gradually, and focus on rucking with proper technique with low impact on the knees similar to the midfoot and forefoot striking styles of barefoot and minimalist running.
Be safe around traffic by rucking on the side of the road that has you walking towards oncoming traffic on your side of the street and wear reflective gear if rucking at night, to stay visible.
Whether rucking in the city or the outdoors, I recommend keeping a headlamp handy either way, if you’re rucking close to dark.
USE AN APP TO MAP ROUTE, TRACK PACE, AND STAY MOTIVATED (WITH MUSIC)
I recommend downloading an app to use for route planning as well as tracking pace.
Maps.me
Thanks to the maps.me functionality of mapping hiking routes and routes on offroad terrain. This is a great help for planning distances beforehand.
Google Maps
Though Google maps is a little more difficult as it doesnt map footpaths very well, it’s still convenient if you’re rucking in the city
Nike Run+
Simple, straight forward app to track speed and distance walked, with pace reminders and the ability to sync your music with your ruck
MotionX-GPS
Any Other Running App of Choice
Any other app that tracks your distance and speed will give you all of the information you need to keep on pace and amp up your progression
TAKE CARE OF YOUR FEET
In the Marines, this is one of the first things we learn about movements (rucking) because once your feet go, you’re out of the game and of no use to anyone. The situation is less dire when rucking recreationally but I promise, the comfier your feet are the happier you’ll be.
- Keep your feet dry by using foot powder/baby powder and the right socks (wool not cotton)
- Get a good pair of midweight wool socks. I highly recommend People Socks or Darn Tough Socks. Read this article to understand why wool socks are everything for your feet and which I recommend to keep your feet dry
- Avoid cotton socks at all costs. Synthetic hiking socks are a good alternative to cut costs and keep the performance you need
HOW TO MIX WORKOUTS WITH RUCKING
Rucking on its own is a great workout for the legs and core. If you’re after whole-body fitness and durability, stack your rucking with calisthenics or exercises with your ruck. The best ways to do this are during your workout, to build all-around fitness, or post-workout, to focus on a part of the body or an aspect of fitness (strength, speed, endurance
GETTING A FULL-BODY WORKOUT MIDWAY THROUGH YOUR RUCK
The easiest and most effective way to get in a workout while rucking if you’re aiming for full-body fitness is to add exercises and “mini-workouts” at specific intervals during your ruck
Ideas for adding more exercise to during your rucking workouts
- Perform Calisthenics Circuits before or after your ruck
- HIIT workouts before or after using calisthenics or weighted ruck workouts (Crossfit HIIT workout ideas that don’t require equipment)
- Do 2-3 exercises at specific time intervals while rucking – performed every 15 minutes wherein you stop, drop your ruck, and perform a set of 2-3 exercises for a “mini-workout”
- Do 2-3 exercises “Every mile, on the mile” Every mile, on the mile perform a 1 to 3 minute “mini workout”
To do these “mini-workouts” put together 2-3 exercises done for a single round in circuit for 1-3 minutes
A few recommended mini-workouts for your ruck
- Mini Workout 1: 5 Push-Ups, 10 Sit-Ups, 15 Squats
- Mini Workout 2: 10 Burpees (without ruck weight)
- Mini Workout 3: 20 Rucksack Thrusters (Squat + overhead press ruckpack)
- Mini Workout 1: 5 Push-Ups, 5 Rucksack Rows, 5 Overhead presses, 10 Sit-Ups, 15 Squats
GETTING A WORKOUT AFTER YOUR RUCK
Pick one these equipment free Crossfit works as post workout HIIT workout. Or try a weighted workout using your ruck
- Tabata
- Kettlehell (Performed with a weighted Backpack)
- 100 Renegade Manmakers or Weighted Burpees (without the jump)
- AMRAP 5 Pull Ups, 10 Push Ups, 15 Squats in 10-15 Minutes
- 10 Rounds of 5 Pull Ups, 10 Push Ups, 15 Squats as quickly as possible
- Crossfit Hero Workouts that don’t require equipment
- Crossfit Benchmark Workouts that don’t require equipment
- Crossfit Travel WODs
RUCKING PROGRESSION: HOW OFTEN, HOW FAR, HOW HEAVY, HOW SOON…
One of the biggest risks in rucking is starting too heavy or rucking too long, too soon. Though the act of rucking is natural, placing too much weight on the knees, feet, and core, before the joints and “high endurance” (slow twitch) muscles have had enough training to develop and support long weighted walks can result in usage injuries, tendinitis, stress fractures, and worse.
The best advice for starting and progression is to start light and progress gradually. Step up the difficulty by rucking faster (without running) before rucking heavier
Starting Out…Weight and Frequency: 15lbs, 1 Mile
Ruck before you run. If you’re not already running, or your feet, knees, and cardio system can’t handle running, start a running program first before rucking to build up that lower body endurance and conditioning that will be the base on which you develop the strength that comes from rucking.
Start rucking once per week with 15-25lbs at max 10% bodyweight for 1-2 miles
If you’re bothered by how “light” this initial workout seems, don’t be. Simply stack your rucking exercise with a post-ruck workout to get a sufficient workout. As your rucking distance, weight, and speed increase, scale back your post-ruck workout and let your rucking workout make for the difficulty
Progressing and Increasing Difficulty: Once per week increase weight (5lbs) or distance (1 mile)
Increase in difficulty once per week, either 5lbs or 1 mile. Never both. Don’t progress every week, only when your body feels recovered and you’ve hit your goals. Listen to your joints
Only increase the difficulty if you can maintain your current distance and weight at a 4mph pace (without running). As you progress, feel free to step up and ruck twice per week.
For recreational rucking, ruck a maximum 2x per week. If you’re prepping for military training or a pipeline, 3+ is more appropriate but I recommend using a SOF prep type program such as Stew Smith’s Ranger School prep books
Complementing Rucking with other Exercise
You should aim to work out in general at least 3 times per week. Complement rucking with running, weightlifting, cross training or Crossfit style workouts, or swimming to hit your 3 a week goal.
Why Should You Ruck: The Benefits of Rucking
Let’s expand a little more on the benefits of rucking…
Why should you Ruck?: The Benefits of Rucking
- Great Conditioning for Trekking, Backpacking, and Adventurous Travel
- Increase Muscle and Strength in legs and lower back
- Cardio condition
- Reinforce good posture
- Lower Impact exercise compared to running
- Getting Outside: Sunlight, Fresh Air, Lowered Heart Disease Risk
- Cheap
- Easy
- Natural
- Conditions core, structural health, and bone density
- Calories burned: Higher than average with less impact on the knees
Great Conditioning for Trekking, Backpacking, and Adventurous Travel
Though hitting the gym and running are great, most adventurous travel usually involves trekking, lots of walking for long distances, or wandering with a backpack. Rucking prepares you for exactly that.
Before my trip to Nepal to trek to Everest Base Camp I knew I was going to hike the 50 miles at high altitude solo, carrying all of my own gear. Though I still did my upper body workouts with a suspension trainer my main focus was rucking – walking briskly for long distances with heavy weight, followed by Tabata workouts or some other mini cardio HIIT workout.
The result was better than I could have guessed. I had zero trouble with endurance, had no problems carrying all of my own gear (despite the thin air and altitude), out walked most of the other trekkers and managed to keep pace with the porters. After the trek, my wanderings through Peru, Colombia, and the Galapagos islands stayed easy as I was conditioned to walk and explore.
If you have adventurous travel planned, that involves trekking or lots of walking, start rucking to condition your body for the fun to come
Increase Muscle and Strength in legs and lower back
If you want to condition your legs and lower back to be stronger, more durable, and more adventure ready (for trekking, walking, and wandering with a backpack) rucking is the best way to get it done. All accomplished without back squats, deadlifts, and complex gym machines, rucking is your best.
When rucking, the extra weight worn during what would otherwise be walking or hiking builds strength and conditions slow twitch muscle fibers in the legs, glutes, and lower back in addition to core. Compared to what you achieve from other types of exercise, you’ll develop more strength, muscular tone than you will with bodyweight calisthenics, and you’ll develop more endurance and stamina than you will with lifting weights (squats, deadlifts, and powerlifting movements) alone.
My preferred approach is to combine rucking with high intensity calisthenics, like single legged squats, lunges, squat jumps, burped, and sprints to maintain power and strength through the legs’ entire range of motion
Want to build more strength and endurance under heavy loads? Simply put your focus on progressing in weight every 1 to 2 weeks, instead of focusing on increasing distance or time. Whatever your improvement focus is (strength, stamina, or cardiovascular health), don’t exceed our recommendations for progressing to avoid joint injuries and usage injuries by pushing too hard, too soon.
Cardio conditioning
Because of the fast pace of rucking (ideally 3 to 4 miles per hour) and the extra work your muscles have to do thanks to the weight in your ruck, rucking naturally gets your heart rate up without running.
To get a cardio workout while rucking, simply prep your load and start walking, targeting to maintain a 4mph pace. You’ll fall into that aerobic workout heartrate zone very quickly.
To ensure you actually are getting an aerobic workout, aim for a minimum heart rate of 180 – your age. For instance, I’m 35 years young, so I target a heart rate of 145 (180-35=145).
Note: no matter what do not run with weight to get your heart rate up or move faster. If your heart rate drops, walk faster, but do not run as the potential knee damage long term isn’t worth the potential workout.
Reinforces good, healthy posture
Proper technique when rucking positions your body for the best mechanical advantage and helps stave off injuries. Pay attention to these cues for proper technique
- Spine aligned in a neutral position, supported by the abs and lower back muscles
- Chest “proud and open”
- Shoulders in a neutral position pulled back and down lightly
- Head up, with the spine extended and aligned
- Stand upright, “pulling” with the glutes and aiming for full extension in the hips
Execute this technique and rucking is not only safer and easier, but also conditions the muscles that support good posture, spinal health, and the ability to walk and stay mobile well into old age
Note: Maintaining good posture in rucking requires enough strength and endurance in the activated muscles to maintain that posture for miles & hours. Slouching, leaning forward too far, and staring at the ground are indicators that 1) your form is failing (and you’re potentially being lazy) or 2) you’re progressing too fast, increasing weight or distance too early, so adhere to our guidance for increasing difficulty. As a general rule, increase the difficulty of your rucking workout by rucking faster before rucking longer, further, or heavier.
Lower Impact exercise compared to running
The primary difference between running and rucking (or walking in general) is that while rucking, at least one foot is in contact with the ground at all times. This leads to a continuous shifting of the bodyweight forward, in rucking. On the other hand, in running the body is repeatedly launching and landing in a cycle where the body is briefly airborne before landing on a single foot and the pounding pressure of “landing” is transferred up through the single knee.
Because of the differences between the processes of running rucking (and walking in general), the continual forward movement has a lower impact on the knees – as long as rucking is done with reasonable weight (not heavy) and progressing only with the 5lbs per week or 1 mile per week increase.
Getting Outside Is Healthy: Sunlight, Fresh Air, Lowered Heart Disease Risk
Just getting outside is a benefit that shouldn’t be underestimated. According to the American Heart Association, just getting into nature and breathing fresh air, enjoying the pleasure of a greenspace has been associated with a much lower risk of heart attack and cardiovascular disease. Pair this with the aerobic exercise of rucking and the positive hormone boost that comes from aerobic exercise and you have some clear life and health-improving benefits.
Cheap
Rucking is one of the cheapest ways to exercise. Simply grab a good durable backpack, find a good weight, but on some good athletic shoes, and walk. For less than $150 you can have everything you need to ruck and get in a good full-body workout. Add a suspension trainer and your improv gym will be complete
Easy and Natural
You’ve been walking since, well, the day you learned how to walk. You started out life with great posture and body mechanics (just watch a 3 year old use his body). Rucking is easy because as long as you know how to progress, you already know everything you need to ruck right.
Conditions Abs and Lower Back
Proper technique in rucking requires maintaining a “neutrally engaged”, meaning the abdominal and lower back muscles are engaged in a balanced way that keeps the spine in a healthy, neutral position. When rucking properly, the core remains engaged the entire time building more strength and increasing endurance in a way that injury proofs the body and preserves the muscles that can keep you walking in old age, but are some of the first to atrophy so heavily that they reduce the ability to walk in elderly populations.
Rucking conditions and strengthens the core muscles (lower back and abdominal muscles) in a way that injury proofs now and keeps you walking and upright well into old age
Improved structural health and increased bone density
According to Mayo Clinic, loading the body’s structure (bones) with weight has been shown to increase bone density and bone health. Though you could achieve this with weight lifts that load the body’s structure – like back squats, deadlifts, and front squats the same can be achieved with rucking at higher weights, as it loads the structure as well.
Calories burned rucking exceeds the calories burned running, while being lower impact on the knees
According to a Harvard Research study on calories burned, activities such as rucking burn around 800 calories per hour in a 155lb male adult as long as the heart rate stays in the range of (180BPM minus age)
Compared to 446 calories per hour for hiking alone, 596 calories per hour for running (12 minute mile pace), 326 calories per hour for calisthenics, rucking (at the target heart rate) burns more calories while developing more strength and saving your joints.
For more info on why you should and rucking to your fitness regimen, check out our article The Benefits of Rucking
TIPS FOR RUCKING RIGHT
- Stand tall, spine aligned, head up, chest open
- Maintain a neutrally engaged core
- Take shorter steps
- Do not run with weight
- Drive the movements while flexing the glutes and achieving full or close to full extension on the
- Pack the weights high on your back and stable so they don’t move
- Pick athletic shoes that offer just enough cushion (but not too much).
- Forgo the ankle support and high top of military boots to encourage development of the lower legs
For a full overview of rucking tips, check out our Rucking Tips article.
WARNINGS, PRECAUTIONS, AND HOW TO RUCK HEALTHY
Rucking is a great, low impact way to train and can great for your life, as long as it is added in a healthy way that’s safe. To ruck at your best and avoid injury in the short and long term, take these precautions
- Stay hydrated: 3 liters of water plus water equal to the amount you sweated out
- Warmup Pre-Ruck: Focus on the calves/lower legs and hips and give a few minutes of moving before going hard
- Stretch Post-Ruck: Focus on hips, glutes, and lower leg mobility
- Progress slowly: 5lbs or 1 mile per week, never both
- Listen to your body: If your joints are hurting then rest, stretch, and reevaluate your weight/distance/technique
- DO NOT RUN WITH WEIGHT
Other Great Resources
- The Rucker: A Gym in a bag and the best backpack for rucking available
- Benefits of Rucking
- Rucking Tips
- GORUCK Rucker vs. the GR1: Which is right for you?
FREQUENTLY ASKED QUESTIONS ABOUT RUCKING
- How much weight should I ruck?
- How far should I ruck?
- How do you ruck safely?
- How many times a week should you ruck?
- How can I ruck faster?
- How long does it take to do a 12 mile ruck march?
- What does “ruck” mean? What is the definition of “rucking”?
- If rucking is healthy, why do many veterans have bad backs & knees?
How much weight should I ruck?
All new ruckers should start with 10lbs to 20lbs of weight ensuring not to exceed 10% of their bodyweight on their first ruck. All ruckers should avoid increasing by more than 5lbs per week or 1 mile per week. Though this may seem like a low amount, the joints and their structures (bones, tendons, connective tissue, etc.) take more time than muscles to adapt to stress, to grow, and to recover. Setting these limits avoids creating damage to joints that new ruckers may be unaware of but would ultimately take much longer to heal than anticipated
How far should I ruck?
For your first ruck, start out at 1 mile with the **recommended starting weight**. Each week, progress by increasing a maximum 1 mile but not in the same week that you’ve increased weight.
How do you ruck safely?
Ruck safely by executing proper **rucking technique** maintaining good posture, an aligned spine, a neutrally engaged core, and shoulders in a neutral position (not shrugged) while taking shorter strides and striking with a flat foot. Pack your ruck weight high in your **ruckpack** for maximum mobility and cinch the pack down tight to avoid having the weight shift while rucking.
How many times a week should you ruck?
New ruckers should start by rucking once per week, working out in some other way two other times per week. Experienced recreational ruckers should max out at rucking two times weekly. Professionals (military, first responders) should ruck 3x+ weekly only on a well-designed ruck fitness plan for a specific performance goal or competence level.
How can I ruck faster?
Though you shouldn’t because of the damage it can do to your knees, ruck shuffling allows you to pick up the pace, save your knees, and get your heart rate a little higher. For more on ruck shuffling, read Jason at GORUCK’s thoughts on ruck shuffling
How long does it take to do a 12 mile ruck march?
By the US Army’s standard for rucking, a 12 mile ruck march should be completed in a maximum of 3 hours
What does “ruck” mean? What is the definition of “rucking”?
“Ruck” comes from the German word for “back”. “Ruckpack” is a half translation of the word “backpack”. Over time, military forces have come to refer to a “forced march”, or marching with a weighted backpack, a “ruckpack march”, eventually shortening the colloquial term to “ruck march” and eventually simply referring to the activity as “rucking” or simply a “ruck”. Ultimately “ruck” can refer to the backpack or to the activity of walking with a weighted backpack.
If rucking is healthy, why do many veterans have bad backs & knees?
Rucking, as presented in this article, is a great fitness activity that is lower impact than running and many other activities, ultimately making it safer for the joints. However, talk to ex-military, especially former special operations personnel, and you’ll hear about a host of back and knee problems, largely due to walking with weighted packs. The difference between the rucking approach listed in this article and their approach is progression, focus on stretching, mobility, recovery, and the ability to take rest periods during a ruck march.
In the military, everyone “starts” with a minimum of 45 lbs to ruck with (which quickly moves to 60 lbs or 80 lbs), and distance is dictated by the training. There is no opportunity to scale weight or distance for the individual. The primary goal is either to train or identify individuals who can’t meet the standard – not necessarily to look out for the individual’s long-term health. The result is that most military veterans push their bodies far beyond normal “limits” at the cost of cartilage in the joints, cushioning tissue between the spinal discs, and massive effects on posture to compensate for loads of 100lbs+
With the techniques shared in this article, specifically starting light and short, progressing very slowly, and focusing on mobility before rucking and stretching + mobility after rucking, we manage to correct the bad health habits that military veterans are expected to “just deal with” in rucking. As a result of this new approach, we take a potentially healthy activity and build safety around it to ensure that we don’t unnecessarily risk damaging our bodies.
Slow progression allows parts of your body with low blood circulation, like joints and connective tissue, to heal fully before progressing. Mobility work and warming up before rucking ensures your body is fully prepared to engage with good posture and technique, allowing the strength of your muscles to protect your joints. Stretching post ruck ensures we maintain a full healthy range of motion through the muscles of our body, strength through the ranges, and balance in their development. Ultimately with these safeguards, rucking becomes an amazing fitness tool…not a risk.
References
- Calories burned in 30 minutes for people of three different weights
- US Army Manual for Foot Marche [PDF]
- Marine Special Operations Command (MARSOC) Assessment & Selection (A&S) Prep Guide
- American Heart Association: …more green space may mean less heart disease
- The Rucking White Paper (Beta) by GORUCK
- Strength Training: Get Stronger, Leaner, and Healthier (Mayo Clinic)

ABOUT THE AUTHOR
Carlos is a nomad, slow traveler, and writer dedicated to helping others live abroad and travel better by using his 7+ years of experience living abroad and background as a management consultant and financial advisor to help other nomad and expats plot better paths for an international lifestyle. Click here to learn more about Carlos's story.